Installation instructions – Brandmotion 9002-9504-V2 User Manual
Page 11
INSTALLATION INSTRUCTIONS
9503 and 9504 Instructions 7-10-13.doc
11
of
12
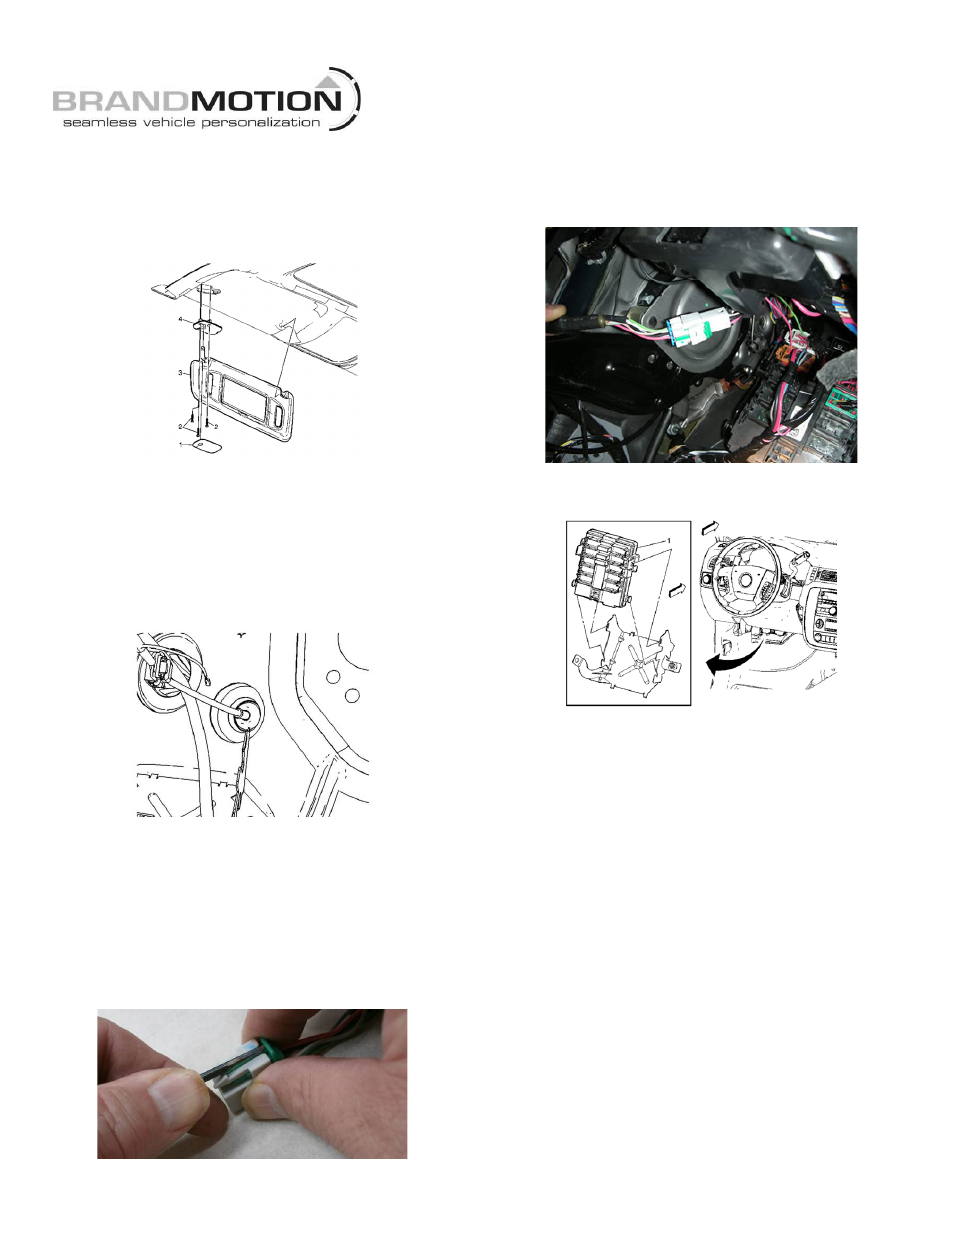
80. Re-install the Driver’s Side Sunshade electrical
connector, bracket (4) and assembly (3). Tighten
the three Screws (2) to 6 N·m (53 lb in). Re-install
the Driver’s Side Sunshade Bracket Cover (1). Figure
43.
FIGURE 43
Install Chassis Harness
81. Locate the supplied Chassis Harness.
82. Route the grommet end of the Chassis Harness
through the Driver’s Side Wheel Housing and then
through the opening you created in the Front-of-
Dash. Figure 44.
FIGURE 44
83. From the inside of the cab, pull the Chassis Harness
through until the grommet is properly seated.
84. Remove the green lock tab from the Chassis
Harness front connector by inserting the tip of
Delphi Terminal Tool 12094429
or a small flat blade
screwdriver between the lock tab and connector and
prying the tab out. Figure 45.
FIGURE 45
85. Connect the Chassis Harness to the Mirror Harness
then reinstall the green lock tab. Secure both
harnesses to vehicle wiring with supplied Wire Ties.
Figure 46.
FIGURE 46
86. Install M-BEC into Support Bracket. Figure 47.
FIGURE 47
87. Install the M-BEC cover onto the M-BEC. Figure 15.
88. Raise vehicle on hoist to route the Chassis Harness.
89. Route the supplied Chassis Harness, working
towards the rear of the vehicle, along the existing
Chassis Harness, routing away from Body Mounts.
90. Connect the supplied Chassis Harness to the Camera
Assembly Harness.
91. Secure the supplied Chassis Harness along the
existing Chassis Harness using Wire Ties every
200mm (approximately 8”). Note: Depending on the
vehicle wheelbase there may be excess length in the
Chassis Harness. Loop, and secure with Wire Ties,
any excess harness length along the Body Frame
away from Mechanical areas.
92. Lower the truck.
93. Re-Install Rear License Plate, if necessary.
94. Connect the negative battery terminal. Tighten the
negative cable nut to 5 N·m (44 lb in).
95. Test system functionality. Start vehicle, apply brake,
and shift into Reverse. The camera image should
appear in the ISRVM display.