Installation instructions – Brandmotion 9002-9504-V2 User Manual
Page 10
INSTALLATION INSTRUCTIONS
9503 and 9504 Instructions 7-10-13.doc
10
of
12
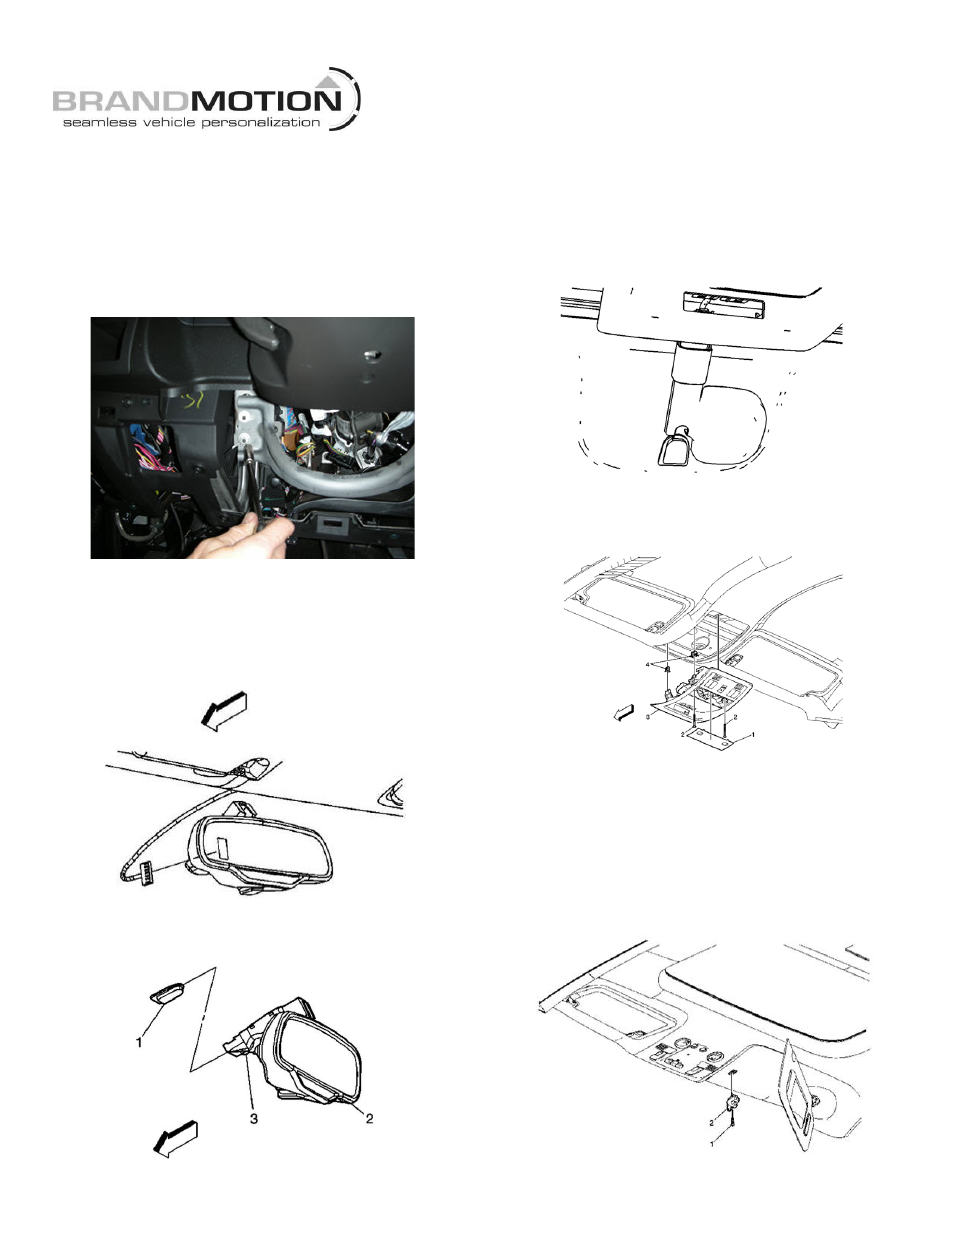
B. Cut terminal off Pink ignition (+) wire of supplied
Mirror Harness and splice to wire in Brown BCM
X5 Connector Cavity 13. Figures 15 & 36.
69. Locate Ground Ring Terminal on black wire of
supplied Mirror Harness and attach at lower knee
bolster stud using supplied Ground Nut and a 10mm
socket. Tighten to 4 N·m (36 lb in). Figure 37.
FIGURE 37
Install Supplied Rear View Mirror
70. Locate the supplied Inside Rearview Mirror (ISRVM.)
71. Insert the mirror connector into the supplied ISRVM
until it clicks into place. Figure 38.
FIGURE 38
72. Slide supplied Mirror (2) onto the mounting tab (1).
Figure 39.
FIGURE 39
73. Use a T20 Torx bit to tighten the mirror screw (3).
CAUTION: Torque mirror screw (3) to 1.8 N·m (16
lb in). Figure 39.
74. Lower the front end of the Headlining Trim Panel.
75. Re-attach the ISRVM Wire Cover and base trim
cover, if present. Figure 40.
FIGURE 40
76. Re-engage the Roof Console Assembly (3) to the
headliner. Figure 41.
FIGURE 41
77. Re-install the two Roof Console Screws (2) into the
Console Assembly (3), tighten the two Screws to 2
N·m (18 lb in). Figure 41.
78. Re-install the Front Overhead Console Lens (1).
Figure 41.
79. Re-install the Driver’s Side Sunshade Anchor (2),
tighten the Screw (1) to 3 N·m (25 lb in). Figure 42.
FIGURE 42