Caution – Brother HL-2400C Series User Manual
Page 160
CHAPTER 5 MAINTENANCE
5-19
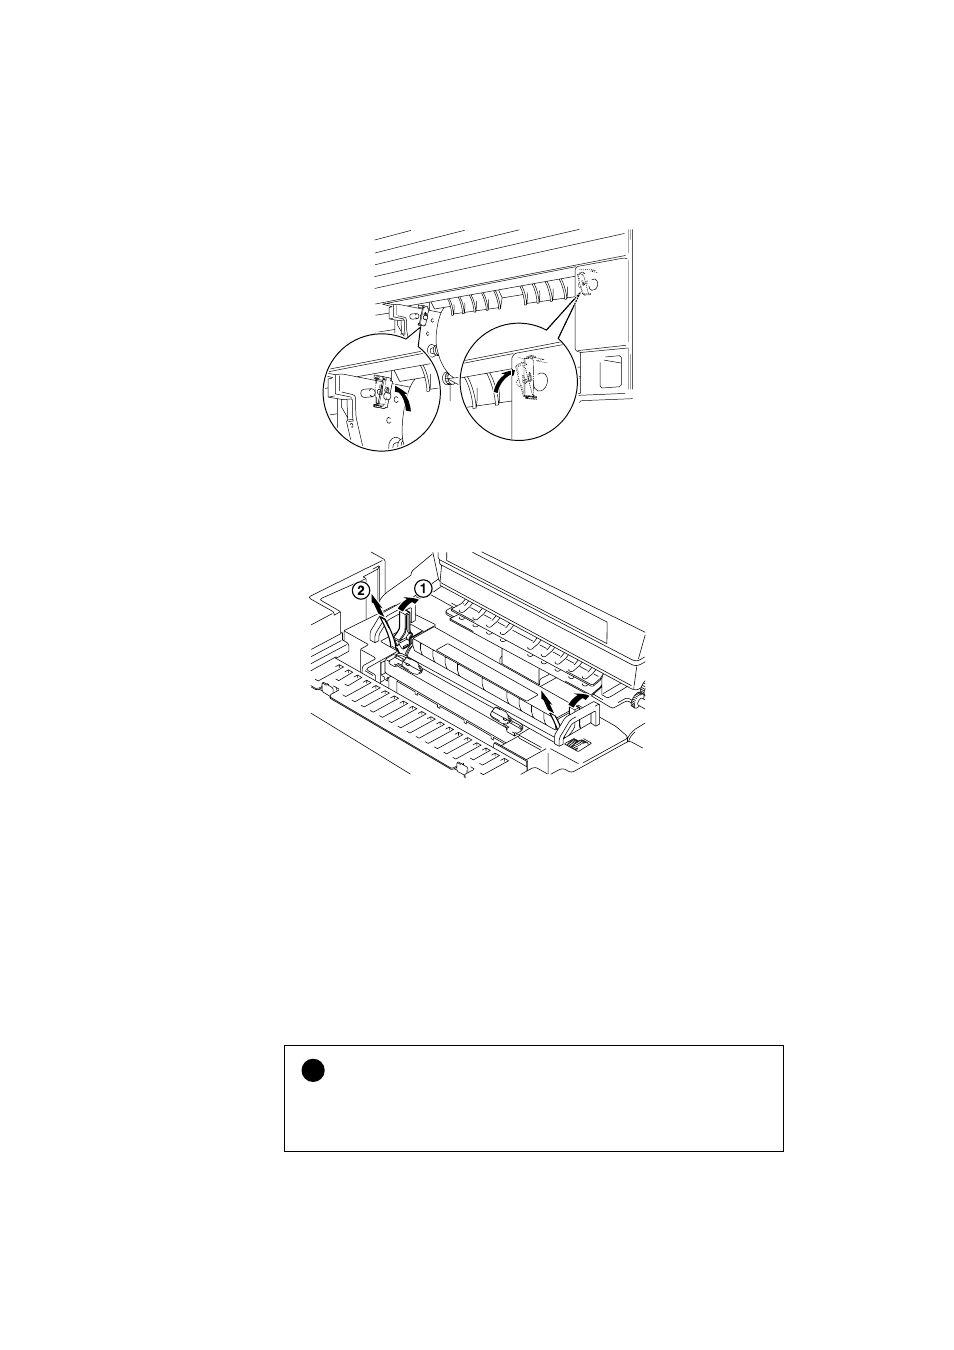
7. Fit the metal parts and secure with the two screws.
Fig. 5-21 Secure the Metal Parts
8. Release the pressure a little with the Pressure Release Levers(
).
Then pull the protective parts between the rollers of the Fusing Unit
out to remove them(
).Make sure that the Pressure Release Levers
are locked when the protective parts have been removed.
Fig. 5-22 Removing the Protective Parts
9. Install the Fuser Cleaner and the Oil bottle into the new Fixing Unit
and Lock the Oil Bottle Lock Levers. Be careful not to spill oil inside
the printer. It might cause damage to the printer.
10. Press the
Power
button and turn the printer on.
11. Press the
Sel
button and make the printer Off Line.
12. Press the
Reset
button while holding down the
Shift
button.
13. When you see “RESET PRINTER” on the LCD panel, press the ▲
(UP) or ▼ (DOWN) button and select “RESET PARTS LIFE” . Press
the
Set
button and select “FUSER UNIT” with the ▲ (UP) or ▼
(DOWN) button.
14. Press the
Set
button and the printer becomes On Line.
!
Caution
When you replace the Fusing Unit, do the replacement very carefully. Do
not put pressure onto the Fusing unit. If you do, it might cause damage to
the Fusing Unit and / or the printer.