AirLive IP-2000VPN User Manual
Page 74
3. Click "Next" to continue to the following screen.
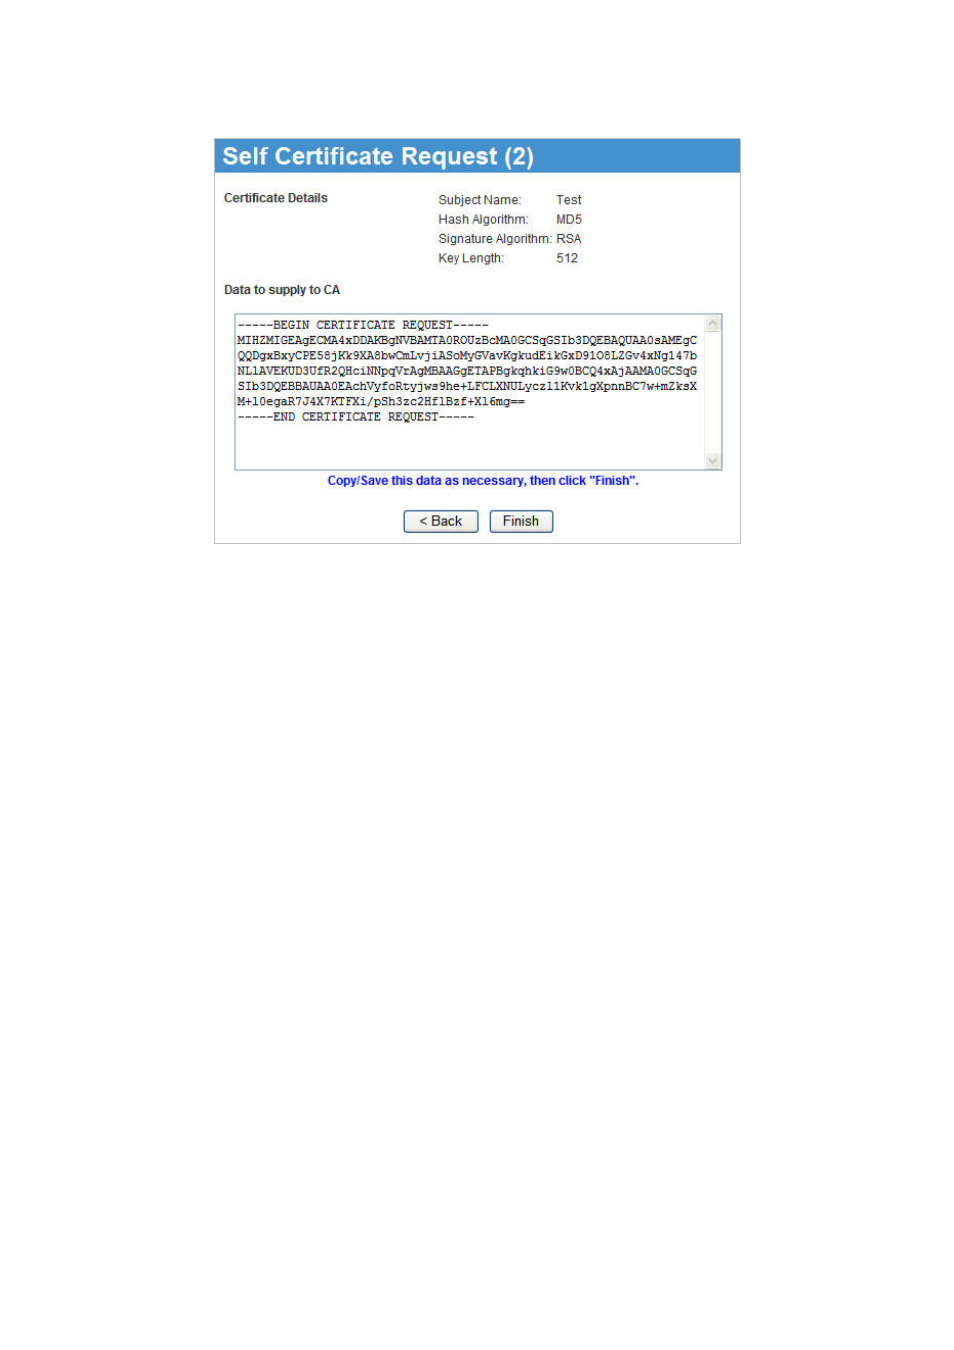
4. Check that the data displayed in the Certificate Details section is correct. This data is used to generate
the Certificate request. If the data is not correct, click the "Back" button and correct the previous screen.
5. If the data is correct, copy the text in the Data to supply to CA panel
(including "-----BEGIN CERTIFICATE REQUEST-----" and "-----END CERTIFICATE REQUEST-----") to a
new document in a text editor such as Notepad, and save the file.
6. Click
Finish
to return to the Self Certificates screen.
Your request will be listed under Self Certificate Requests.
7. Apply for a Certificate:
• Connect to the CA's web site.
• Start the Self Certificate request procedure.
• When prompted for the request data, supply the data you copied and saved in step 5 above.
• Submit the CA's form.
• If there are no problems, the Certificate will then be issued.
8. After obtaining a new Certificate, as described above, you need to upload it the IP-2000VPN.
• Return to the Self Certificates screen.
• In
the
Self Certificate Requests
list, select the request matching this certificate.
• Click
the
Upload Certificate
button, and you will see a screen like the one below.
AirLive IP-2000VPN User’s Manual
71