AirLive IP-2000VPN User Manual
Page 35
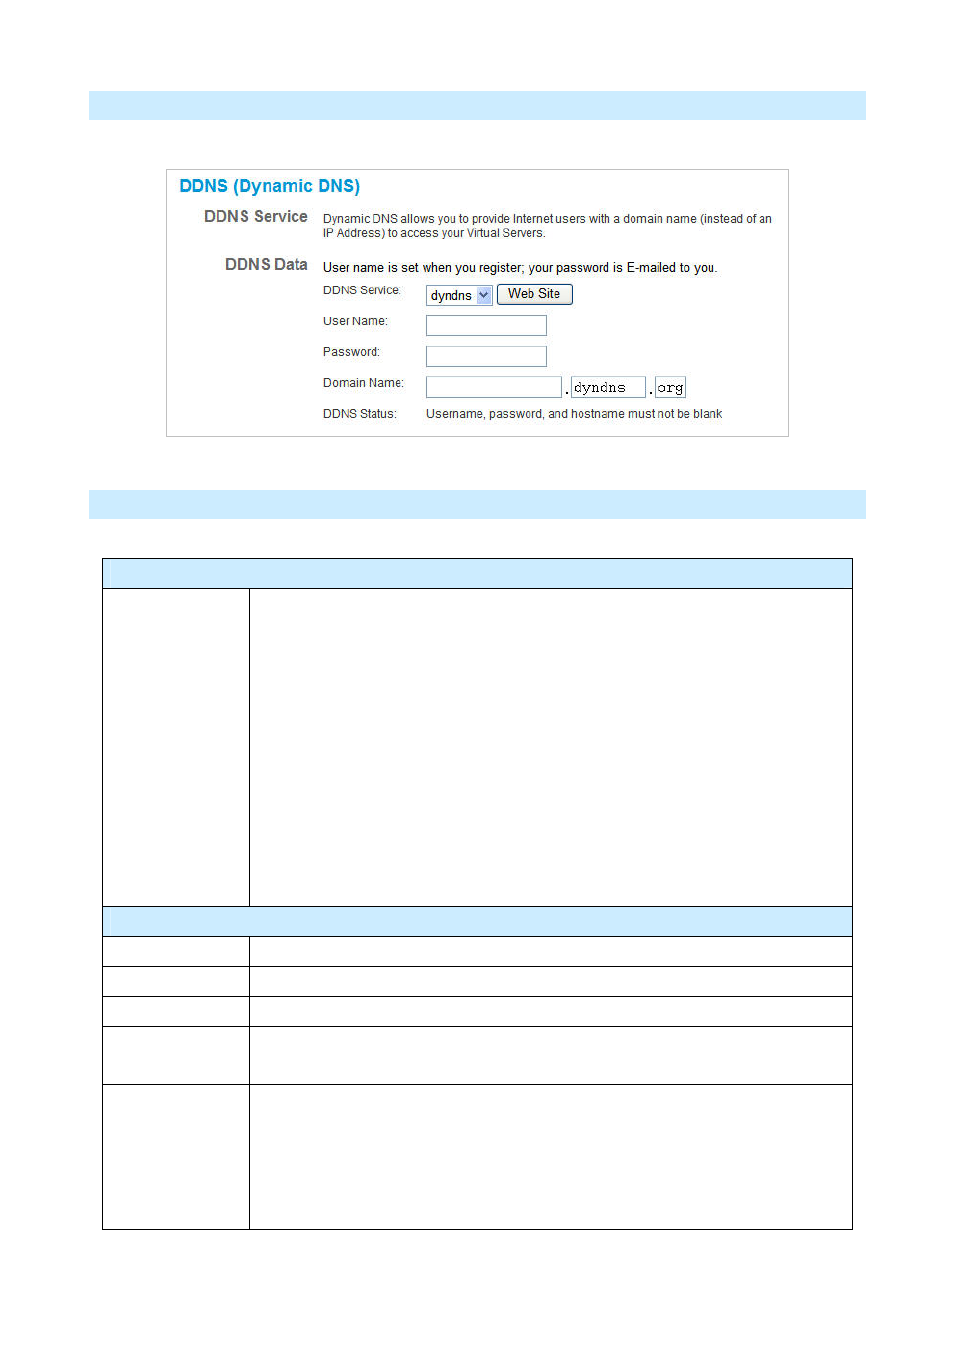
Dynamic DNS Screen
Select Internet on the main menu, then Dynamic DNS, to see a screen like the following:
Data – Dynamic DNS Screen
DDNS Service
DDNS Service
• You must register for the service at one of the listed Service Providers. You
can reach the Service provider's Web Site by selecting them in the list and
clicking the "Web Site" button.
• Apply for a Domain Name, and ensure it is allocated to you.
• Details of your DDNS account (Name, password, Domain name) must then be
entered and saved on this screen.
• This device will then automatically ensure that your current IP Address is
recorded by the DDNS Service Provider. (You do NOT need to use the "Client"
program provided by some DDNS Service providers.)
• From the Internet, users will now be able to connect to your Virtual Servers (or
DMZ PC) using your Domain name.
DDNS Data
DDNS Service
Select the desired DDNS Service provider.
User Name
Enter your Username for the DDNS Service.
Password/Key
Enter your current password for the DDNS Service.
Domain Name
Enter the domain name allocated to you by the DDNS Service. If you have more
than one name, enter the name you wish to use.
DDNS Status
• This message is returned by the DDNS Server
• Normally, this message should be something like "Update successful" or "IP
address updated".
• If the message indicates some problem, you need to connect to the DDNS
Service provider and correct this problem.
AirLive IP-2000VPN User’s Manual
32