Installation instruc tio ns – Poison Spyder LJ TRAILGATE User Manual
Page 4
INSTALLATION INSTRUC
TIO
NS
Poison Spyder Customs • TJ/LJ TRAILGATE INSTALLATION
Page 4
©2011 POISON SPYDER CUSTOMS, INC. • 951-849-5911 • WWW.POISONSPYDER.COM
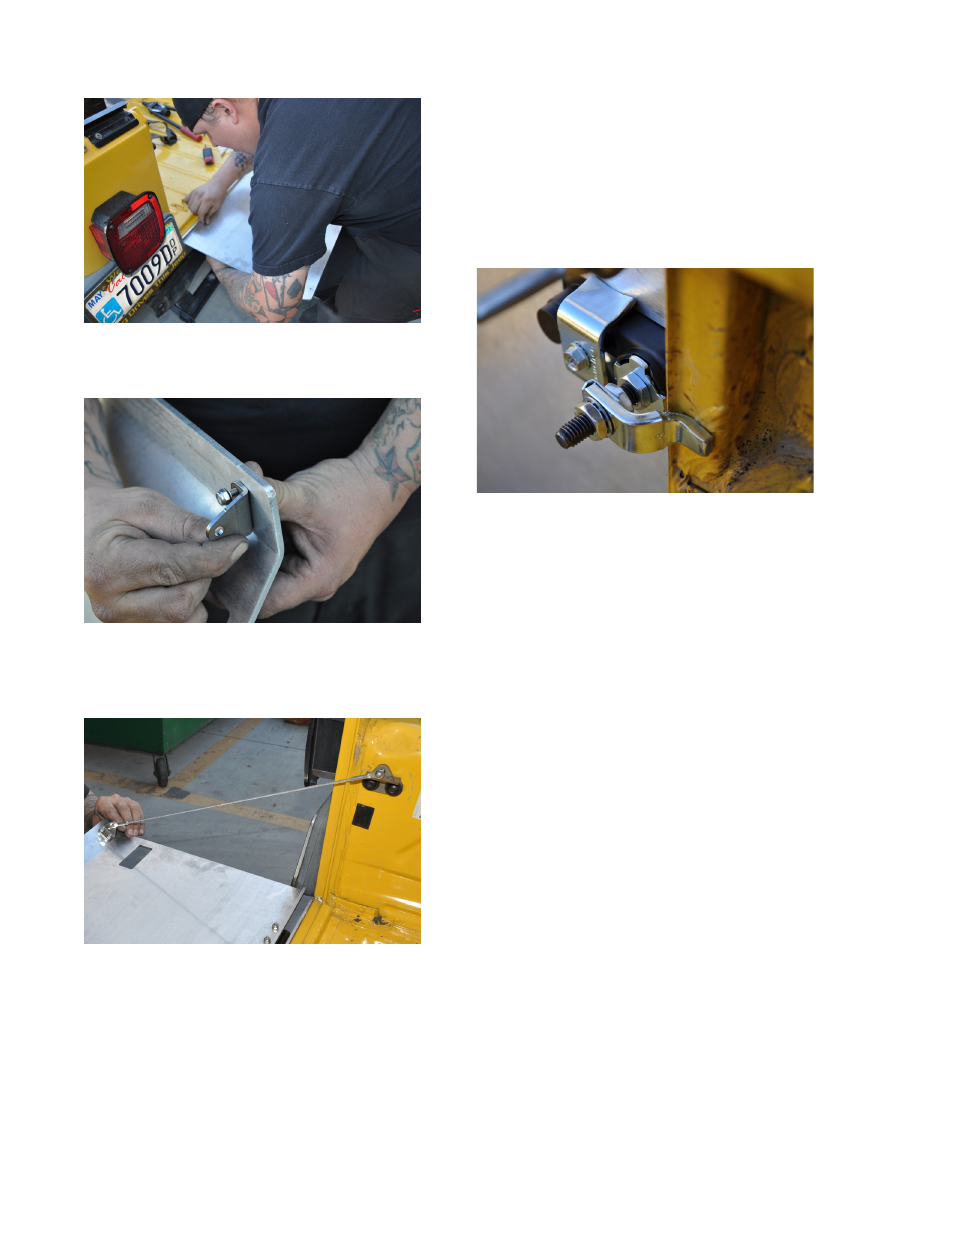
FIGURE 7
20. Bolt the two Gate-Side Cable Brackets to
the TrailGate using the provided hardware.
FIGURE 8
21. Attach the Limit Cable to the Gate-Side
Cable Bracket, then to the Tub-Side Cable
Bracket, as shown. Do this for both sides.
FIGURE 9
22. Install the provided weatherstrips to
the vertical flanges along either side of the
tailgate opening. Make sure the bulb seal
is oriented toward the rear, so that the
TrailGate™ compresses it as it closes.
23. Install the provided lock/latch mechanisms
into each of the rectangular holes in the
TrailGate™ . Use the u-bracket provided in
the latch kit to secure the mechanism in place.
Use the provided jamb nuts and washers to
orient and install the latch as shown in the
photo below. Upon closing the TrailGate™,
it is likely that the latch will require some
adjustment. Loosen/tighten the jam nuts to
move the latch in either direction, until the
correct position is found. When installed,
FIGURE 10
24. Upon closing the TrailGate, it is likely
that the latch will require some adjustment.
Simple loosen/tighten the jam nuts to move
the latch in or out. Adjust the latch so that the
outer surface of the TrailGate™ is flush with
the Jeep’s tub when closed and latched.
25. Use a grinder or pneumatic cut-off wheel
to cut off the excess threads from the end of
the latch stud. It will need to be shortened by
about 1/4” for the latch to function properly
after the latch cover is installed.
26. Install the latch covers. Begin by
removing the u-brackets that were installed
in a previous step, and replace them with the
latch covers using the M5-.8 X 50 hex head
cap screws and #10 flat washers provided.
Note that the latch covers are not identical,
there is a right and left cover. Make sure the
rectangular notch for the latch is oriented
toward the bottom of the TrailGate™ (when
gate is closed).