Installation instruc tio ns – Poison Spyder LJ TRAILGATE User Manual
Page 2
INSTALLATION INSTRUC
TIO
NS
Poison Spyder Customs • TJ/LJ TRAILGATE INSTALLATION
Page 2
©2011 POISON SPYDER CUSTOMS, INC. • 951-849-5911 • WWW.POISONSPYDER.COM
TOOLS NEEDED
• Fine-tip felt marker & measuring tape
• Mechanic’s tool set including an assortment
of hex keys, end wrenches, sockets and
ratchet
• Drill motor with 1/4, 5/16, 25/64, 17/32 and
1/2 drill bits
• Grinder or cut-off wheel
• Thread anti-seize compound
• Touch-up paint
• Optional: Professional nut-sert install tool
NOTE: The Nut-sert installation tool provided is
simple and inexpensive. It works but it can be
tedious to use, especially when installing a large
number of nut-serts. We highly recommend
purchasing, renting, or borrowing a professional
quality nut-sert installation tool, such as the
“Marson Giant Thread Setter 325-RN 34604”,
available from www.blindrivetsupply.com.
INSTALLATION PROCEDURE
1. Park vehicle on a level surface and set the
emergency brake. You will want to wear eye
protection beyond this point in time.
2. Remove the spare tire and stock tailgate,
if present. Fold back carpet so that it is out
of the way, exposing the shetmetal of the
Jeep’s body tub, just inside of the tailgate on
each side.
3. Remove the OE inside latch mechanism.
Retain the two lower bolts, they will be used
later.
FIGURE 1
5. Install one of the provided Tub-Side Cable
Brackets using the two lower bolt locations
and OE hardware from the removal of the
latch mechanism in the previous step. Make
sure the flange with the single hole is pointed
upward, as shown in Figure 2.
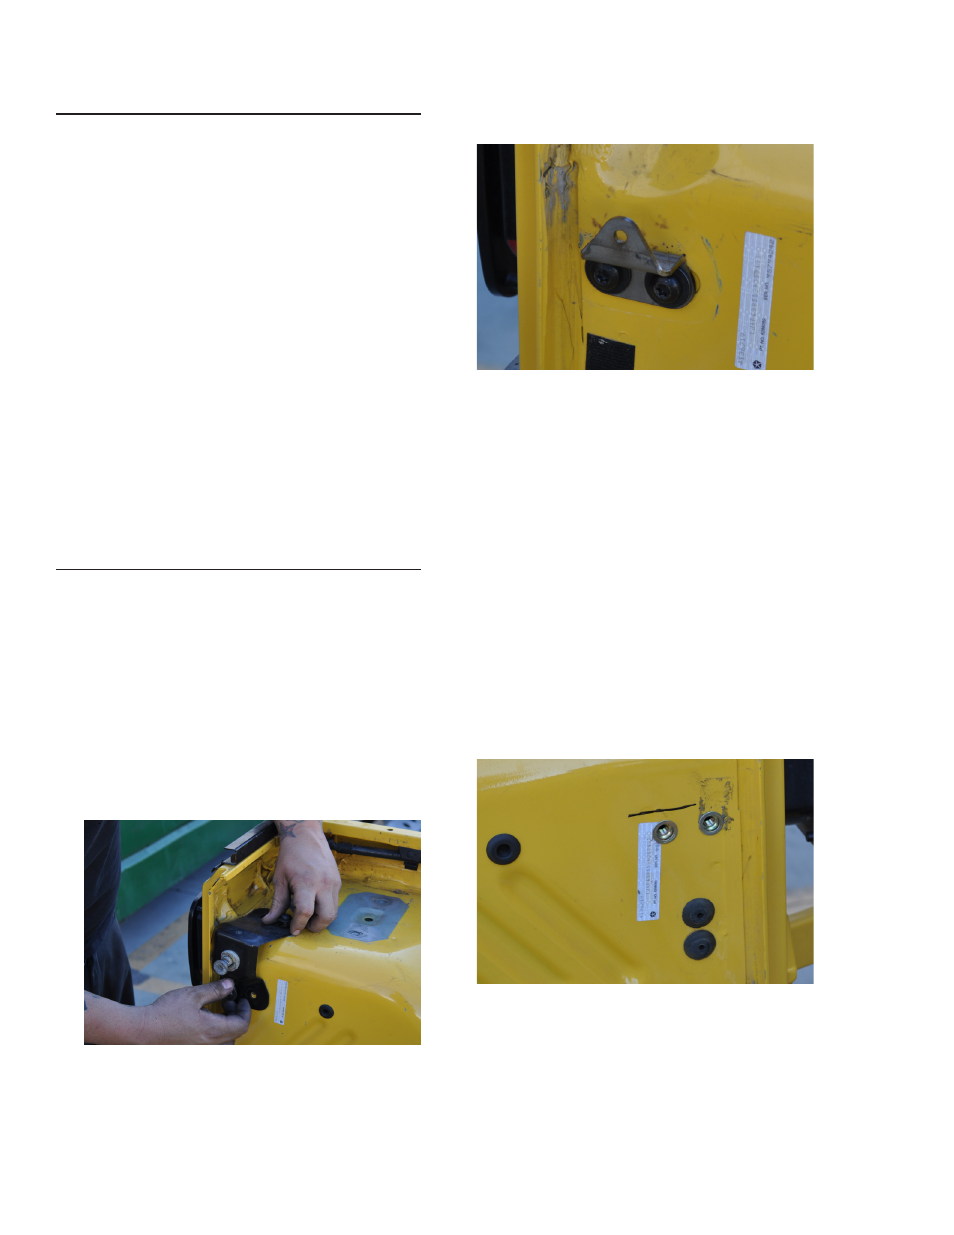
FIGURE 2
6. The other Tub-Side Cable Bracket
will need to be installed on the opposite
(passenger side) wall of the Jeep’s interior.
There are no existing holes for this, so you
will be installing the two supplied 5/16 nut-
serts. Use a measuring tape and fine tip felt
marker to measure the placement of the two
existing bolt locations on the driver side, and
mirror them to the passenger side. Measure
the distance up from the floor, and in from the
edge of the tailgate opening, for both holes.
Mark or center-punch the two hole locations.
7. Use the procedure outlined in the Nut-
sert Install Tool Instructions to install the two
5/16-18 nut-serts in the locations marked in
the previous step. Use a 17/32” bit for the
final hole size before installing the nut-serts.
FIGURE 3
8. Use the provided 5/16-18 SS button head
cap screws to attach the remaining Tub-
Side Cable Bracket where the nut-serts
were installed in the previous step. Coat
the threads of the screws with anti-sieze
compound before threading them in.