Installation instruc tio ns – Poison Spyder LJ RICOCHET ROCKERS & ROCKER KNOCKERS User Manual
Page 2
INSTALLATION INSTRUC
TIO
NS
©2009 POISON SPYDER CUSTOMS, INC. • 951-849-5911 • WWW.POISONSPYDER.COM
Poison Spyder Customs • LJ RICOCHET/ROCKER KNOCKER INSTALL
Page 2
INSTALLATION PROCEduRE
1. Loosen all eleven (11) body mount bolts.
Remove the three body mount bolts on the
outside of the frame between the front and
rear axles, on the driver’s side of the Jeep.
2. Raise the driver side of the body with a floor
jack and extension. Be sure to position the
jack pad at or near a body support to avoid
damage to the body tub. There is a triangular
section between the first and second body
mount that is an ideal spot to locate the jack
pad. Lift the body until a 1/2” gap appears
between the body and the body mount
bushing.
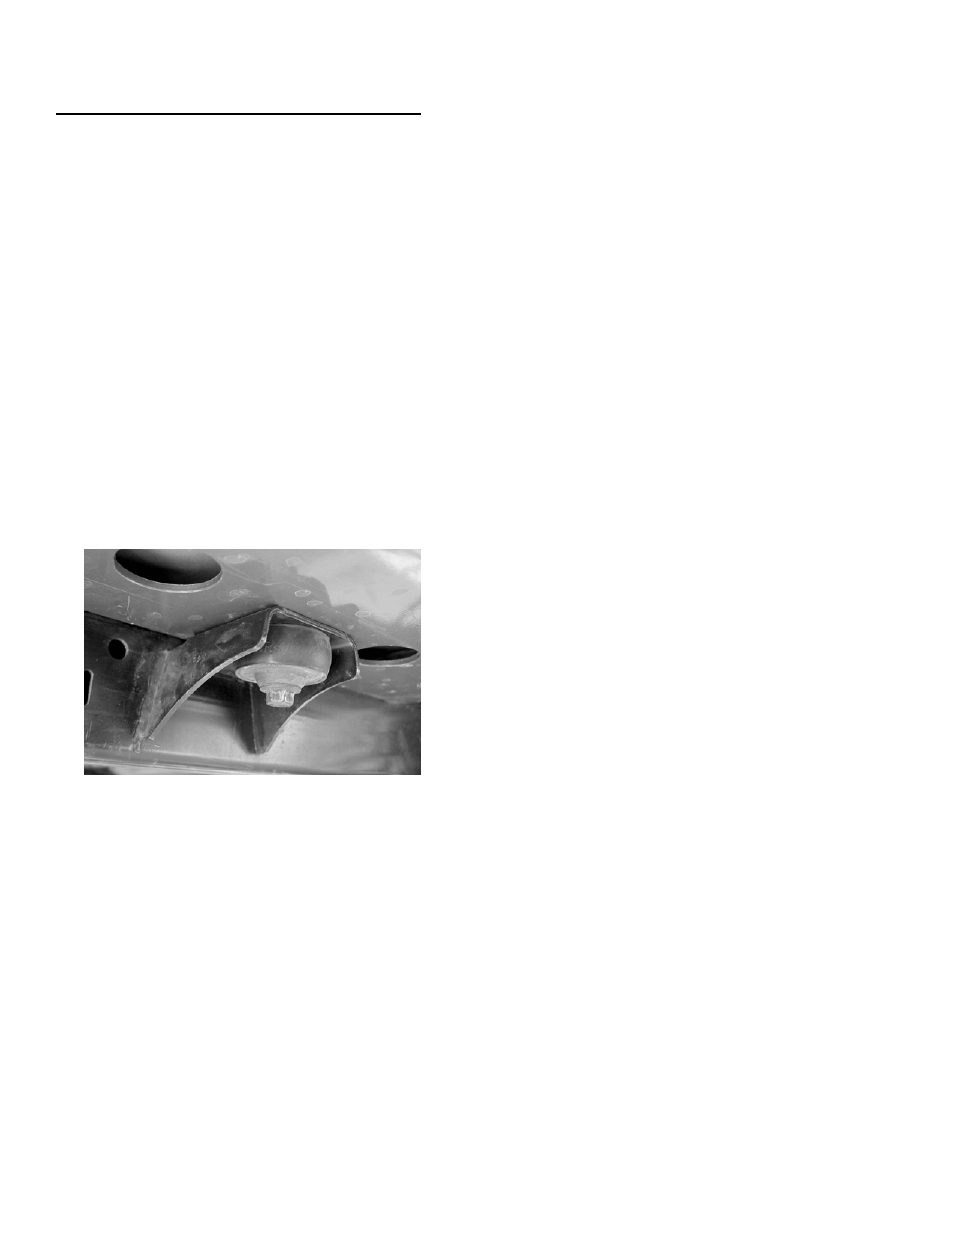
3. Slide the Rocker into position with the
Spyder logo towards the rear of the tub. It is
not necessary to remove the body mounts or
body mount bolts. The Rocker will be located
between the steel body mount outrigger and
the upper rubber body bushing as shown in
Figure 1.
FIGURE 1
If you have a body lift, the body lift puck
should be located between the Rocker and
the steel body mount outrigger, with the
upper bushing above the Rocker, between
the Rocker and the body tub.
4. Press the rocker against the vertical surface
of the body tub and clamp it into place.
5. Gently lower the body back down. Maintain
the correct positioning of the Rocker as you
lower the body and place its weight onto the
Rocker. Pay close attention to the top edge
of the Rocker in relation to the door opening.
6. With the body lowered, check for fitment
of the Rocker against the body tub. Adjust
either end of the Rocker until level and
aligned.
7. Use the fine-tip felt marker to mark the 5
holes along the top edge of the Rocker.
Use the Rocker itself as your template to
mark the drill holes in the body, through the
countersunk bolt holes in the Rocker.
8. Re-lift the body and remove the Rocker.
9. Carefully check the backside/inside of the
Jeep’s rocker panel area, for wiring or any
other obstructions that are located where
you will be drilling mounting holes. Remove
or relocate obstructions as necessary.
10. Use an auto-punch or center punch with
hammer to lightly punch the center of each
hole mark you just made.
11. Use a drill motor with 3/16” bit to drill a pilot
hole at each center punch. Then step up to
the 3/8” bit to finish-drill each hole to its final
size. Drill carefully, as thin sheetmetal will
tend to snag and/or deform if not careful.
12. De-burr the holes with a rat-tail file or burr
knife. Use touch-up paint or clear-coat to
protect the bare metal edges of the drilled
holes from future rust.
13. Slide the Rocker back into place. Install the
supplied stainless steel flat head cap screws
with flat washers and nylon insert lock nuts
at each of the 5 countersunk hole locations
along the top of the Rocker, through the holes
you just drilled in the side of the Jeep body.
Leave all hardware loose (not tightened) at
this time.
14. Lower the body back down. Perform
any minor adjustments to the position of
the Rocker, then tighten all 5 flat head cap
screws and locknuts. Lightly tighten the
three body mount bolts but leave them loose
enough to raise the opposite side of the body
during install of the other Rocker. Torque the
flat head cap screws to 20 ft./lbs.
15. Repeat the procedure for the passenger
side Rocker.
16. Tighten all 11 body mount bolts and torque
to 50 ft./lbs.
Be sure to periodically re-check all hardware as
part of your routine maintenance checks.