Installation instruc tio ns – Poison Spyder CJ RICOCHET ROCKERS & ROCKER KNOCKERS User Manual
Page 2
INSTALLATION INSTRUC
TIO
NS
©2009 POISON SPYDER CUSTOMS, INC. • 951-849-5911 • WWW.POISONSPYDER.COM
Poison Spyder Customs • TJ YJ CJ ROCKER KNOCKER INSTALL
Page 2
Remove any existing rocker panel molding
(some CJ’s), or any existing OEM rocker
panel covers (all Rubicons and Saharas).
• While not required, it is helpful to loosen the
lower three bolts that hold the OEM flares in
place at the lower end.
INSTALLATION PROCEDURE
1. Loosen all of the body mounts on the driver
side of the Jeep.
2. Raise the driver side of the body with a floor
jack and extension. Be sure to position the
jack pad at or near a body support to avoid
damage to the body tub.
3. Remove the body mount bushings that are
in Rocker Knocker mounting slot locations.
4. Measuring from the top, cut 3/16” off the
top of the body bushing to allow for Rocker
Knocker clearance.
5. Re-install the body bushings (and body lift
spacers, if used), and all hardware.
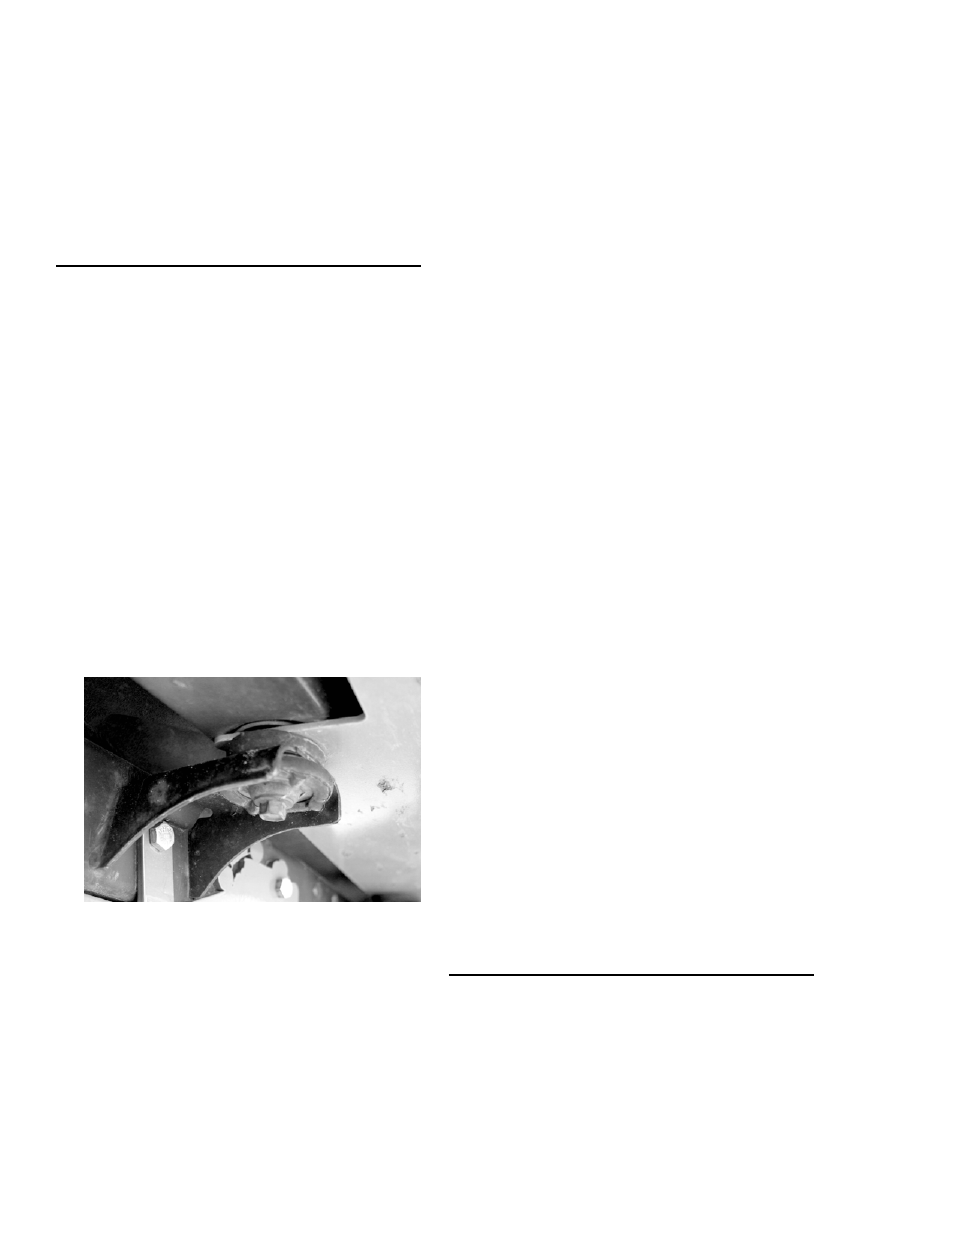
6. Slide Rocker Knocker into position, with
the body mount bolts passing through the
slots in the Rocker Knocker. The Rocker
Knocker should be above the body mount
bushing, as shown in figure 1. .
FIGURE 1
Make sure the Rocker Knocker is pressed
firmly against the side of the Jeep, then
gently lower the driver side body back down
onto the body mounts.
7. Check all mounting positions for proper
placement. Step back and observe the front-
to-back position of the Rocker Knocker, and
make any necessary adjustments. With the
Rocker Knocker correctly positioned, clamp it
firmly to the Jeep’s body with C-clamps, vise-
grip clamps or similar (at least one clamp at
each end).
8. Use a fine-tip felt marker to mark all of the
3/8” mounting holes along the top side of the
Rocker Knocker.
9. Remove the clamps, use the jack to
carefully lift the driver side of the body once
again, remove the Rocker Knocker and set it
aside.
10. Use an auto-punch or center-punch and
hammer to center-punch the drill marks for
each of the hole locations marked in step 9.
11. Check behind the Jeep’s rocker panels for
wiring, fuel lines or any other obstructions
where the holes are to be drilled. Temporarily
hold away or remove any such obstructions.
12. Drill each of the marked hole locations with
a sharp 3/8” drill bit. De-burr the edges of the
holes with a file, sander or burr knife.
13. On CJ’s and 2003+ TJ/LJ, an access hole
will need to be drilled from the inside of the
tub to access the area where the rear-most
nut will be installed. Use a 1” hole saw. After
installation is complete, this hole can be
plugged with a rubber CJ body plug.
14. Use touch-up paint or clear coat to coat the
bare metal edges of the drilled holes.
15. Re-position the Rocker Knocker into
place. Reinstall the body mount pieces in
the order from which they were removed.
Lightly tighten the body mount bolts.
16. Install a stainless steel flat head cap screw
at each of the countersunk holes in the
Rocker Knocker. Secure with a flat washer
and nylon insert lock nut on the back side of
the Jeep body tub. Tighten all hardware to
specs. Re-install flares (if applicable)
17. Repeat process for passenger side.
WARRANTY
Poison Spyder Customs™ warranties all of
the products we sell and distribute for one (1)
year from the date of sale. These products will be
free from defects in material and workmanship
under normal installation, and use. Due to the
intended use the powder coat finish is warranted
for ninety (90) days. The finish warranty will not
cover a product if it has been damaged in any