Installation instruc tio ns – Poison Spyder JK BRAWLER ROCKERS User Manual
Page 4
INSTALLATION INSTRUC
TIO
NS
©2010 POISON SPYDER CUSTOMS, INC. • 951-849-5911 • WWW.POISONSPYDER.COM
Poison Spyder Customs • JK BRAWLER ROCKERS INSTALLATION
Page 4
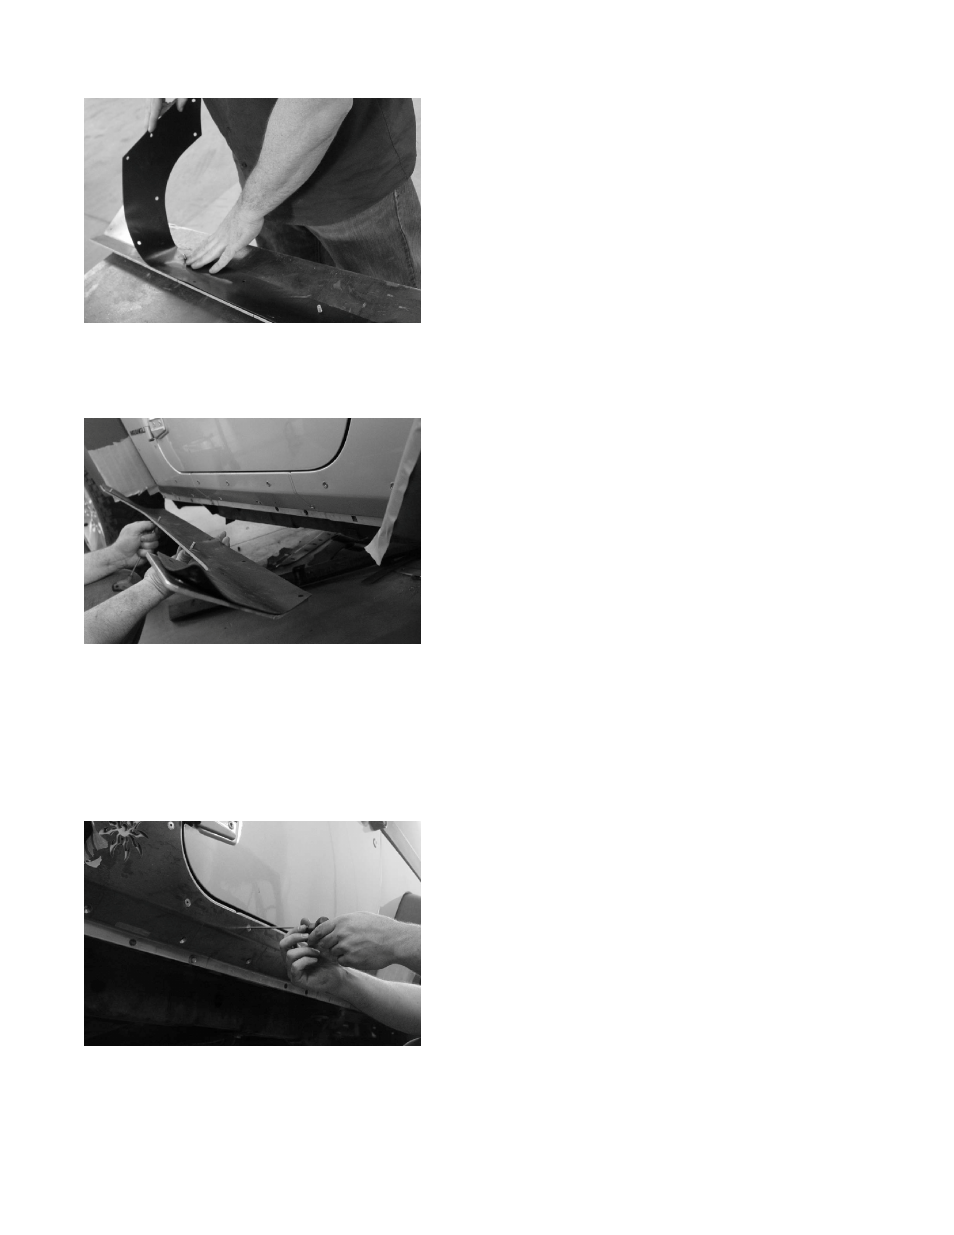
FIGURE 7
16. For the final install it is helpful to have
someone assist you with lining things up.
See figure 14.
FIGURE 8
17. Install the Body Armor using 1/4-20 X 3/4
flat head cap screws. Make sure you place a
small amount of anti-seize on the threads of
each cap screw. Make sure you get all of the
screws started before tightening any of the
bolts up. Do not over tighten the bolts; for this
step you will only need to snug them up.
FIGURE 9
18. Remove the masking tape from the front
and rear fender flares.
19. Tighten all of the 1/4-20 X 3/4 flat head cap
screws to no more that 10 ft./lbs.
20. Install the supplied 3/8-16 clip-nuts into
the nut flanges along the bottom of the
Body Armor Upper Piece. Make sure that
the extruded barrel of the clip-nut points
downward through the hole in the flange.
21. Use an 18mm wrench to remove the nuts
and washers from the bottom of the body
mounts below the rocker panels. There will
be 3 such body mounts on a 4-door JK, and
2 on a 2-door. Set the nuts and washers
aside, they will be re-installed later.
22. Hang the Brawler Rocker Lower Piece on
the nut flanges of the Body Armor Upper
Piece. Install a supplied 3/8-16 X 1 flat head
cap screw at each end of the Brawler Rocker
to temporarily hold the part in place. Leave
these two fasteners loose at this time. The
help of a friend, or the use of a floor jack to
assist in holding the piece up may be helpful
with this step.
23. Push the lower end of the Brawler Rocker
Lower Piece upward so that the exposed
ends of the body mount bolts slip through the
corresponding slots on the Brawler Rocker.
Reinstall the body mount washers and nuts,
leaving them slightly loose at this time.
24. Install the remaining 3/8-16 X 1 flat head
cap screws into the holes along the top
surface of the Brawler Rocker Lower Piece.
25. Have a friend push against the Brawler
Rocker Lower Piece, or use a pry-bar against
a closely-placed stationary object, to snug
the Lower Piece up against the side of the
Body Armor Upper Piece.
26. Tighten all of the 3/8-16 X 1 flat head cap
screws along the top of the Brawler Rocker
Lower Piece, as well as the 2 or 3 body
mount nuts underneath, while ensuring that
the Brawler Rocker Lower Piece remains
tight to the Body Armor Upper Piece. There
should be no gap along the seam where the
two pieces meet.
27. Repeat the procedure for the other side.