Installation instruc tio ns – Poison Spyder JK BODY ARMOR User Manual
Page 2
INSTALLATION INSTRUC
TIO
NS
©2009 POISON SPYDER CUSTOMS, INC. • 951-849-5911 • WWW.POISONSPYDER.COM
Poison Spyder Customs • JK BODY ARMOR INSTALLATION
Page 2
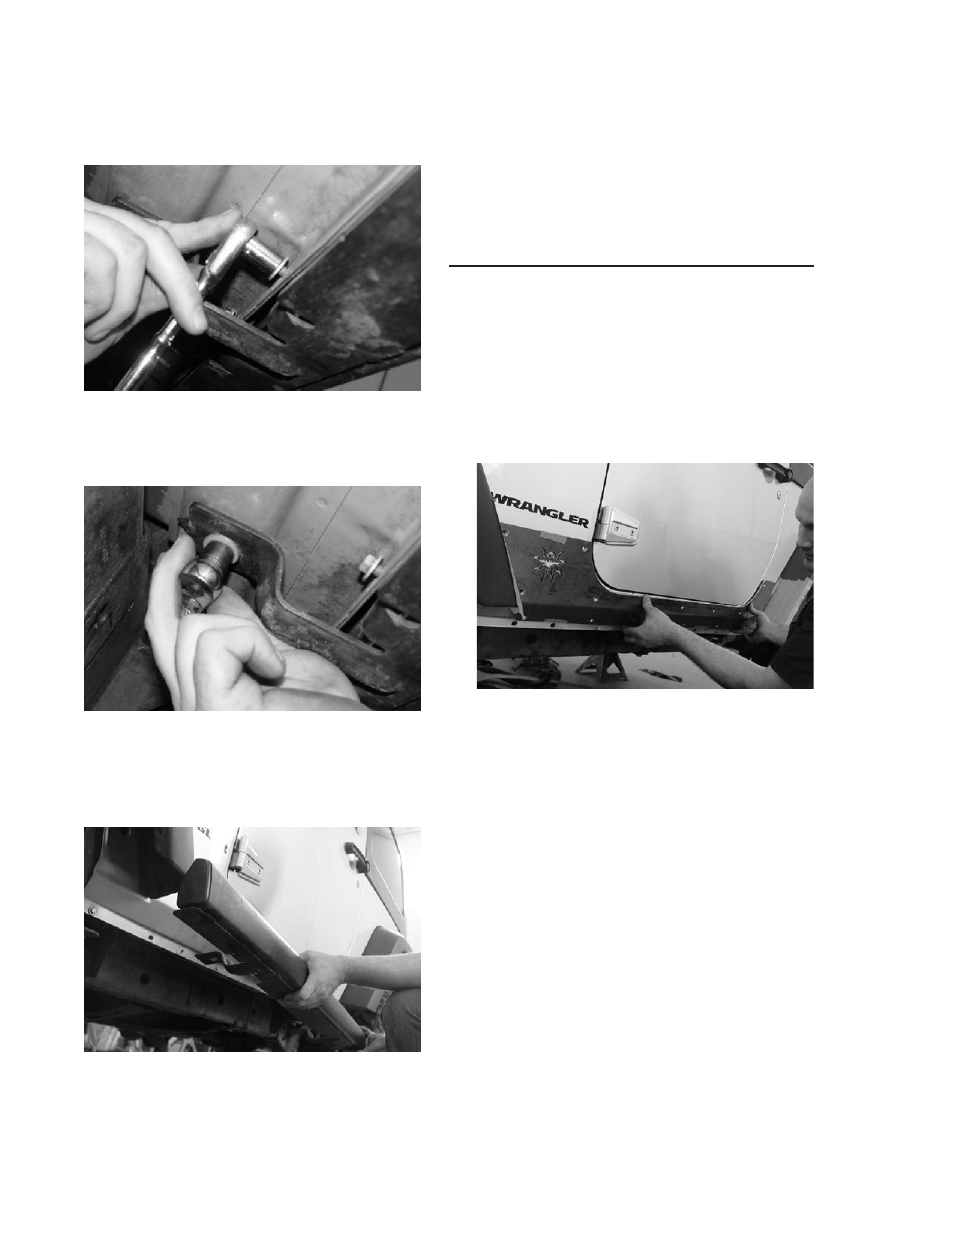
b. 4-Door: six (6) nuts in the pinch weld
flange (Figure 1) and three (3) bolts that
go into the bottom of the tub (Figure 2).
FIGURE 1
Using the 1/4” drive ratchet, 10mm socket
and the 13mm socket remove the hardware
that fastens the rocker protection to the Jeep.
FIGURE 2
Do not discard the hardware—you will need
it to reinstall the rockers. Remove the factory
rocker protection from the Jeep by gently
pulling it away from the tub.
FIGURE 3
3. Apply masking tape onto the front and rear
fender flares. You will want to make sure you
apply the tape from the bottom of the flare up
at least ten (10) inches. This step will help
eliminate scratches during installation.
4. Apply several pieces of tape (about three
inch sections) to the back of the Body Armor.
This step will help eliminate scratches during
installation.
INSTALLATION PROCEDURE
1. Start with the drivers side. Open the
door(s) and hold the Body Armor panel up
and position it on the tub. Make sure the gap
around the door is equal front to back and
the body armor is level to the bottom of the
door. See figure 4. Use the bar clamps to
clamp the Body Armor panel into place (with
the door open you can clamp through the
door opening).
FIGURE 4
2. Use the 1/4” bit and drill motor to drill the
first two mounting holes using the Body
Armor as your drill guide. Use the forward
and rearward most holes. Make sure you do
not drill through the inner panel.
3. Remove the Body Armor from the Jeep
and set aside.
4. Use the 25/64th drill bit and open up the two
holes you just drilled. Take your time drilling
these holes, the larger drill bit may catch and
distort the hole. Make sure you do not drill
through the inner panel.
5. Apply some touch up paint to the areas
where bare metal is exposed; this will aid in
the prevention of corrosion.
6. Using the nut insert tool and the separate
instructions provided, install nut-serts into
the holes you just drilled. Do not over tighten
the nut inserts; this will cause them to distort
and not fasten to the body correctly.