Installation instruc tio ns – Poison Spyder TJ DEFENDERS User Manual
Page 4
INSTALLATION INSTRUC
TIO
NS
Poison Spyder Customs • TJ/LJ-YJ-CJ DEFENDERS INSTALLATION
Page 4
©2011 POISON SPYDER CUSTOMS, INC. • 951-849-5911 • WWW.POISONSPYDER.COM
FIGURE 10
16. All of the major cutting is now complete,
however you may find that you need to do
further cutting at various inner flanges and
corners, in order to fully free the cut-away
portion of the fender. Once this has been
done, lift the cut portion away and set it aside.
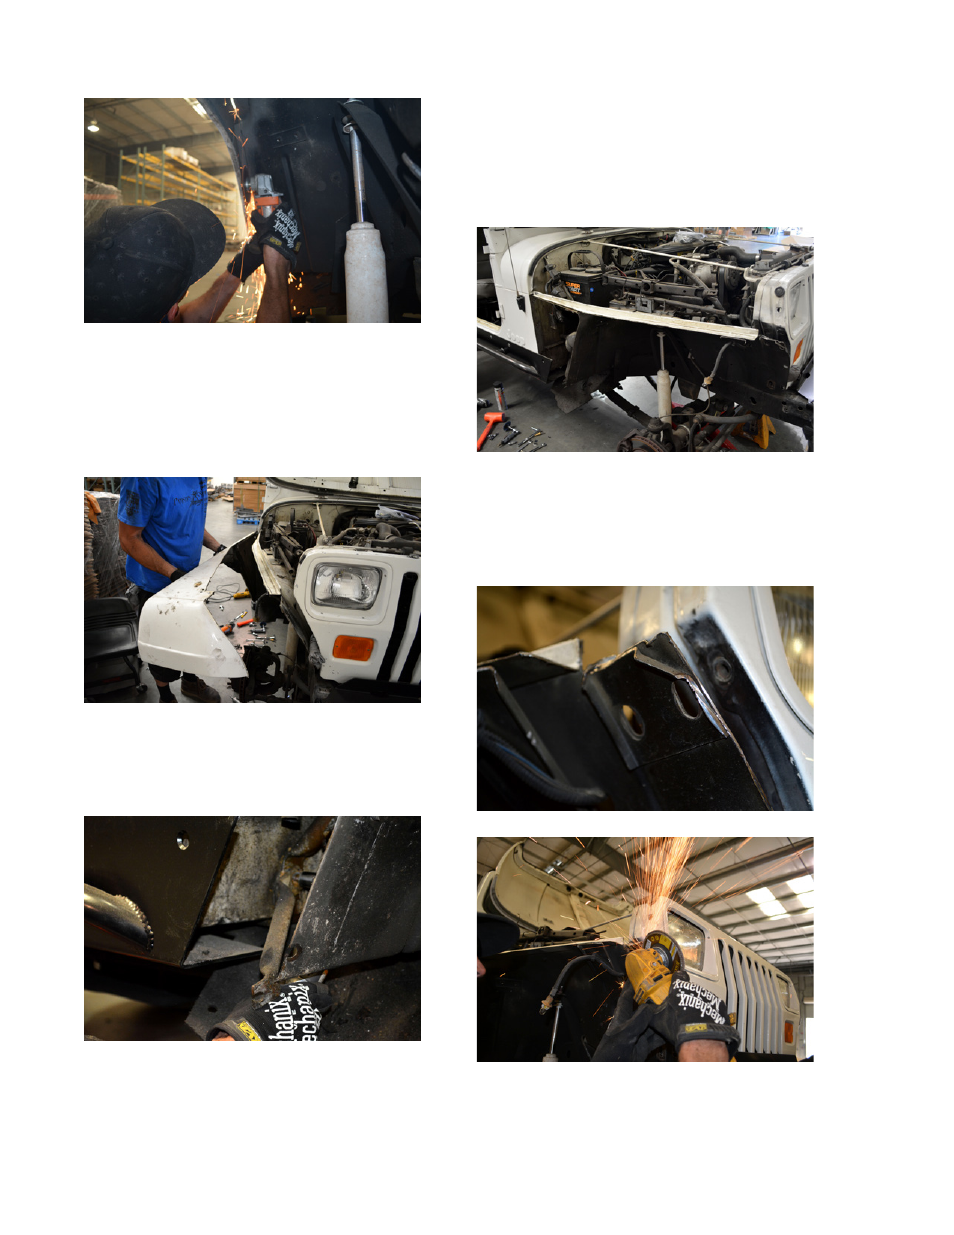
FIGURE 11
17. There may be a fender support bar behind
the inner wheel well, that braced the fender
to the firewall. Remove it if the material it
had been attached to has been cut away.
FIGURE 12
18. At this point your work should look
somewhat like the photo below, with only the
inner fender and a narrow strip along the top
of the outer fender remaining. NOTE: your
stock inner fender will NOT be attached to
the Jeep’s tub at this time—at this point in
the installation process it will be unsupported
except by the accessories bolted to it. This
is normal. It will regain its rigidity once the
DeFender™ has been installed.
FIGURE 13
19. Note the remnants of the stock fender
bracing where the fender attaches to the
grille, near the top, as shown in the photo
below. These will need to be ground flush
and smoothed out.
FIGURE 14
FIGURE 15
20. Use a file or sander to de-burr and smooth
all of the cut edges. Then paint the bare metal