Winland Electronics EA800-ip User Manual
Page 24
24
D-011-0152
Install the Wireless Sensors
Note:
Verify that the wireless sensors can communicate with the console as outlined in the following procedure
before permanently mounting them.
1.
Remove the cover from the wireless sensors and
record the MAC addresses (see Figure 8) of each
wireless sensor. The MAC address is printed on an
orange label affixed to each wireless sensor’s
printed circuit board (PCB) and is used to identify
each sensor during programming.
2.
Temporarily mount the front panel of the console to
the mounted rear panel.
3.
Connect power to the EA800. The EA800
completes its boot process and the
MONITORING or
NO SENSORS INSTALLED (if there are currently no
wireless sensors installed) screen is displayed.
4.
With the wireless sensors located near the console,
connect power to each wireless sensor.
5.
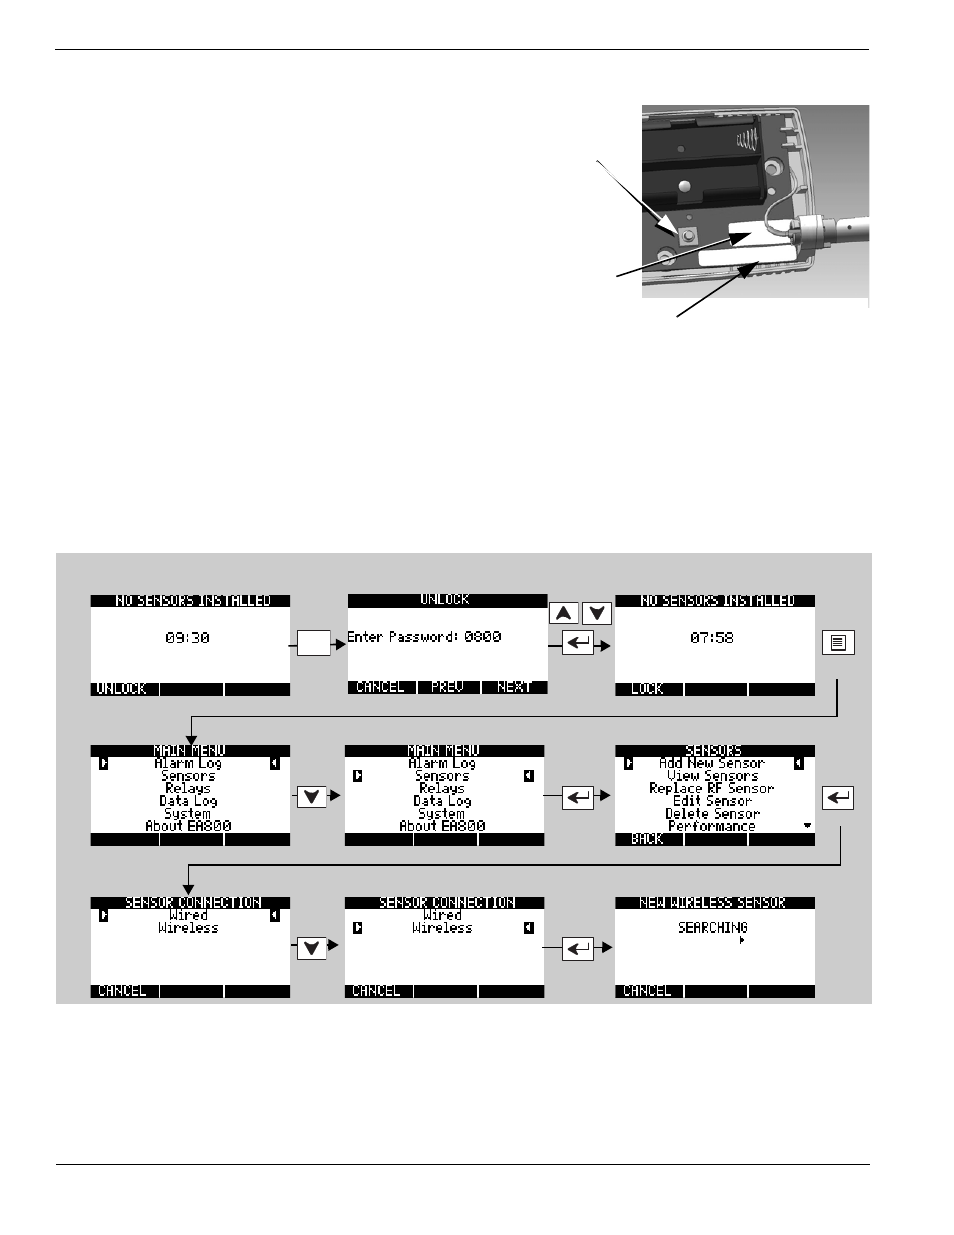
Unlock the keypad and allow the console to detect the wireless sensors using the following procedure.
Note:
The keypad locks automatically after 30 minutes of inactivity (no key presses). If you have not finished
the detection and programming process for a sensor and this occurs, entered values are lost and you
must start the programming procedure for the sensor from the beginning. It is recommended that you
allow the console to identify the wireless sensors one at a time, with the sensors unmounted and in the
same location as the console.
Note:
It may take a few minutes for the console to detect the wireless sensors.
At this point the
NEW WIRELESS SENSOR screen is displayed and an arrow moves from left to right indicating that the
EA800 is waiting to receive sensor ID data. When the EA800 has communicated with the reachable sensors the
SELECT SENSOR screen displays a list of wireless sensors detected.
RESET BUTTON
SENSOR MODEL NO.
(Example: EA-WTS = Wireless Temperature Sensor)
MAC Address Label
Figure 8 Wireless Sensor MAC Address Location
Enter
0800
F1
Example shown, set values as
appropriate for your system.