Detaching and refitting the rails, Detaching the rails, Lift up the front of the rail – Siemens HC724220 User Manual
Page 89: And unhook it (figure a), Then pull the whole rail forward, And remove it (fig. b), Refitting the rails, And then hook it into the front socket (figure b), Detaching and attaching the oven door, Risk of injury
89
Cleaning the cooking compartment floor, ceiling and side
walls
Use a dish cloth and hot soapy water or a vinegar solution.
If there are heavy deposits of dirt, use a stainless steel scouring
pad or oven cleaner. Only use when the cooking compartment
is cold. Never treat the self-cleaning surfaces with a scouring
pad or oven cleaner.
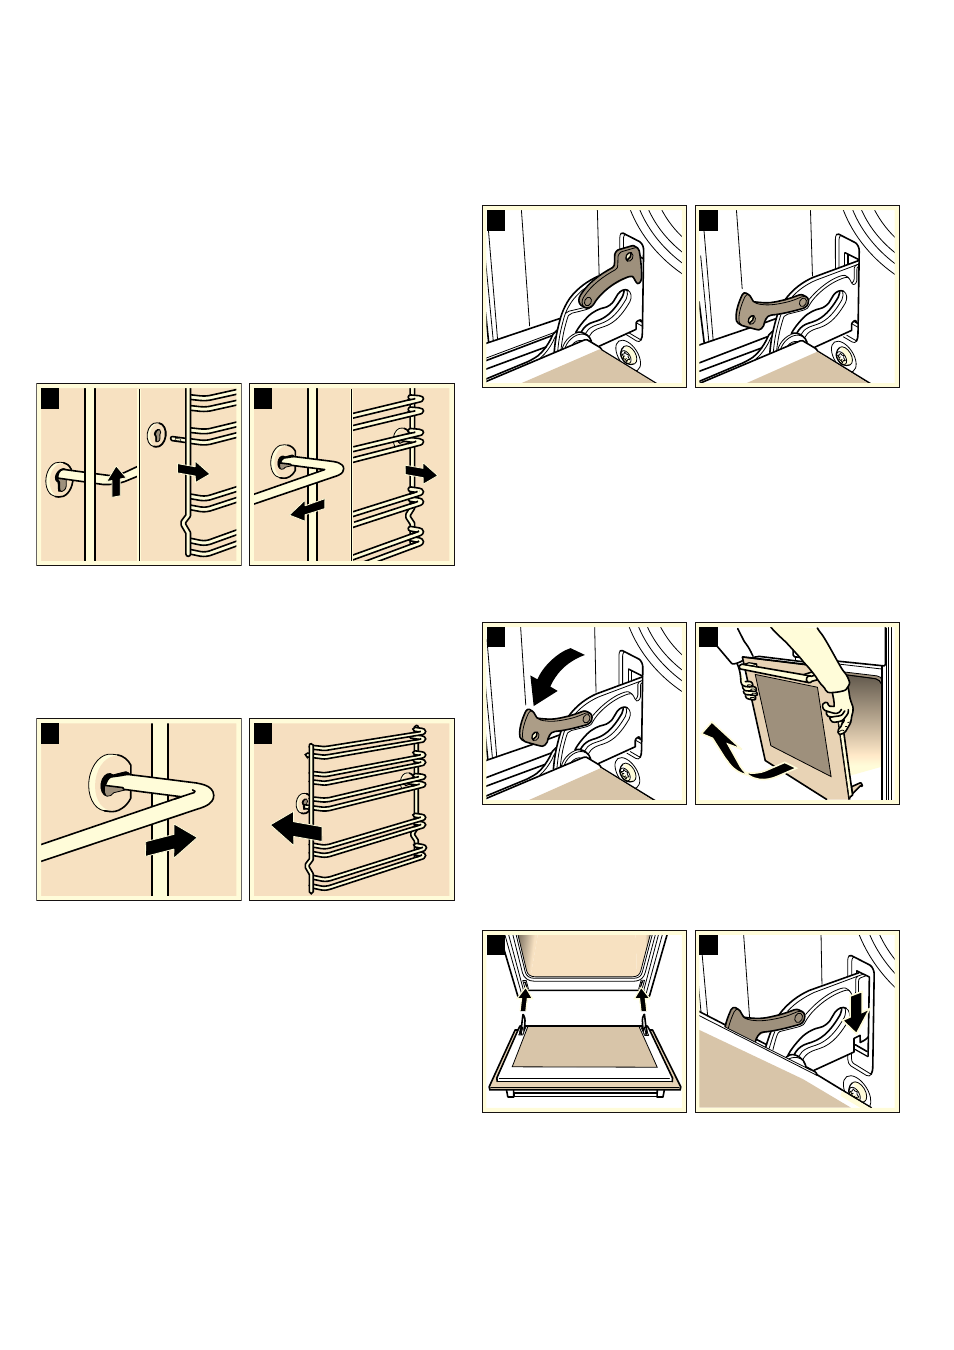
Detaching and refitting the rails
The rails can be removed for cleaning. The oven must have
cooled down.
Detaching the rails
1.
Lift up the front of the rail
2.
and unhook it (figure A).
3.
Then pull the whole rail forward
4.
and remove it (Fig. B).
Clean the rails with cleaning agent and a sponge. For stubborn
deposits of dirt, use a brush.
Refitting the rails
1.
First insert the rail into the rear socket, press it to the back
slightly (figure A),
2.
and then hook it into the front socket (figure B).
The rails fit both the left and right sides. Ensure that, as shown
in figure B, levels 1 and 2 are below and levels 3, 4 and 5 are
above.
Detaching and attaching the oven door
For cleaning purposes and to remove the door panels, you can
detach the oven door.
The oven door hinges each have a locking lever. When the
locking levers are closed (figure A), the oven door is secured in
place. It cannot be detached. When the locking levers are open
in order to detach the oven door (Fig. B), the hinges are locked.
They cannot snap shut.
:
Risk of injury!
Whenever the hinges are not locked, they snap shut with great
force. Ensure that the locking levers are always fully closed or,
when detaching the oven door, fully open.
Detaching the door
1.
Open the oven door fully.
2.
Fold up the two locking levers on the left and right (figure A).
3.
Close the oven door as far as the limit stop. With both hands,
grip the door on the left and right-hand sides. Close the door
a little further and pull it out (figure B).
Attaching the door
Reattach the oven door in the reverse sequence to removal.
1.
When attaching the oven door, ensure that both hinges are
inserted straight into the opening (figure A).
2.
The notch on the hinge must engage on both sides (figure B).
%
$
%
$
%
$
%
$
%
$