Installation and wiring – Vaisala DMT346 User Manual
Page 54
User's Guide _______________________________________________________________________
54 ___________________________________________________________________ M210762EN-G
1102-023
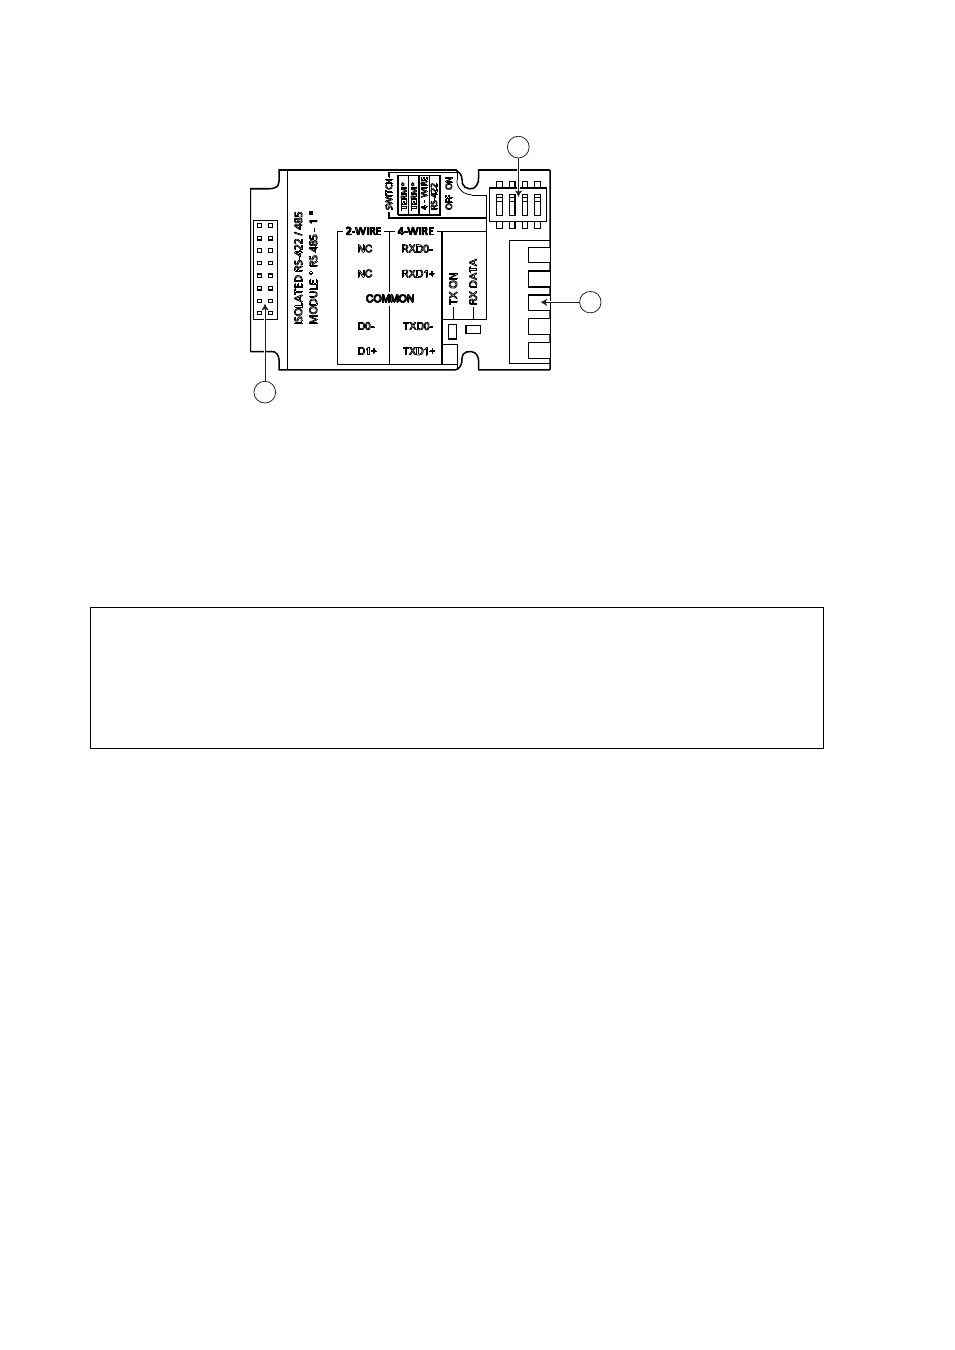
Figure 33
RS-422/485 Module
The following numbers refer to Figure 33 above:
1
=
Flat cable pins
2
=
Selection switches
3
=
Screw terminals for wiring
NOTE
The data lines on earlier versions of the RS-422/485 module are marked
A and B instead of D1+ and D0-. When the line is idle, D1+ has positive
voltage compared to D0-.
When connecting the module, be prepared to swap the D1+ and D0-
wires if you have a communication problem.
Installation and Wiring
1.
Disconnect the power. In case the RS-422/485-module is installed
in the factory, continue with the item 4.
2.
To attach the module, open the transmitter cover and fasten the
RS-422/485 module to the bottom of the housing with four screws.
3.
Connect the flat cable between the RS-422/485 module and the
motherboard's pins MODULE1 (Communications).
4.
Pull the network wirings through the cable gland.
5.
Connect the twisted pair wires (1 or 2 pairs) to the screw terminals
as presented in Table 6:
1
2
3