Configuring the scan to network default settings – Brother MFC J6910DW User Manual
Page 217
Network Scanning
210
13
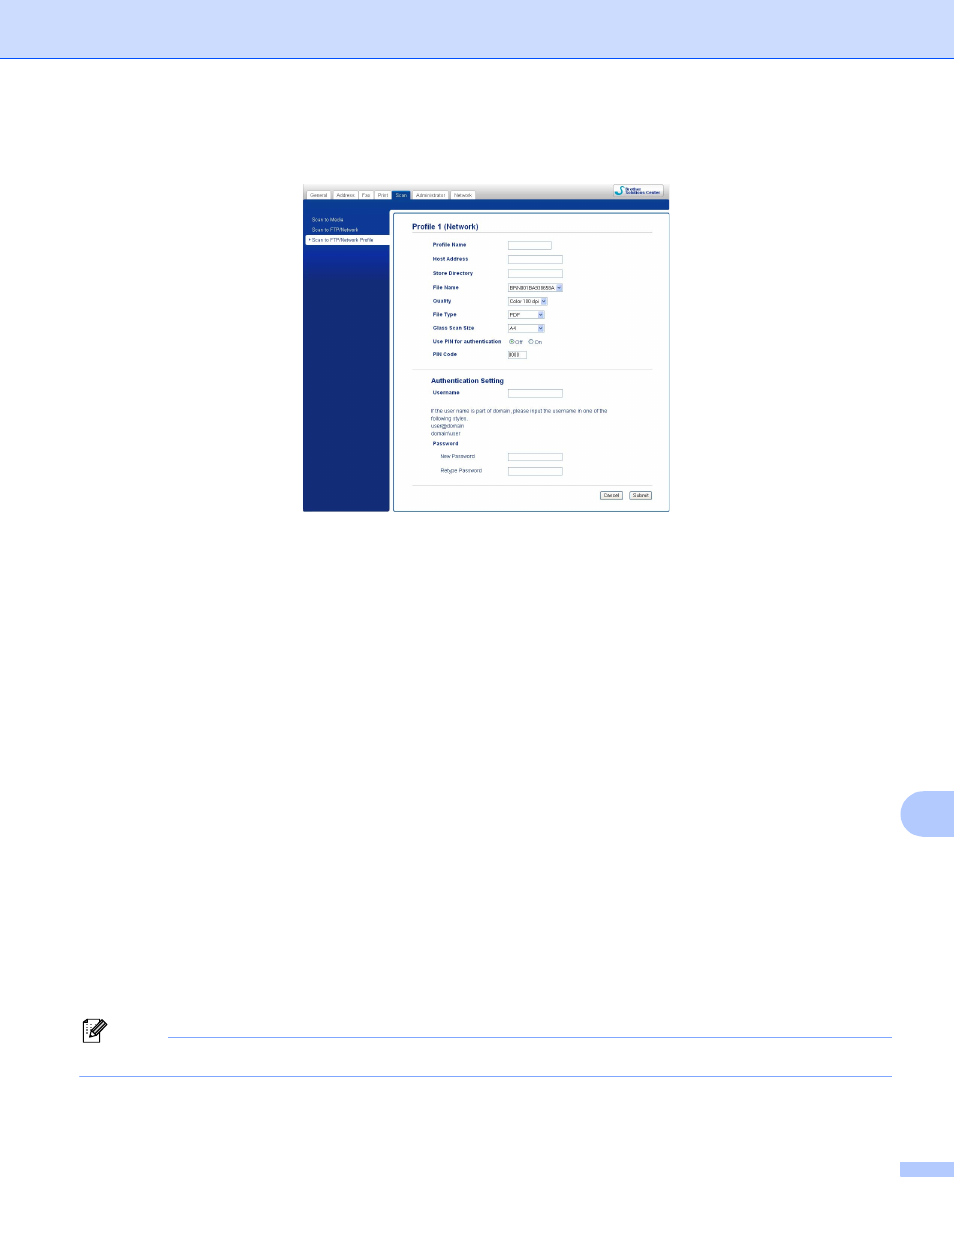
Configuring the Scan to Network Default Settings
13
a
Choose Network in Scan to FTP/Network from the Scan tab. Press Submit.
b
Choose the Profile you want to configure in Scan to FTP/Network Profile.
c
Enter the name that you want to use for the Scan to Network profile. This name will be displayed on the
LCD of the machine and can be up to 15 characters.
d
The Host Address is the domain name of the CIFS server. Enter the Host Address (for example
ftp.example.com) (up to 64 characters) or the IP address (for example 192.23.56.189).
e
Enter the destination folder where your document will be stored on the CIFS server (for example
\brother\abc) (up to 60 characters).
f
Choose the file name you want to use for the scanned document. You can choose from seven preset
and two user defined file names. The file name that will be used for your document will be the file name
you selected plus the last 6 digits of the flatbed/ADF scanner counter plus the file extension (For
example, Estimate_098765.pdf). You can also manually enter a file name up to 32 characters.
g
Choose the scan quality from the drop-down list. You can choose Color 100 dpi, Color 200 dpi,
Color 300 dpi, Color 600 dpi, B/W 100 dpi, B/W 200 dpi or B/W 300 dpi.
h
Choose the file type for the document from the drop-down list. You can choose PDF or JPEG for color
documents, PDF or TIFF for B/W documents.
i
Choose the glass scan size from the drop-down list. You can choose Letter, Legal, Ledger, A4 or A3.
Note
If you choose Secure PDF, the machine will ask you to enter the password before it starts scanning.