Maintenance – Prochem Legend SE AD User Manual
Page 36
MAINTENANCE
LEGEND SE 980059 07/23/02
4-4
WATER PUMP
Refer to the Water Pump Operation and Service
Manual for specific instructions.
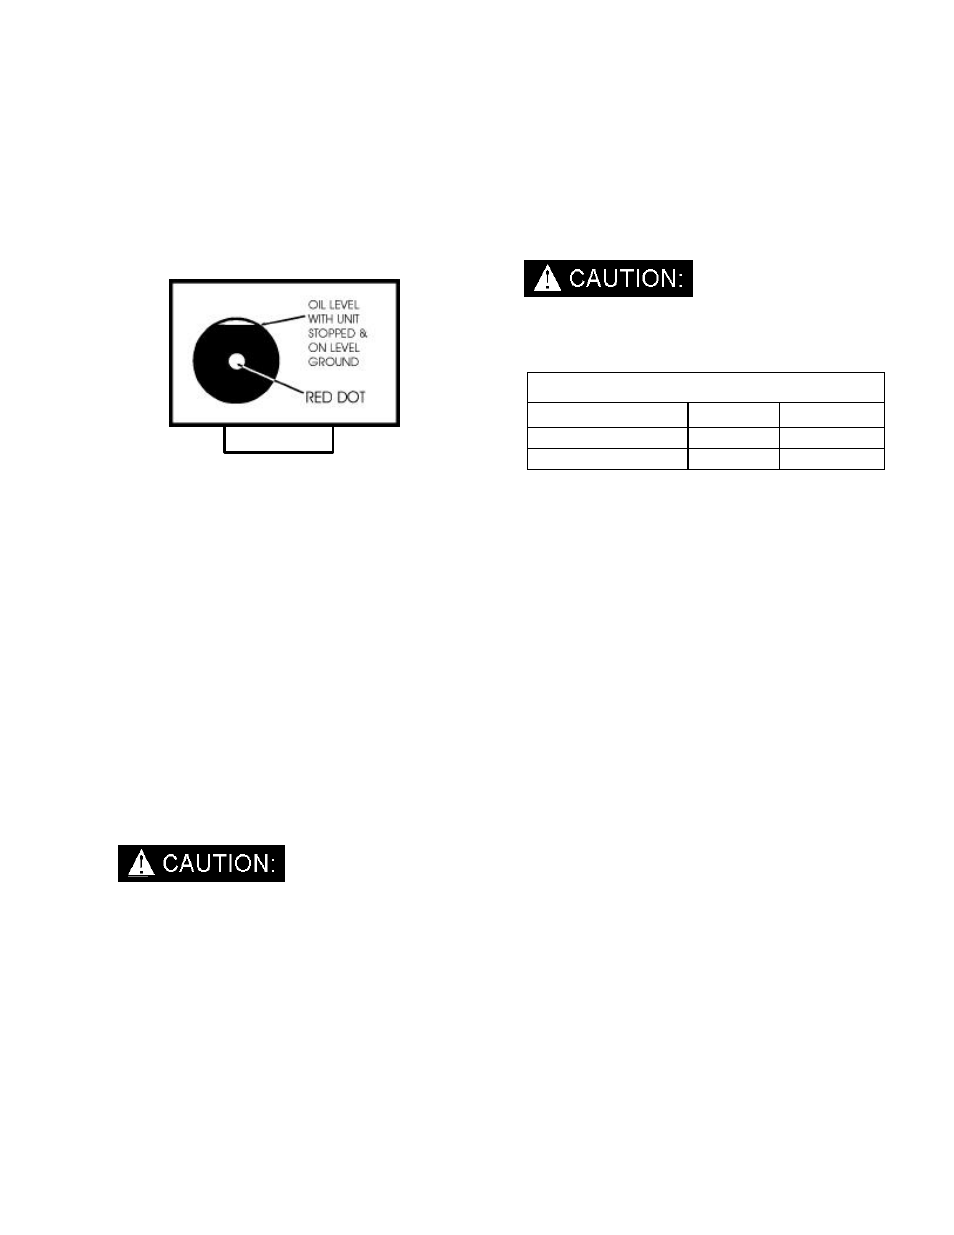
1. Check the crankcase oil level daily to assure the
proper level. Use Figure 20 as a guide when
checking the oil level. If the level has dropped,
check for the source of leakage and repair.
2. Change the crankcase oil with Cat Pump
Crankcase Oil, Part #05-008016, after the first
50 hours of operation. Drain and refill the
crankcase oil with Cat Pump Crankcase Oil
every 500 hours thereafter.
3. Other Cat approved oil equivalents are: Mobil
DTE 16, Amoco Rykow 68, and Shell Tellus T68.
VACUUM INLET FILTER (IN WASTE TANK)
1. The vacuum filter in the waste tank should be
removed and cleaned daily. If this is done, the
filter will last for a long period of time.
2. Inspect the vacuum inlet filter inside the waste
tank. If there is any lint or debris, remove and
clean filter. Re-install the filter hand-tight.
Replace this filter yearly.
When removing the vacuum inlet filter, grip the
plastic hexagonal section of filter. Grasping filter
by the screen may collapse or ruin the filter.
NOTE: When replacing this filter, we recommend
using only a stainless steel Prochem filter, Part
#14-806518.
DRIVE BELTS, PULLEYS, & HUBS
1. Check pulley set screws and/or hub cap screws
after the first 25 hours and then again at 100 hours.
Re-torque these screws with a torque wrench, using
the values on the chart on the next page. Check
pulley set screws and/or hub cap screws every 500
hours thereafter.
Make certain that when you re-torque these
screws, that you use a clockwise pattern and
continue until proper torque is achieved.
TORQUE VALUES
COMPONENT
INCH/LBS
FOOT/LBS
Engine hub
720
60
Vacuum pump hub
192
16
2. Check for pulley groove wear, clean belts and
pulley grooves, check for worn belts, proper belt
tension, and pulley alignment after the first 25
hours and then again at 100 hours.
Check for belt ride in the groove. In multiple
groove drives, belt ride should be uniform, not
more than 1/16" above or below top of pulley
groove.
Check groove wear area for wear. Side wall of
groove should be straight, not dished out. Bottom
of groove should show no signs of belt contact.
Inspect belts for contaminants, such as oil or
grease. Wipe belts clean with detergent and
water. Inspect pulley grooves for buildup of such
material and remove, if necessary.
Check wear surfaces of belt for excessive wear.
If they have a slick, glazed look, belts are
slipping. Check belt tension. Never replace one
belt in a used set, as used belts will elongate.
Replace entire set if replacement is necessary.
Place a straight-edge across the top of belt.
There should be no more than 1/2" deflection in
the center of the belt, halfway between the
pulleys. If there is too much slack, tighten belt,
making sure that it stays properly aligned.
See the "General Service Adjustments” section
in this manual for details.
Check alignment with straight-edge, string, or
machinist level. Correct alignment to as near
perfect as possible.
FIGURE 20