Hardware setup and connections, Software installation, Intrinsically safe – Crystal FastCalXP Calibration Software User Manual
Page 6: Reference recorder
Installation and Setup
4
FastCalXP Operation Manual
HARDWARE SETUP AND CONNECTIONS
To set up your work station, position the GaugeCalHP next to the computer monitor and keyboard. Be sure that your serial or USB cable will reach from the
reference mounted on the rear comparator position to the serial or USB port of the computer. Also, in some modes of operation, you may need to have one
hand on the handle of the comparator and one hand on your computer keyboard or mouse.
If you have purchased the optional foot switch (Part no. 3327), plug the switch in to a USB port on your computer. Refer to the
Refer to the
for help with setting up the comparator.
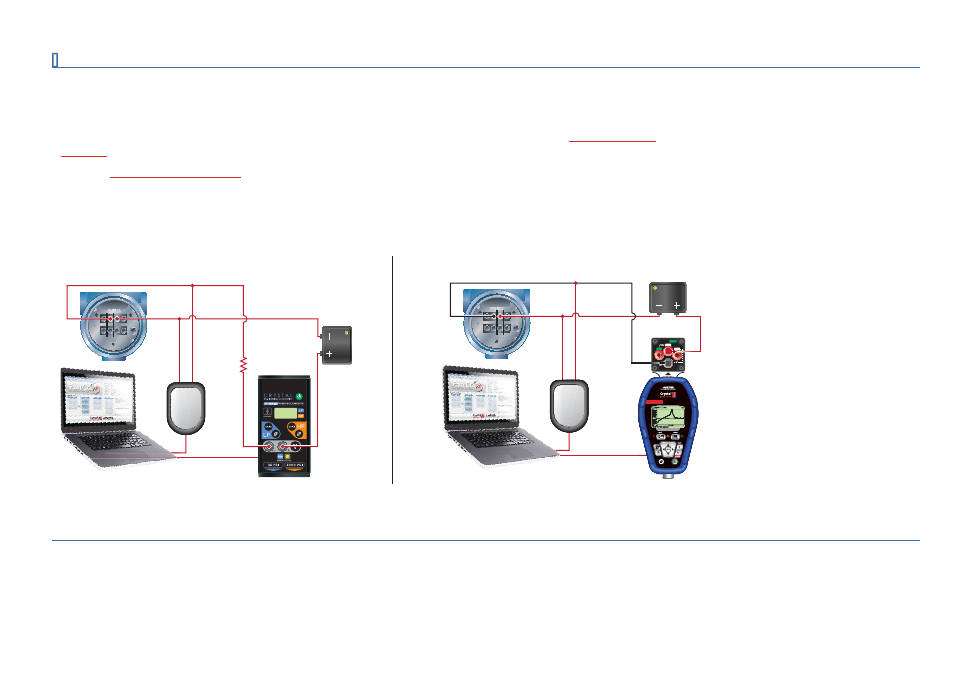
To use FastCalXP for calibration of pressure transmitters, the following diagrams illustrate the recommended connections for measuring current output and
digital HART signals. It is important to connect to the working terminals on the pressure transmitter to obtain accurate milliamp readings. Do not use the TEST
terminals provided on some transmitters. These terminals may give incorrect current readings and should not be used for calibration. The polarity of the HART
modem is not important.
Transmitter
RL ≥ 250 Ω
HART
Modem
30 Series
Power Supply
Transmitter
HART
Modem
Power Supply
MA20
mA
HART
V
CRYSTAL
nVision
Intrinsically Safe
nVision
Reference Recorder
on
Intrinsically Safe
nVision
Reference Recorder
Computer
Computer
30 Series Calibrator connections
nVision Reference Recorder connections
SOFTWARE INSTALLATION
If you have downloaded the software from the Internet, simply run the downloaded executable and follow the instructions to complete the installation.
If you have an installation CD, insert the CD into the drive on your computer and setup will run automatically. If setup fails to start, run the FastCalXP2.1Setup.
exe from the CD. Follow the instructions in setup to complete the installation.