Crystal FastCalXP Calibration Software User Manual
Page 12
Calibrating Gauges
10
FastCalXP Operation Manual
3
Select a model from the pull-down list. If the model of the gauge you are creating has not been previously entered into the database, click on the
Add New
Model button
.
The Add New Model Wizard will step you through the creation of a new model in two steps.
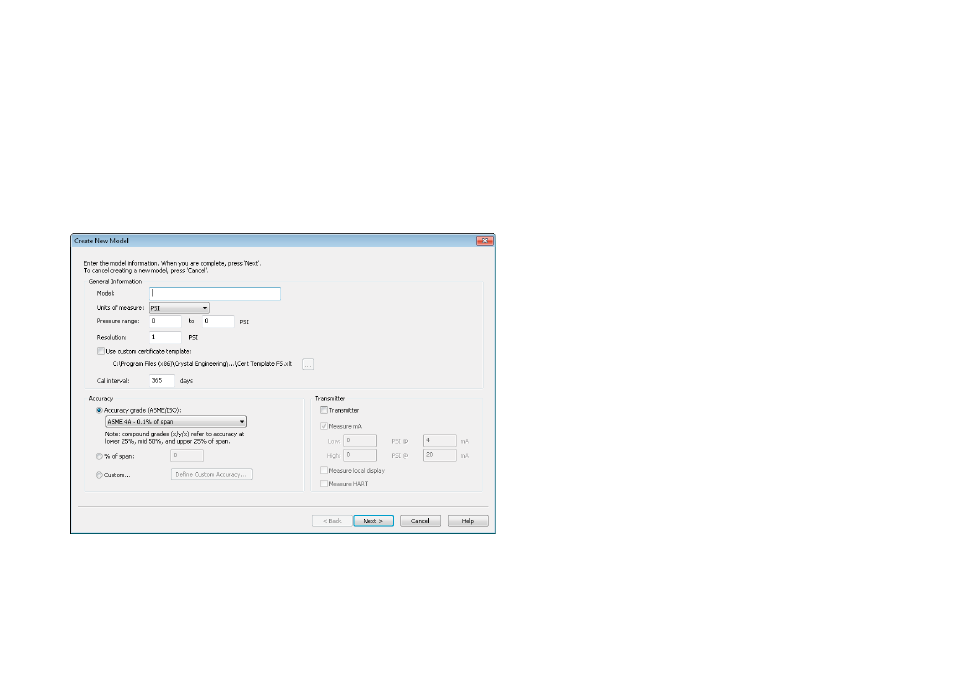
The initial dialog box allows you to enter the model information.
4
Enter the
Model
number or name and select the
Units of measure
from the pull-down list.
5
Enter the
Pressure range
measured by the model.
6
Specify the increment represented by the
Resolution
of the gauge or transmitter.
When
Use custom certifi cate template
is checked, you can override the default Excel template defi ned in the FastCalXP Options dialog. This allows this
model to have a unique certifi cate format.
7
Enter the
Cal Interval
,
in days, which will be used for calibration scheduling.
If you will be calibrating a transmitter, check the
Transmitter box
and select the parameters that you wish to measure. If you wish to
Measure mA
,
check
the box, enter the
Low
and
High PSI
represented by the range of mA readings for the transmitter. In addition, it is possible to
Measure local display
or
Measure HART
signals through a connected HART modem.
Note:
The default certifi cate template will change depending on the chosen transmitter confi guration. Also, if
Measure HART
is selected, the Resolution will
automatically be adjusted to the resolution of the connected pressure standard.