Crystal FastCalXP Calibration Software User Manual
Page 22

Calibrating Gauges
20
FastCalXP Operation Manual
The Adiabatic Eff ect
Regardless of what fl uid is used in the comparator there will always be a small amount of air remaining between the fl uid and the gauge sensor. When pres-
sure is increased in the comparator the air is pressurized and this pressurized gas heats up. When the pressure stops increasing, the gas cools and the pressure
in the comparator decreases slightly. The reverse is true when the pressure is reduced in the comparator. This is called the adiabatic eff ect.
The result of the eff ect for FastCalXP is that the pressure is not immediately stable when a new target pressure is reached. At high pressures, the adiabatic ef-
fect can be large. For example, at 10 000 PSI the pressure can change by 100 PSI or more as the gas stabilizes thermally.
With FastCalXP, there are two approaches to working with the adiabatic eff ect. One approach is to adjust the comparator and wait for the pressure to stabilize.
This approach is used in the
Actual data
acquisition mode. The other approach is to take advantage of the adiabatic eff ect with the
Peak data
acquisition mode.
Actual or Peak Mode calibration can be selected in the Calibration Window. Refer to the discussions of the techniques used in
and
Peak Mode Calibration on page 22
To change the default Data Acquisition Mode
Choose
Options
from the Tools menu and click on the
Calibration Settings tab
.
Completing a Calibration
When the exercising is complete and the data acquisition mode has been selected, the calibration process can begin.
1
Even in auto peak mode, the fi rst zero-level measurement must be made manually by pressing
Enter
,
clicking on the
Next Point button
,
or pressing the foot switch.
Refer to the discussions of
Actual Mode Calibration on page 21
and
Peak Mode Calibration on page 22
for guidance with making measurements.
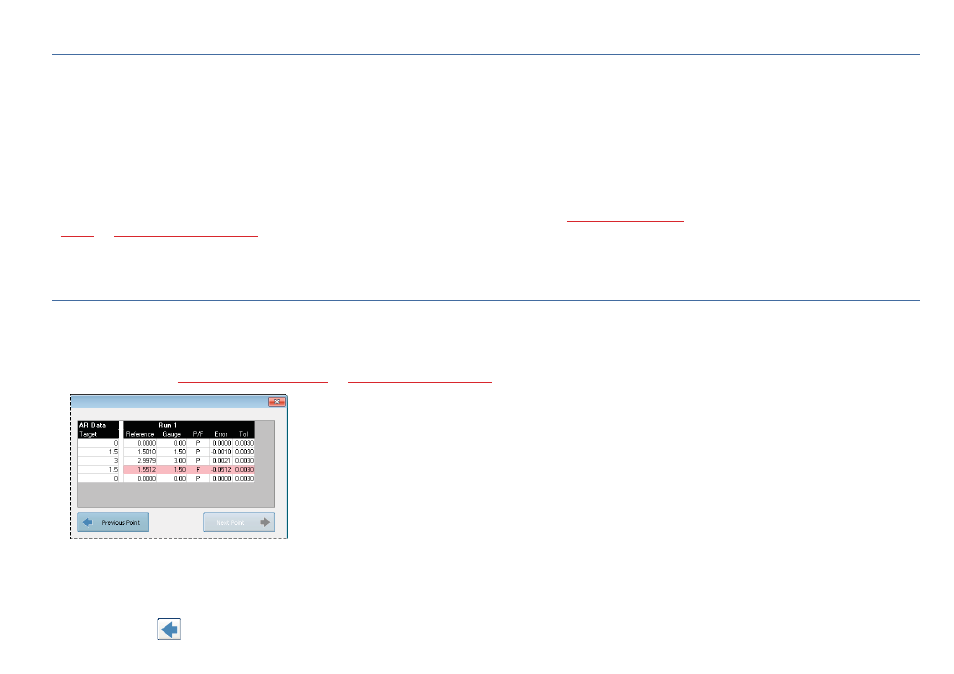
As the calibration progresses, the gauge will pass or fail at each profi le point, or Target Pressure. To pass, the Gauge must be equivalent to the Reference
within the tolerance range. The tolerance is defi ned as the accuracy of the gauge at the measured pressure. The data is displayed in a box at the right of the
calibration window.
Failed profi le points are shaded red. The gauge must pass at every profi le point to pass the calibration.
2
Use the
Back buttons
to return to a previous step or to start over.
