Setting up tanks and fluids – Badger Meter Fluid Management System User Manual
Page 40
Setting Up Tanks and Fluids
Using the software, you can track and monitor tank levels based off work orders . To track this, you first need to add a tank and
its corresponding fluid .
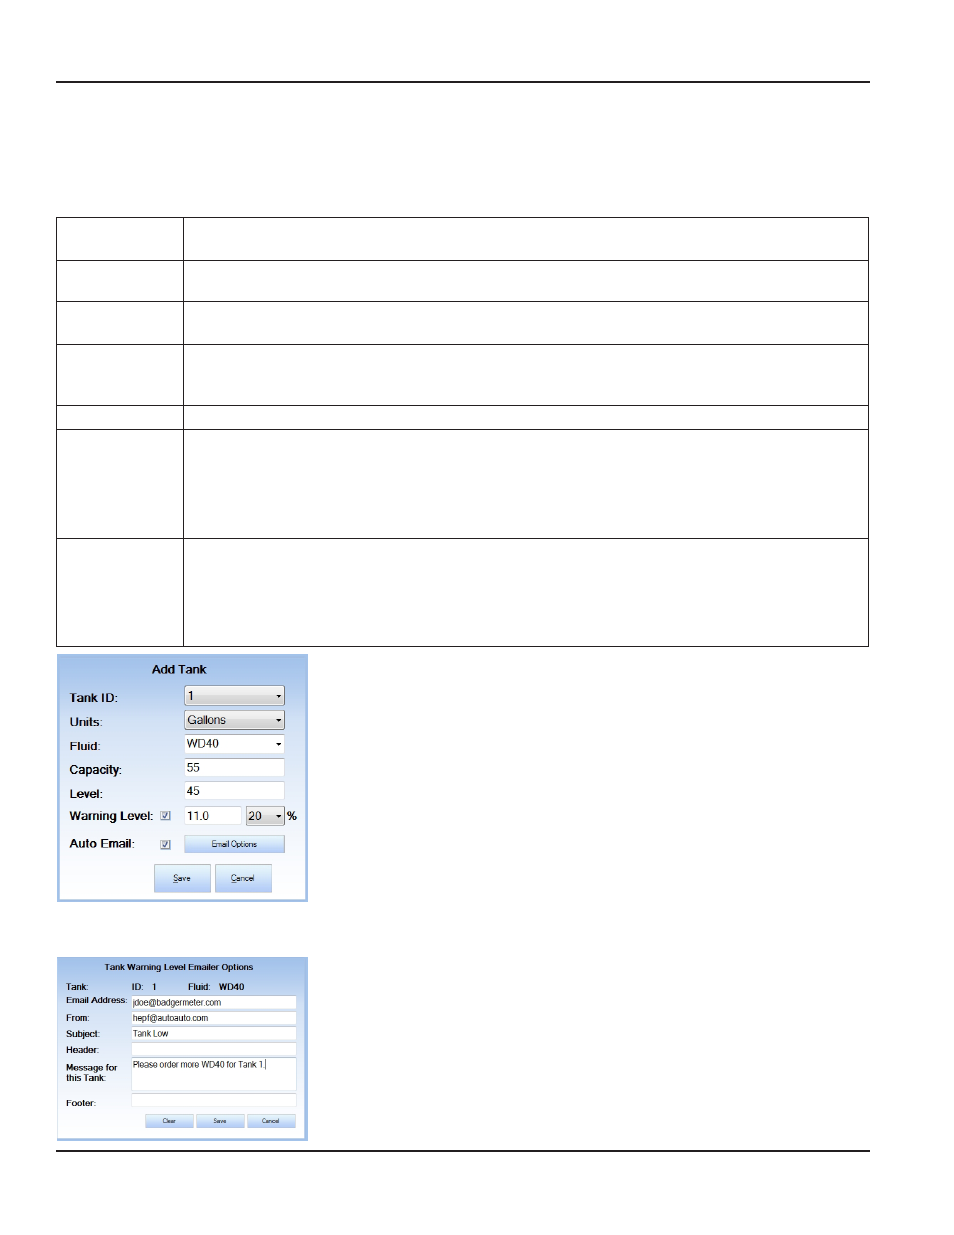
These are the fields of information required to add a tank:
Tank ID
The Tank ID field automatically displays the next available sequential ID number . You can also select
available tank IDs from the drop-down menu .
Units
The Units field specifies the units of measurement that you use to track the tank level . The choices are
Gallons, Liters, Pints and Quarts .
Fluid
The Fluid field specifies the type of fluid in the tank . You can also select existing fluids from the
drop-down menu .
Capacity
The Capacity field specifies the total amount of fluid that may be stored in that tank . Enter a numeric
value that corresponds to the capacity of the tank (the value will be in the units you previously
identified) .
Level
The Level field specifies the current level of fluid in the tank .
Warning Level
The Warning Level field specifies the fluid level at which you would like a warning message emailed to a
particular person . A warning message will appear on any running client screen when a completed work
order brings the tank level down to, or below, the warning level setpoint .
To use this feature, click the check box and enter either a nominal value or percentage (the other value
with self-propagate after you enter the first value) .
Auto Email
Check the Auto Email checkbox to bring up a screen to specify email settings for the warning message .
When the tank reaches the specified Warning Level, this email will be sent to the email recipient .
Multiple recipients can be defined . Enter a semicolon ( ; ) between each e-mail address .
OTEE:
N
This is not a required field . This option will not run if email settings are not activated . See
.
To set up a tank:
1 . Click on the ADD TANK button .
2 . In the Units field, select a unit of measure from the drop-down menu .
3 . In the Fluid field, enter a fluid name in the text box or select a fluid from the
drop-down menu .
4 . In the Capacity field, enter the total number of units (gallons, liters, pints or
quarts) of fluid that may be stored in the tank .
5 . In the Warning Level field, enter the fluid level at which to trigger a warning
message .
6 . To specify the email setting for the warning message, check the box next to
Auto Email, then select Email Options .
7 . Enter the email address of the recipient .
8 . Type a message .
9 . Click SAVE to close this screen and return to the Add Tank screen .
10 . Click SAVE again to save your changes and exit the Add Tank screen .
OTEE:
N
If the fluid you entered was not in the drop-down list, you will be asked if
you want to create a new fluid when you exit this screen .
Fluid Managment System, FMS-3 2.4 GHz RF High-End Software v3.4.1
Page 40
July 2014