Jenway 3540 User Manual
Page 62
careful re-calibration against precision standards a new cell constant can be
determined after a period of use.
To calibrate against a known cell constant (K Factor), select the Setup tab using the
right or left arrow keys, then select Conductivity Set up using the up or down arrow
keys. Press Enter and select Calibration Set up using the up or down arrow keys.
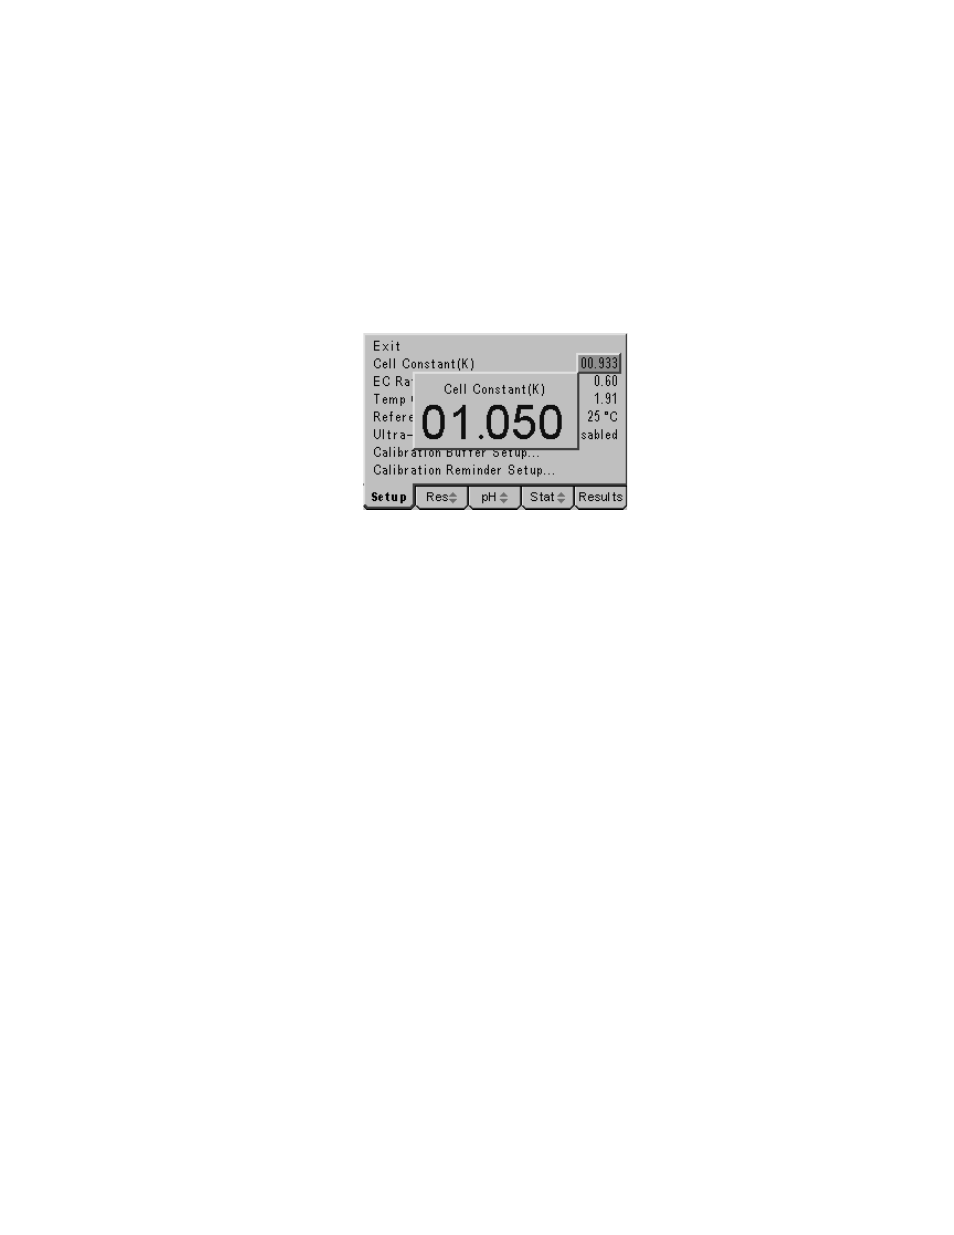
Press Enter and use the down arrow key to highlight the Cell Constant (K) option then
press Enter. A data entry box will be displayed with a box around the least significant
digit flashing to indicate it can be adjusted with the up or down arrow keys. Set this
digit to the desired value then use the left or right arrow keys to highlight each digit in
turn, for adjustment with the up or down arrow keys, until the correct Cell Constant
value for the conductivity probe in use is displayed.
Data entry box for setting Cell Constant
Press the Enter key to confirm your setting and then press the Escape key [ESC] to
return to the main measurement screen.
6.24
Calibration to Standard Solutions
It is good practice to calibrate to at least two points that should ideally bracket the
expected range of the sample. One of these points can be a zero as described in
section 6.22, but because of the wide dynamic range of conductivity values it is
preferable to calibrate to zero and two other levels that bracket the expected range of
sample values. In extreme cases or where the expected sample range may cover
several decades then up to three calibration points (as well as zero) may be selected.
Four standard solutions, 10µS, 84µS, 1413µS and 12.88mS are automatically
recognised and so can be measured in any order, although good practice demands
that the lowest conductivity standard is always used first to limit the possibility of carry
over contamination. Other standards entered manually in the conductivity calibration
set up menu (see section 4.16), must be measured in the order as entered in the
menu.
To calibrate against one, two or three conductivity standard solutions the following
procedure should be carried out…
Press the calibration [CAL] key.
Three tabbed screens will now be displayed.
Use the right or left arrow keys to select the Cond Cal tab.
(It is also possible to review or alter the Conductivity calibration set up by moving the
highlight to the Setup tab on the left-hand side – referring to section 4.10 for details.)
Place the conductivity probe into the first calibration solution.
The measured conductivity at the reference temperature will be shown in the top
display while in the lower display the current temperature of the solution is displayed.