Jenway 3540 User Manual
Page 28
3.38 Print
Channel
This enables the print data to be configured so that just conductivity, just pH or
conductivity and pH results are printed, reducing the print out of unnecessary data.
To select which channel(s) are printed press the down arrow to highlight Print
Channel on the Printer Set Up screen, then press the Enter key. The highlight will
move across to the default setting of ‘Conductivity & pH’ or one of the above options if
this has previously been changed. Use the up or down arrow keys to view the options
and press the Enter key to accept your preferred setting when this is highlighted on
the display. Use the Escape key to return to other menu levels or the measurement
screen.
3.40
Time/Date Set Up
The Clock Set up menu enables the time and date to be set and enables either the
time or date to be selected for display on the main measurement screen.
Access the Clock Set Up menu by carrying out paragraphs 3.01 to 3.05, then use the
up or down arrow keys [ ] to move the highlight over the Clock Set Up option, then
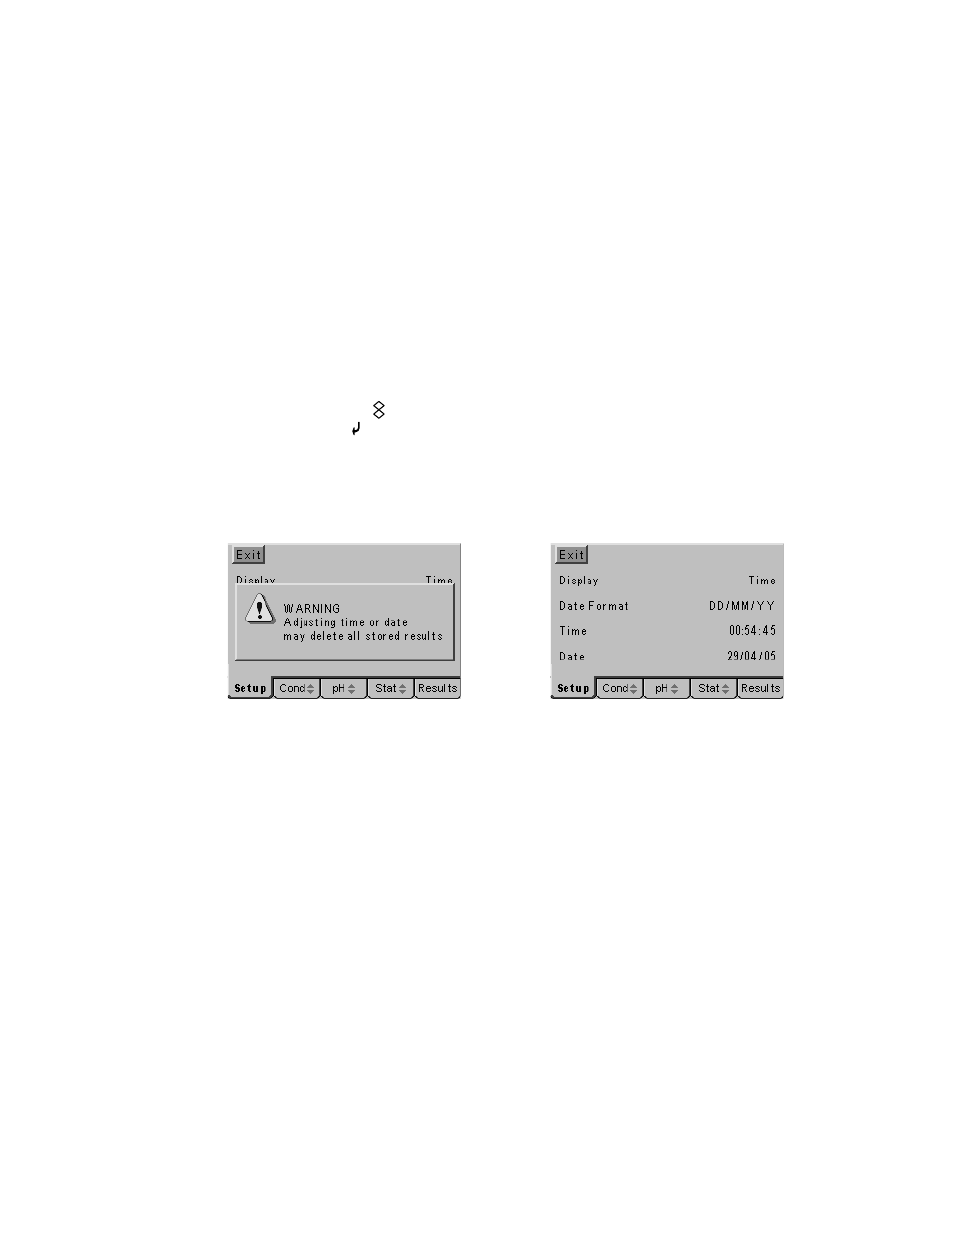
press the Enter key [ ]. The Clock Set Up screens below will be displayed, the initial
warning that data will be lost from memory if the clock is adjusted is to protect, for
GLP conformance, the integrity of the date/time stamp on stored results. For this
reason clock/time settings should always be made before any data is stored or if
changes are made all data should be copied to an external source first. Corrections
for daylight saving are permitted with no effect on stored data.
Changing date will invalidate stored data
Clock Set Up screen
3.41 Display
To select between the display of the Time or Date on the main measuring screen
press the down arrow key in the Clock set Up menu to highlight the Display option,
then press the Enter key. The highlight will move across to the default setting of
‘Time’ or ‘Date’ if this has previously been changed. Use the up or down arrow keys
to toggle between the options and press the Enter key to accept your preferred
setting when this is highlighted on the display. Use the Escape key to return to other
menu levels or continue with setting the other Clock Set Up options as below.
3.42 Date
Format
The date can be displayed in either European format (with the day first, DD/MM/YY)
or in American format (with the month first, MM/DD/YY). To select between the two
formats press the down arrow key in the Clock set Up menu to highlight the Date
Format option, then press the Enter key. The highlight will move across to the default
setting of ‘DD/MM/YY’ or ‘MM/DD/YY’ if this has previously been changed. Use the
up or down arrow keys to toggle between the options and press the Enter key to
accept your preferred setting when this is highlighted on the display. Use the Escape
key to return to other menu levels or continue with setting the other Clock Set Up
options as below.