Warning, Arm 1 arm 2 – IAI America IX-NNN3515 User Manual
Page 43
35
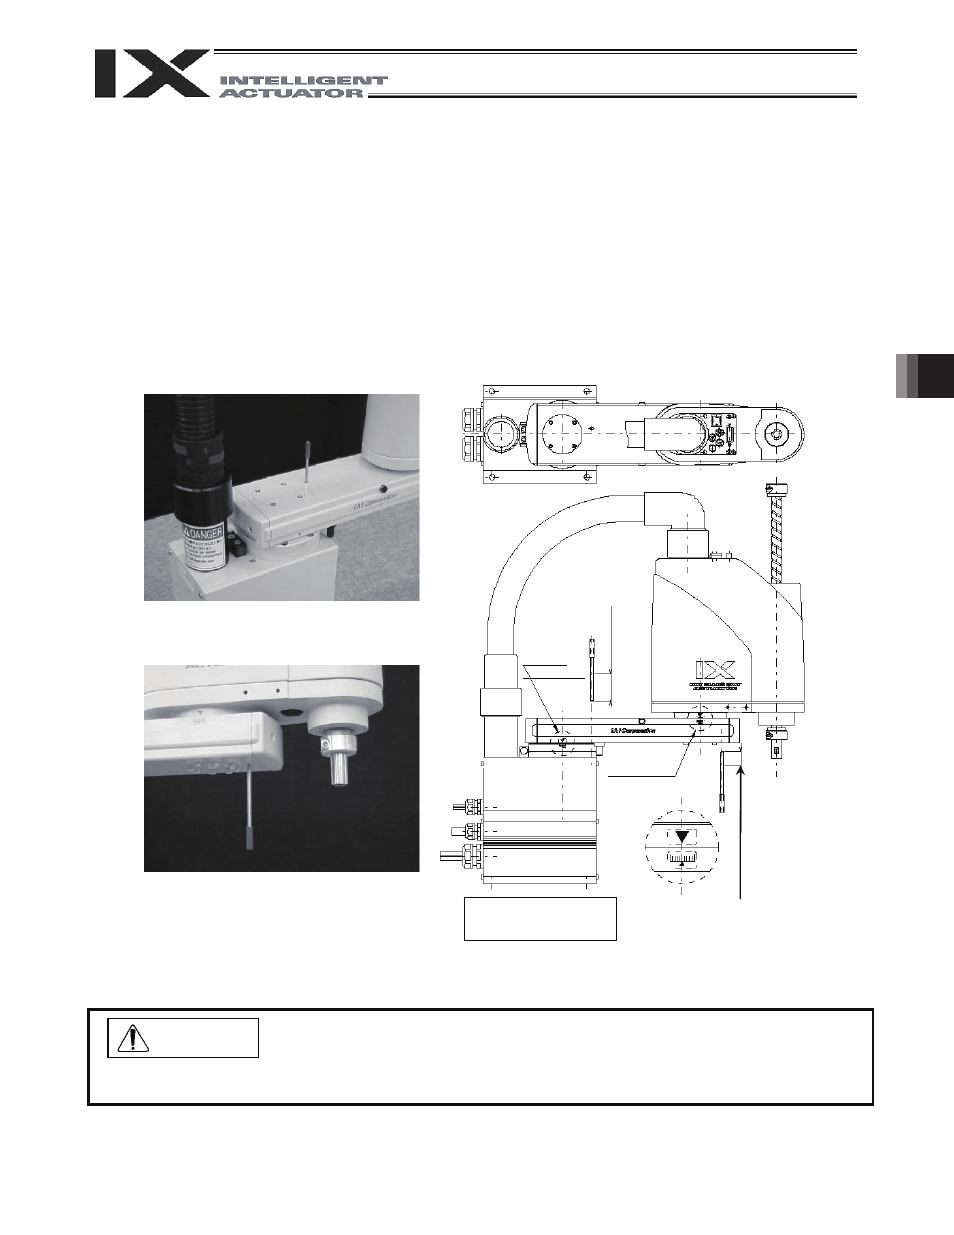
6. Inspection/Maintenance
6.
Press the emergency-stop switch.
7.
When performing an absolute reset of arm 1, set the adjustment jig (pin) on arm 1 to secure the arm in its
reference position. You can move arm 2 when securing arm 1. When performing an absolute reset of arm 2,
set the adjustment jig (pin) on arm 2 to secure the arm in its reference position. You can move arm 1 when
securing arm 2.
x Set the jig after confirming that the emergency-stop switch is pressed.
x Set the jig after adjusting the arm to the reference position, using the positioning mark label as a guide.
x Arm 1 has a cover (not arm 2), which is fixed with setscrews. Remove the setscrews and detach the
cover before setting the jig.
x It is recommended that an adjustment jig be used to perform an absolute reset. With arm 1 or 2,
however, rotation data can be reset as long as a positioning accuracy of “center of positioning mark label
r1 graduation” is ensured.
z Always press the emergency-stop switch before setting an adjustment jig. Failure to do so may cause the
robot to malfunction and result in a serious accident.
Arm 1
Arm 2
Positioning
mark label
for arm 1
Inser
tion
de
pth
: A
p
pr
o
x
. 60 m
m
Positioning
mark label for
arm 2
Inser
tion
de
pth
: A
p
pr
o
x
. 20 m
m
Illustration of
reference positions
(Note) When performing an absolute reset of arm 1 of the IX-NNN2515,
bend arm 2 slightly as you set the adjustment jig (pin).
Warning