Calibration, Figure 3-18 send diameter to m, Real time calibration mode – Gentec-EO Beamage-M2 User Manual
Page 25
Beamage-M
2
User Manual Revision 2.0
25
3.3.3. Calibration
Now that your setup is ready, it is time to calibrate it and to make your first M
2
measurement.
Before continuing, please note the serial number of each camera.
1- Open a first instance of PC-Beamage-3.0. Select the monitoring camera (the camera that is not mounted
on the Beamage-M2 module). This instance of the software will serve for the monitoring.
2- Start a second instance of PC-Beamage-3.0 and select the other camera. This second instance of the
software will serve to calculate the M
2
.
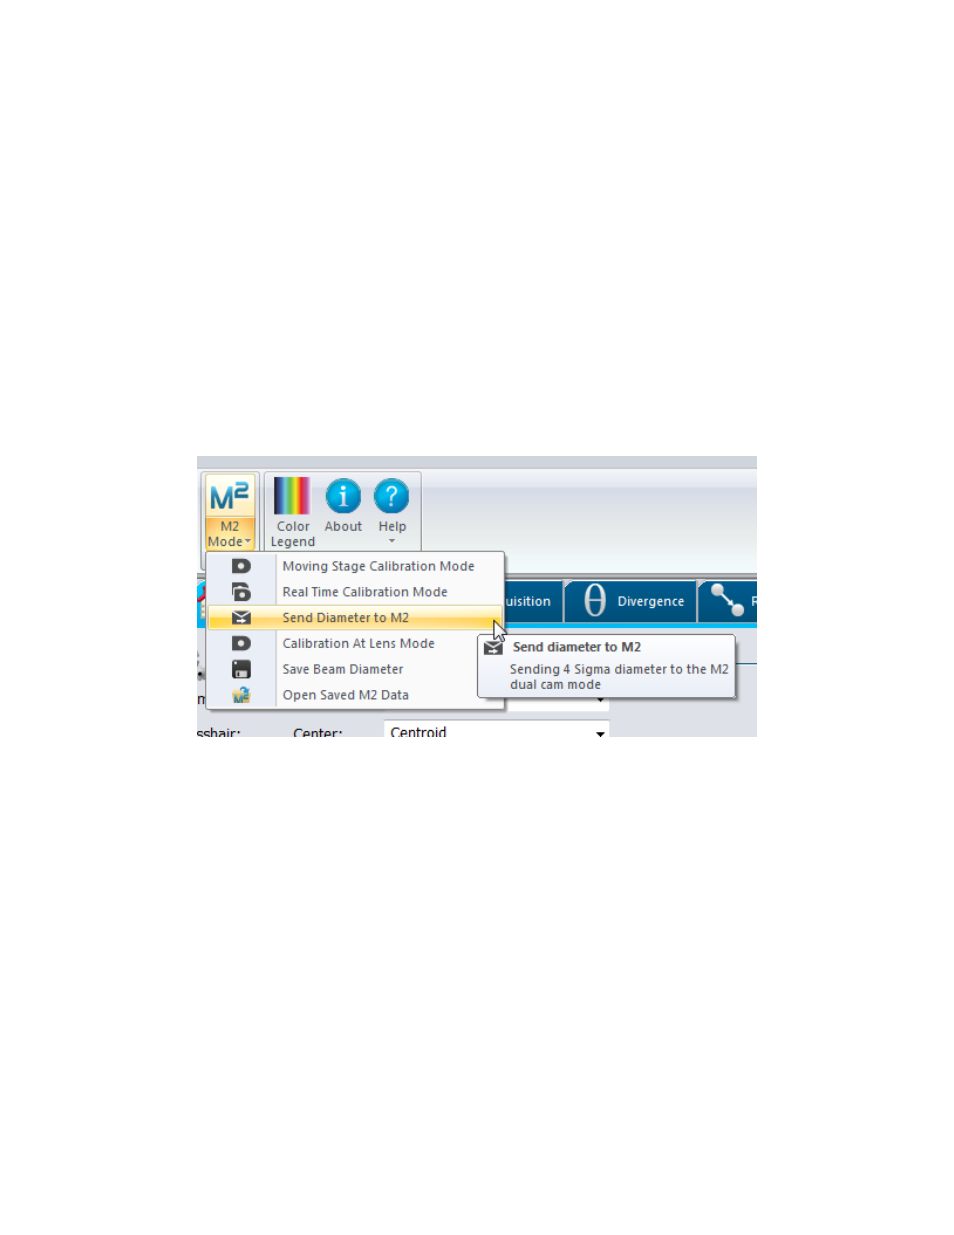
3- In the monitoring software window, start a capture then make all the necessary settings, including a
background subtraction, to measure a beam diameter. When completed, please activate the “Send
Diameter to M2” option in the M2 Mode menu.
Figure 3-18 Send Diameter to M
2
Real Time Calibration Mode
Assuming that the capture will continue and not be stopped, this will send the beam diameter at the focal lens
to the M
2
software window in real time. The monitoring software allows you to continuously visualize the input
laser in the PC-Beamage-3.0’s normal mode.
4- When you are finished setting up the monitoring software, go back to the M
2
software. Before working
in the M
2
mode, the steps listed below must be followed:
a. The active area should be at full resolution (2048 X 1088 pixels)
b. There should be no pixel addressing (set to ‘’none’’)
c. A background subtraction should be performed