Plate layout subtab – Luminex xPONENT 4.2 for FLEXMAP User Manual
Page 100
12. Highlight a range and click Delete Range to delete the range.
13. Click OK to apply the new settings to the analyte first clicked, or Apply to All Analytes
to apply them to all the analytes in the protocol.
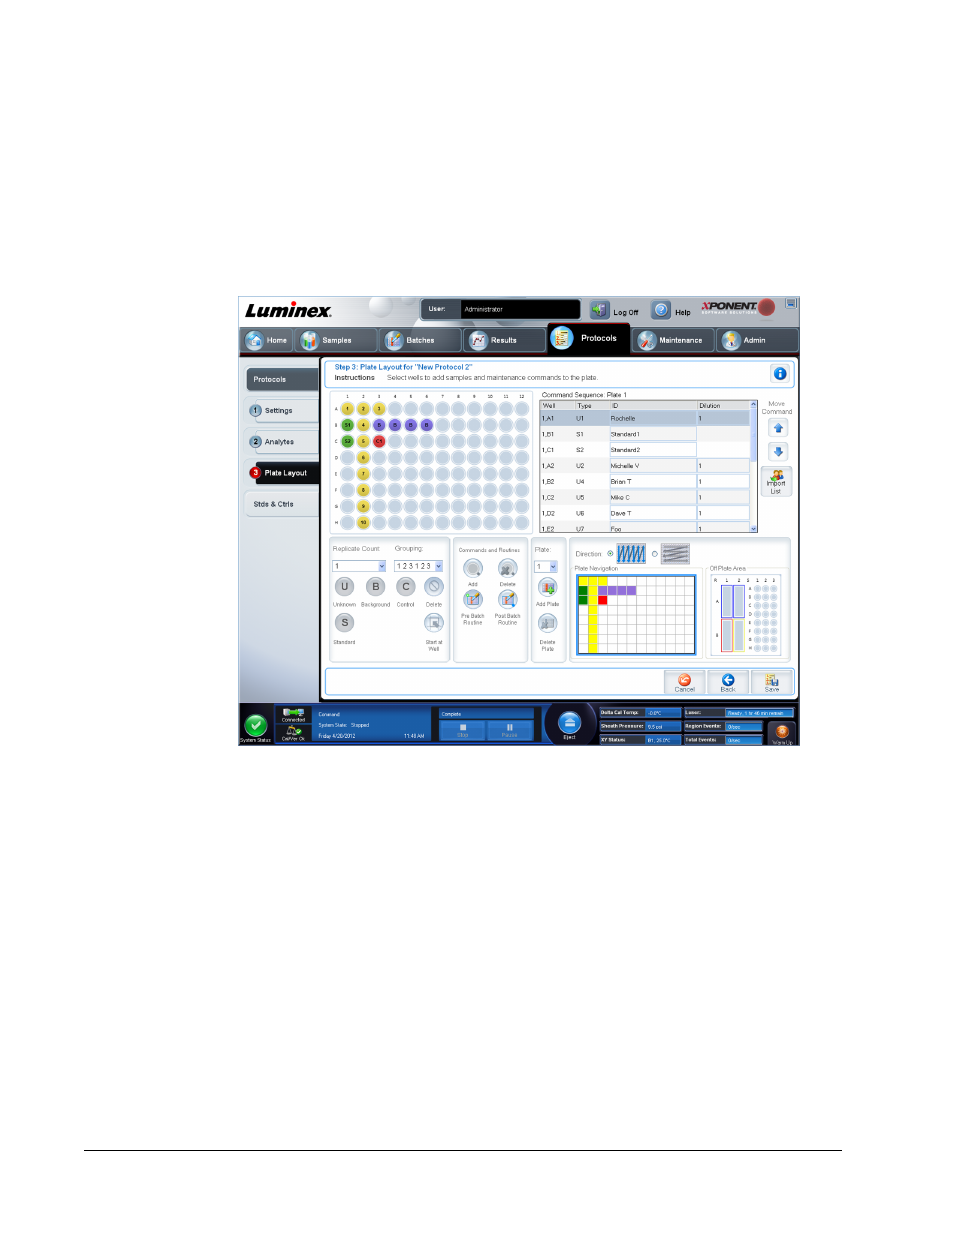
Plate Layout Subtab
Protocols > Protocols > Plate Layout
• Plate Image - This is a representation of the plate. Each well appears as a circle on the
grid. Well commands appear in the appropriate circles as you assign them to wells on the
plate. The Plate Navigation section in the lower right part of the window can be used to
display all the wells in the plate image. Click and drag in the Plate Navigation box to
display different portions of the plate.
• Command Sequence - Contains the command sequence for the active plate. The list
includes all active wells, the type of command (Unknown, Standard, Control, Background,
or assigned maintenance command), ID, and dilution factor. Double-click the ID field to
type an ID. Double-click the Dilution field to type a dilution factor.
NOTE: A command’s ID and Dilution fields have a blue border around them
if they can be double clicked to type information.
• Move Command - These arrows move a selected command up or down in the Command
Sequence list, changing the acquisition order.
• Import List - Opens the Open dialog box to import an existing command sequence list.
NOTE: The import feature allows you to import patient information into
unknown wells or wells with specified locations.
xPONENT
®
for FLEXMAP 3D
®
86