2 layer adjustments – Analog Way SmartMatriX Ultra User Manual
Page 50
50
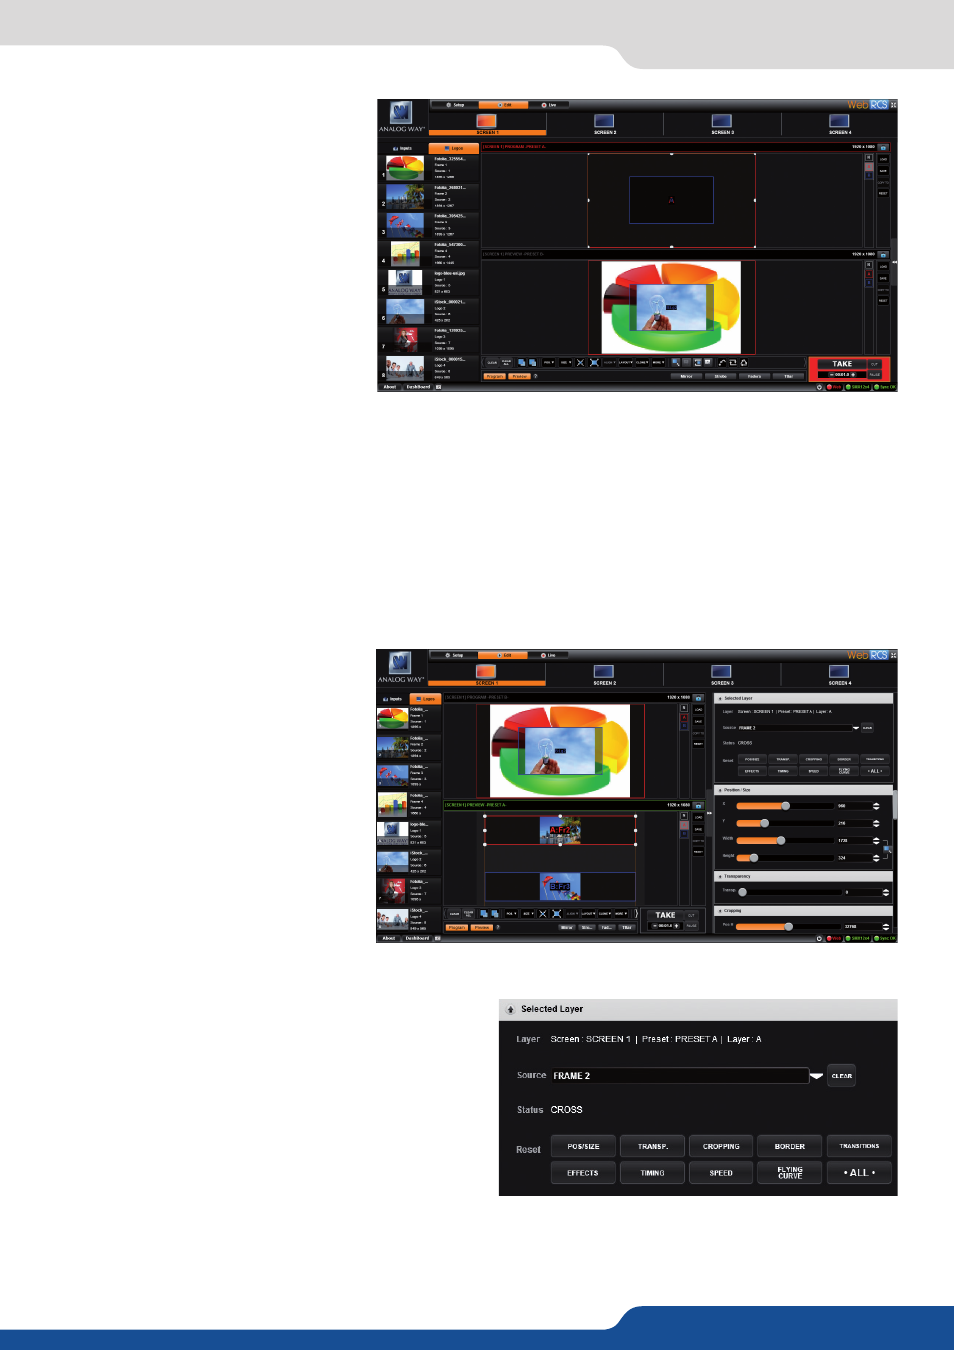
7.4.2 Layer adjustments
In this example, 2 inputs are affected
to 2 layers into the Screen 1 Preview.
The TAKE button on the bottom right
side allows sending your configuration,
made on the Preview screen, to the
Program screen.
The Preview screen is now displayed into the Program screen. By default, the unit works with the PRESET
COPY mode. That means, after a TAKE, the Preview becomes the previous Program. In that way, it is really
easy to play with 2 presets one after the other. You can set up other screens by clicking on the screen button
on the top of the Web RCS.
Layers management
In this Edit mode, you have access to a lot of preset tools that can help you to create the preset you imagined.
A lot of layer adjustments are available
into the right tab. Please click on the 2
arrows on the extreme right part of the
Web RCS, to make it appear.
You first have the screen selected, the preset selected,
the layer selected and then the source number
affected to the selected layer.
7.4.2 Layer adjustments
Selected layer
Reset feature: into this tab you can reset every layer
settings you want (Pos/Size, Transparency, Cropping,
Border, Transitions, Effects, Timing, Speed or Curves)
or you can choose to reset every settings in one click
using the ALL button.
The deleted settings are only for the selected layer
into the selected preset.