10 library management – Analog Way SmartMatriX Ultra User Manual
Page 41
41
7.3.10 Library management
HOW TO USE THE CREMATTE® KEYING:
The CremaTTe® algorithm was developed by Analog Way to perform a high quality keying. If your live source
contains some transparent area or if you need to key a difficult video of people with wispy hair, you need to
use CremaTTe® algorithm.
Using the CremaTTe® algorithm, we advise you to start by using the keying assistant.
1.
Start to remove the main color using the white square in the keying assistant.
2.
Remember that you can freeze the source, and that you can add several areas by simply clicking several
time on
ADD AREA
button.
3.
After some iteration, most of colors are deleted, enable the RED & BLUE mask to help you find any missed
garbage on the screen.
4.
At this point, with the mask enabled, you should have only RED & BLUE pixels on your live image.
5.
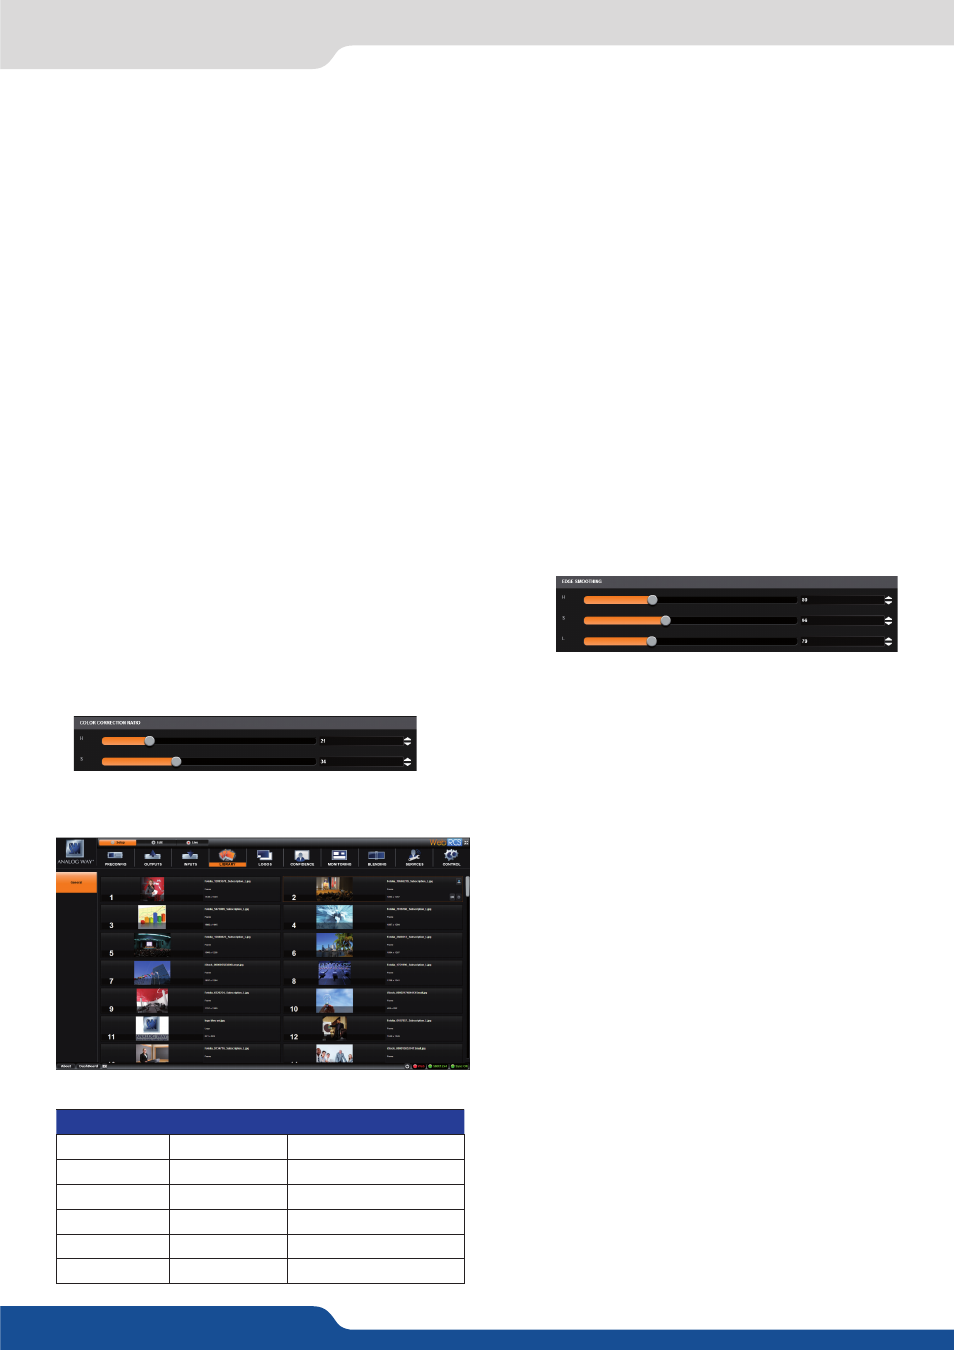
EDGE SMOOTHING: the edge smoothing settings allow you to determinate some area where you want to
add transparency. Adjusting the H S L values will display some GREY pixels around the edge of your live
content. Those GREY pixels will later be rendered semi-transparent.
6.
Adjust accurately the HSL in order to make transparent only the desired area. (A too high level will make
transparent some solid area).
7.
At this point, disable the mask and return to you original live
image.
8.
You can see that some area still have some color reflections. This can occur mainly on clothes and hairs. Ad-
just the COLOR CORRECTION RATIO using the Hue and Saturation settings to find the best result. Be careful
with the color correction, a wrong setting can modify badly
the color of skin. Try to find the best compromise between
color modifications and reflect areas deleted.
In the Library management, under the SETUP menu,
you can upload up to 50 Logos + 50 Frames (or 100
Frames or 100 Logos) that will be used later in the
Edit screen. On the library tab, you find the 100 empty
slots that you can load one by one. After loading, eve-
ry Logo/Frame can be individually deleted by clicking
on the Red Cross.
To erase all Logos/Frames, please refer to the CONTROL
tab chapter.
Please find the list of the supported formats:
7.3.10 Library management
Format
Download
Transparency support
BMP
Yes
N/A
JPEG
Yes
N/A
TIFF
Yes
Yes
GIF
Yes
Yes
PNG
Yes
Yes
ICO
Yes
Yes