Analog Way Smart Vu LE User Manual
Quick start guide, Smart vu le - ref. svu200, Warning
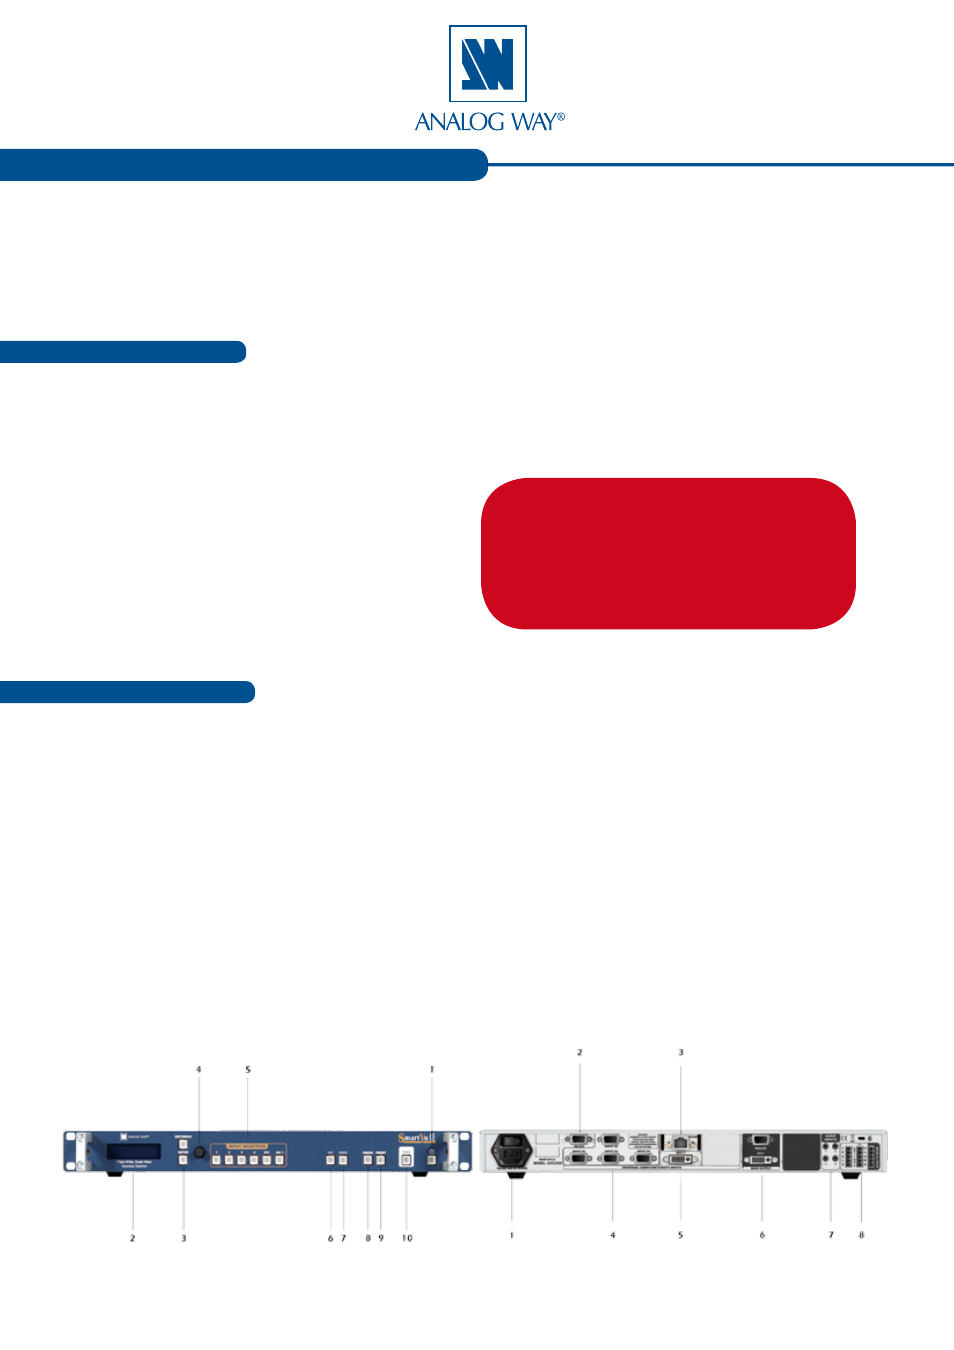
The
Smart Vu LE
front panel is comprised of several sections, each carefully labeled and self explanatory,
corresponding to all of the machine’s versatile functions.
The STANDBY button (1) will allow users to turn the device on and off once the main outlet switch (11) is
turned on. The menu screen (2), Control section (3), and menu scroll knob (4) will give users access to the
Smart Vu LE
menu. The Input Selection section (5), determines which of the 6 available input sources will be
used. The CUT and FADE buttons (6 and 7), are front panel shortcuts to the transitions available in the Layer
menu of the
Smart Vu LE
. The FREEZE button (8) allows users to take a snapshot of the displayed image,
and the PRESET button (9) is a shortcut to the
Smart Vu LE
menu Presets function. The TAKE button (10)
of the
Smart Vu LE
will let you take a selected source to the Main output. The rear panel of the
Smart Vu LE
will let you connect all of your input sources and outputs to the device. Plug universal analog sources (14) or
DVI-I sources (15), audio inputs and outputs (17 and 18), and a remote controller to the IP/LAN connector
(13) of your
Smart Vu LE
.
QUICK START GUIDE
What’s in the box
Smart Vu LE Overview
Thank you for choosing
Analog Way
and the
Smart Vu LE
. By following these simple steps, you should be
able to setup and use your powerfull scaler/switcher within minutes. Discover the
Smart Vu LE
extensive
capabilities and intuitive interface while configuring your first show, and unleash your creativity for a new
experience in show and event management by
Analog Way
.
Smart Vu LE - Ref. SVU200
1 x
Smart Vu LE
seamless scaler/switcher
1 x Power supply cord
1 x HD15 to 5 BNC cable
1 x Ethernet crossover cable
1 x Set of 3 audio 5 pin screw terminals
1 x RCS CD-ROM (PC only)
4 x M4x12mm screws
1 x User manual (PDF version)*
1 x Quick Start Guide (PDF version)*
* Download on our website:
www.analogway.com/
WARNING!
If required, front handles of the device can be dismantled,
but with caution.
The original screws removed must not be reintroduced to
their location without handles in place.
Substantial damages can occur, including risk of electric
shock from the mains voltage.
Only
M4x12mm screws can be used.
(They are supplied with the unit)