Installing the infrared remote ic chip – Extron Electronics System 8_10 Plus User Manual
Page 60
Extron • System 8/10 P
LUS
• User’s Manual
Reference
Infrared Remote Installation
Installing the Infrared Remote IC Chip
Before starting this procedure, verify that power has been removed from the
System 8/10 P
LUS
by removing the AC power cord.
_______ Use ESD protection by grounding yourself with an approved wrist strap. An
electrostatic discharge that is too small to be felt or seen is still capable of
destroying or causing intermittent damage to IC circuits.
1. Prepare the switcher by first following the procedure “Removing the System 8/10
P
LUS
Cover” on page B-3.
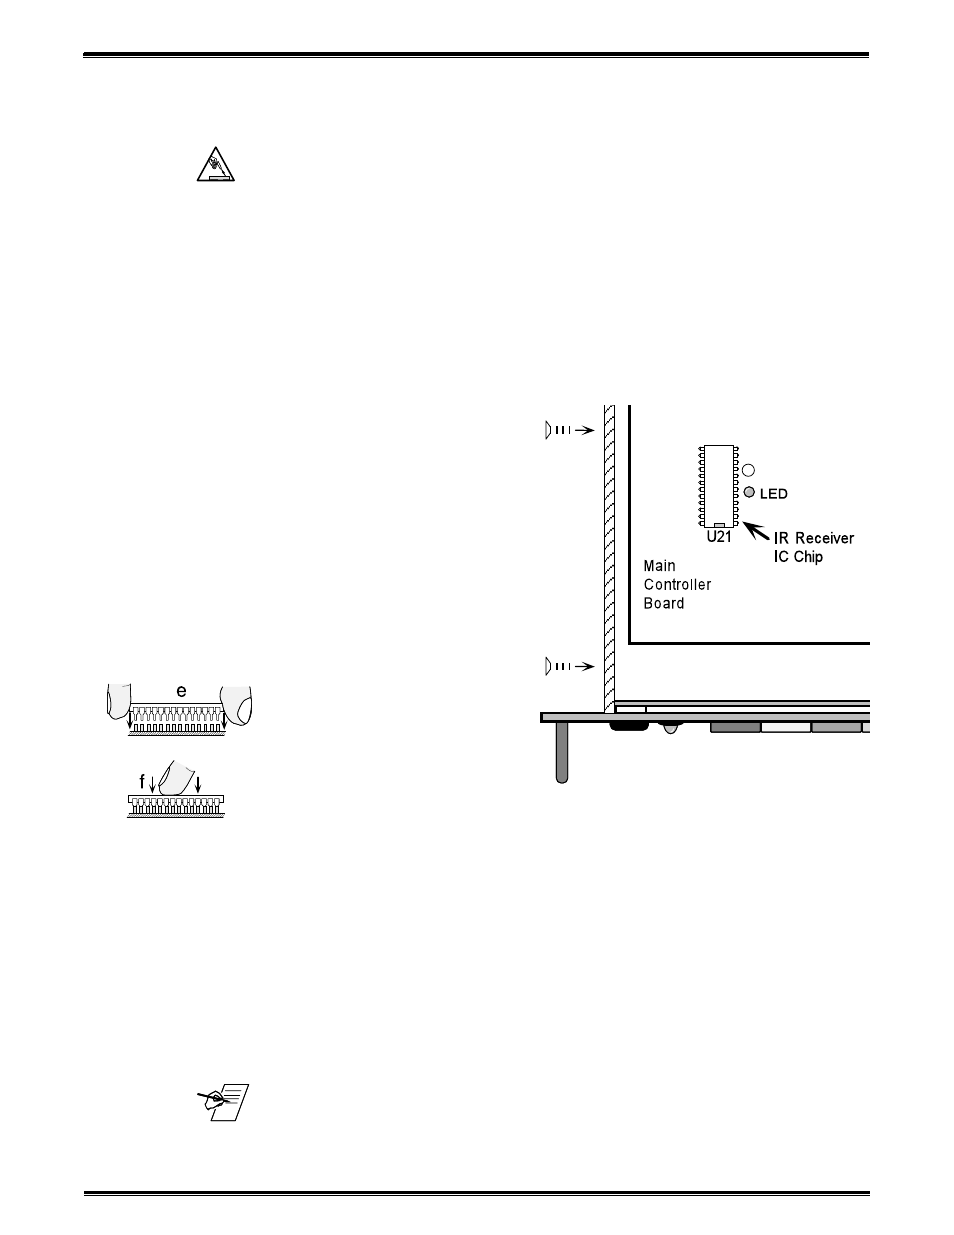
2. With the switcher placed on a clean workspace, the power removed and the
cover off, locate the vacant IC socket at U21 on the Main Controller Board. The
picture below shows the left side of the switcher with the cover removed.
3. Using ESD protection, remove
the IC chip from its packaging
and examine it to verify that all
pins (“legs”) are straight and in
perfect alignment.
4. Orient the chip with the socket,
with the notch to the front of
the switcher, as shown at U21
in the illustration.
5. Carefully align each pin on the
chip to its corresponding
female pin socket (see
illustration “e” on the left).
6. With even pressure, press the
chip into the socket (see illustration “f” on the left). If there is difficulty pressing it
into the socket, see if any pins ("legs") are bent. If so, carefully remove the chip,
straighten the leads and try again.
7. When the IC chip is installed, apply power to the System 8/10 P
LUS
by
connecting the AC power cord.
8. Follow the steps on the next page to check for correct operation of the Infrared
Remote system.
9. After checking the operation, replace the cover on the System 8/10 P
LUS
(page
B-3). The switcher is now ready for normal operation.
_____ The part number for this kit is 70-037-01.
B-5