23 z board setting and installation, 23-1 in case of bx61 and bx62 – Olympus IX2-DSU BX-DSU User Manual
Page 78
ASSEMBLY
/ Z board setting and installation
II.
DSU
II .
8 - 2 4
Page
8-23 Z board setting and installation
8-23-1 In case of BX61 and BX62
For Z board, use type U-ZPCB(T2) for sure.
In case that U-ZPCB(T2) or subsequent is not used, the following
troubles may occur even if correct setting was done.
● Rotation of focusing handle and actual objective lens movement would
be reversed.
● Focusing control may not be able to initialize, depending upon the
position. (Microscope does not boot up).
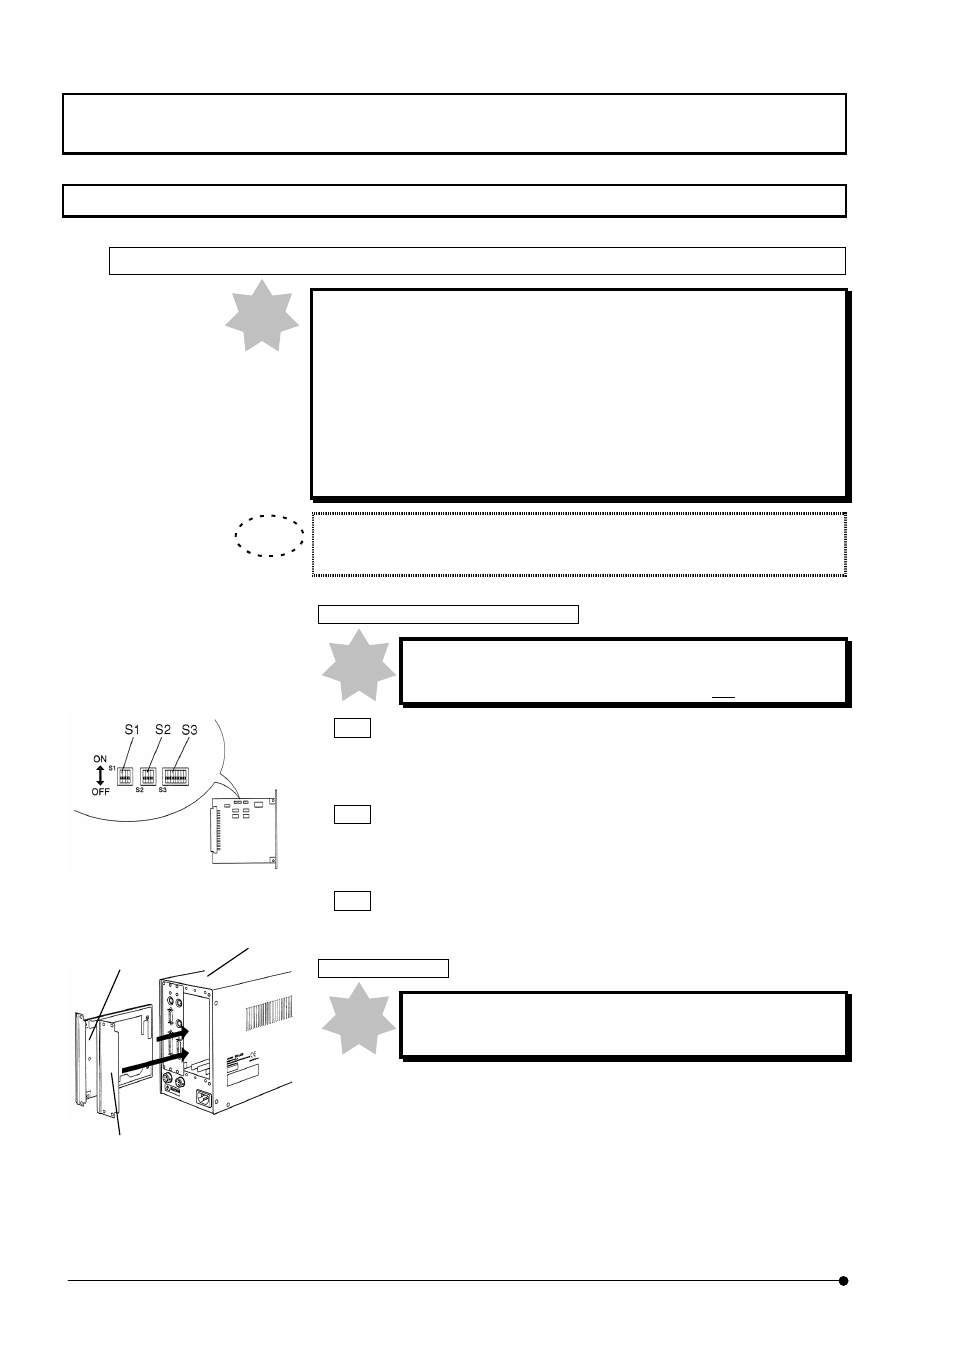
All DIP switches on Z board, S1, S2 and S3 are turned to OFF at ex-factory.
Setting change of ONBOARD DIP SW
Use DIP SW set to OFF except the following DIP SW.
Turn DIP SW that is to be changed only to ON .
S2 NO.4
• Interchanges F/C change button and Stage retreat button located at left
side of BX61/BX62 to Stage DOWN button and Stage UP button.
S3 NO.1
• Automatic initializing function is turned to OFF and default remote state
is set.
S3 NO.4
• Stroke of focusing control is changed from 15mm to 25mm.
Z board installation
You must install Z board after you turn power of control box
to OFF.
1. Loosen fixing knobs (6 pieces) for two slot covers at back side of control
box (1) and remove covers and knobs.
2. Aligning direction of connector of control box and connector of Z board
(2), insert board along with board rails. Push in until connectors are
firmly connected.
Note
(1)
(2)
(3)
TIP
Note
Note