Exchange of the valve plates, Exchange of the bellows, Cleaning – M&C TechGroup MP-F10_R Operator's manual User Manual
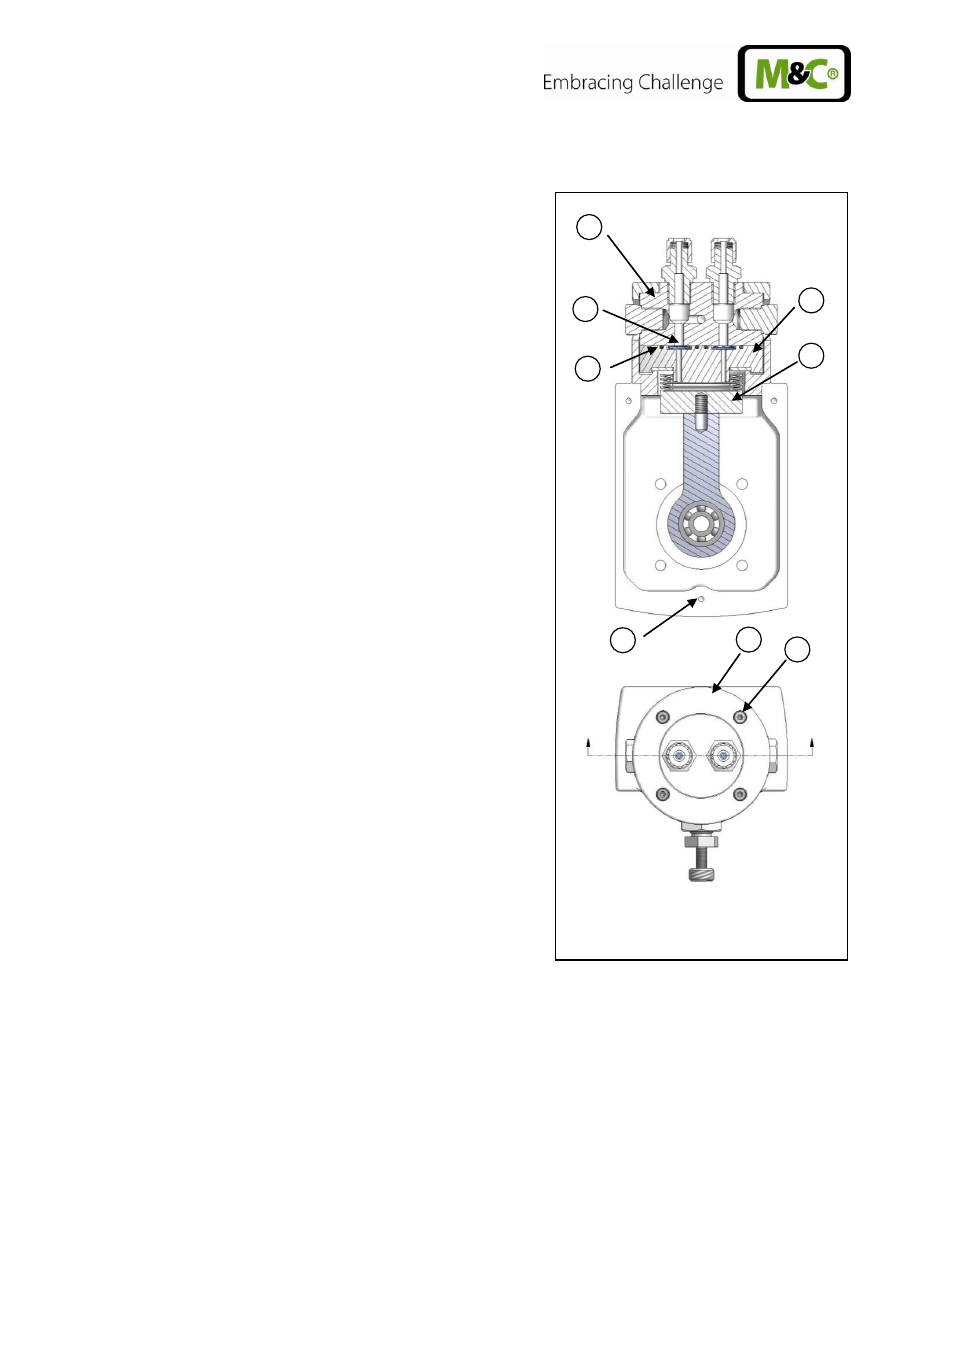
Page 16: Figure 8, Sectional drawing mp-f
16
Gas sampling and gas conditioning technology
10.1a-ME
14.1
EXCHANGE OF THE VALVE PLATES
For the exchange of the valve plates the sample gas fittings
does not have to be dismounted.
Loosen the 4 hexagon socket screws G (key 3mm)
and remove pressure ring H.
Remove upper pump head A. O-rings C and valve
plates B are freely accessible now.
The valve plates and o-rings now can be cleaned or
exchanged. Clean valve seat and pump head with an
adequate solvent (e.g. alcohol) and blow out with
compressed air.
Valve B on the pressure side is looking downwards
with the smooth side and on the suction side with the
smooth side upwards (conveying direction is marked
with an arrow on the pump head).
Remounting happens in reverse order. Attention, en-
sure the correct position of the valve plates.
14.2
EXCHANGE OF THE BELLOWS
Carry out the steps from chapter 14.1 and remove
valves and o-rings.
Unscrew lid of the crankcase. For this loosen the 3
hexagon socket screws F (key 3mm).
Remove lower pump head D. If it is stuck a borehole in
the valve seat can be closed with a finger and pres-
sure air be blown into the other one.
Unscrew the bellows E from the connection rod. Pay
attention to possibly present spacers. Leave these on
the threaded pin.
Screw new bellows hand tight on the connection rod.
Assembly happens in reverse order. Attention, ensure
the correct position of the valve plates!
Figure 7 Sectional drawing MP-F..
14.3
CLEANING
When changing valve plates and bellows, inspect all parts for dirt before assembling the pump
head and clean them if necessary.
Only use adequate solvents (e.g. alcohol) that plastic parts (PTFE, PFA, FEP) do not corrode.
If compressed air is available, blow out the parts.
G
F
H
D
E
A
C
B