Garmin GPS 500 User Manual
Page 40
GPS 500 Pilot’s Guide and Reference
SECTION 2
NAV PAGES
2-14
190-00181-60 Rev. G
Clearing On-Screen Weather Data
‘Clear Storm Data?’ removes storm history information
from the map. New storm data appears as detected and
relayed by a connected weather data source. Weather data
and the ‘Clear Storm Data?’ option are only available when
the GPS 500 installation includes connection to weather
information sources. See the 400/500 Series Display
Interfaces Pilot’s Guide Addendum (190-00140-10) or
Section 12 of this Pilot’s Guide.
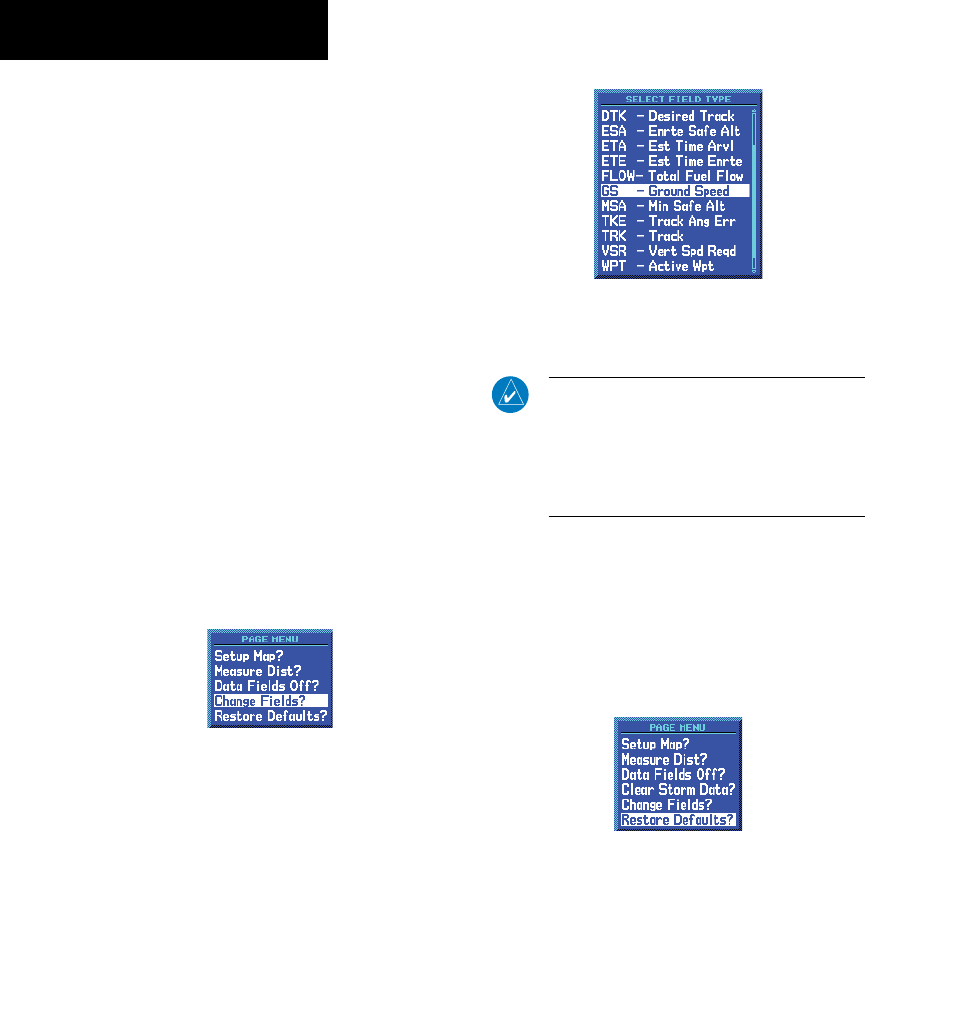
Selecting Desired On-Screen Data
‘Change Fields?’ allows selection of the data displayed
on the five user-selectable data fields along the right-
hand side of the Map Page. There are sixteen available
data types, including bearing to destination, distance
to destination, estimated time of arrival, ground speed,
minimum safe altitude, and track. See Section 14.3 for
descriptions of these (and other) navigation terms.
Changing a data field:
1) From the Map Page Menu, turn the large right
knob to highlight ‘Change Fields?’ (Figure
3-24) and press the ENT Key.
Figure 2-24 Map Page Menu
2) Turn the large right knob to highlight the data
field to be changed.
3) Turn the small right knob to select the type of
data (Figure 2-25) desired to appear on this
field and press the ENT Key.
Figure 2-25 Select Data Field Window
4) Press the small right knob to remove the
cursor.
NOTE: The on-screen traffic information occupies
two data fields, leaving room to display only two
additional data types. Traffic information is only
available when the GPS 500 installation includes
connection to traffic information sources. See
Section 12, Additional Features
Restoring Factory Settings
‘Restore Defaults?’ resets all four user-selectable data
fields to their original factory default settings.
Restoring the factory default settings:
From the Map Page Menu, turn the large right
knob to highlight ‘Restore Defaults?’ (Figure
2-26) and press the ENT Key.
Figure 2-26 Map Page Menu