Garmin GPS 500 User Manual
Page 26
GPS 500 Pilot’s Guide and Reference
1-18
SECTION 1
INTRODUCTION
190-00181-60 Rev. G
Since using flight plans is arguably one of the more
complex features of the GPS 500, it will be discussed only
briefly here, with focus on creating a new flight plan and
activating it to use for navigation. Answers to additional
questions about flight plans not found in this brief
introduction can be found in Section 4, Flight Plans.
Creating a new flight plan:
1) Press the FPL Key.
2) Turn the small right knob to select the Flight
Plan Catalog Page.
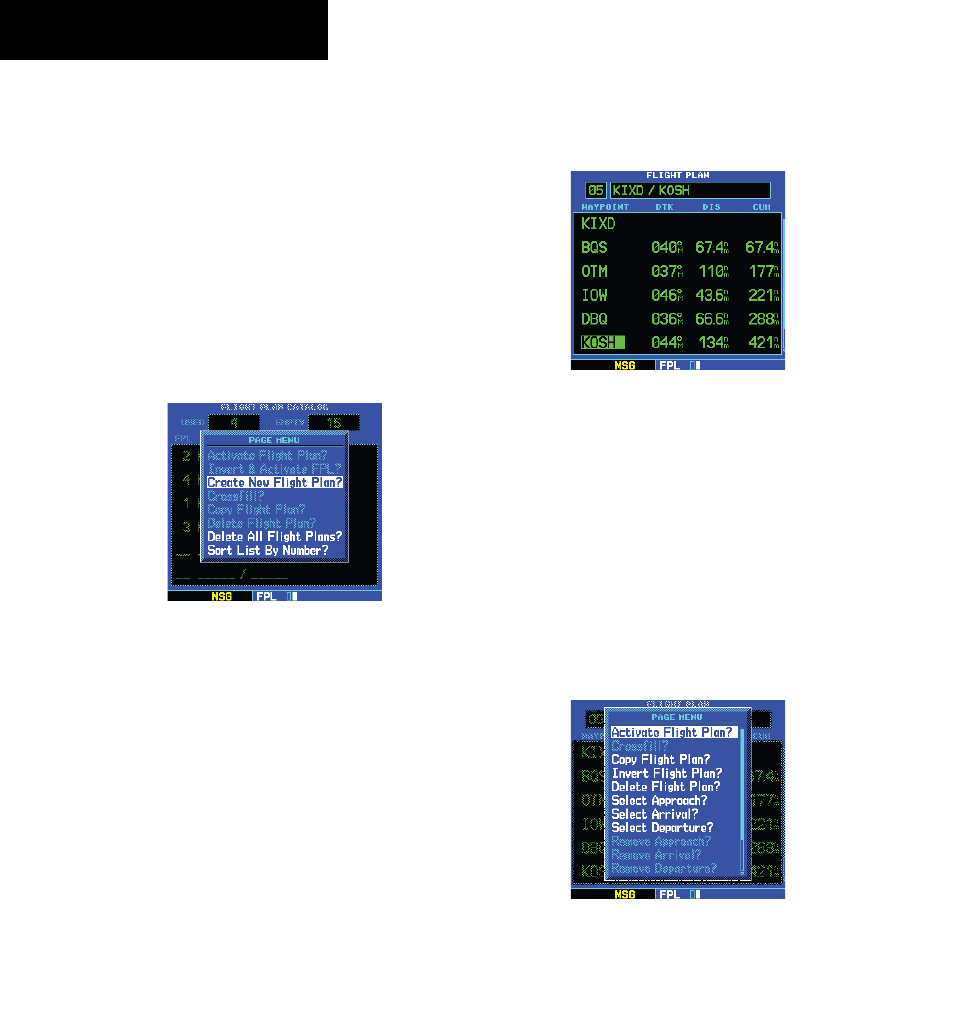
3) Press the MENU Key to display the Flight Plan
Catalog Page Menu (Figure 1-31).
Figure 1-31 Flight Plan Catalog Page Menu
4) Turn the large right knob to select ‘Create New
Flight Plan?’ and press the ENT Key.
5) The cursor appears on the first waypoint identifier
field (located directly below ‘WAYPOINT’). Use
the large and small right knobs to enter the
identifier of the first waypoint in the flight plan.
(The small knob is used to select the desired
letter or number and the large knob is used to
move to the next character space.)
6) Press the ENT Key once the identifier has been
selected. The cursor moves to the next blank
waypoint identifier field.
7) Repeat steps 5 and 6, above, until all waypoints
for the flight plan have been entered (Figure
1-32).
Figure 1-32 Enter Flight Plan Waypoints
Once the flight plan is created, it may be activated from
the Flight Plan Catalog Page Menu. Activating the flight
plan places it into ‘flight plan 00’ (a copy of it still resides
in the original catalog location) and replaces any flight
plan which currently exists in ‘flight plan 00’.
Activating the new flight plan:
1) Press the MENU Key to display the Flight Plan
Catalog Page Menu.
2) Turn the small right knob to select ‘Activate
Flight Plan?’ (Figure 1-33) and press the ENT
Key
Figure 1-33 Flight Plan Catalog Page Menu