Garmin GPS 500 User Manual
Page 141
GPS 500 Pilot’s Guide and Reference
8-7
SECTION 8
AUX PAGES
5) The flashing cursor moves to the total air
temperature (TAT) field. Use the small and
large right knobs to enter the temperature
(Figure 8-10). Press the ENT Key when
finished.
Figure 8-10 TAT Selected
6) The flashing cursor moves to the aircraft
heading (HDG) field. Use the small and large
right knobs to enter the aircraft heading from
the directional gyro or compass. Press the ENT
Key when finished.
7) With all variables entered, the following
information is provided:
•
DEN ALT - Density altitude
•
TAS - True airspeed
•
WIND - Wind direction and speed
•
HEAD/TAIL WIND - Magnitude of head wind
or tail wind component
NOTE: If the installation includes components
(such as an airdata sensor) to provide any of the
variables above, the Density Alt/TAS/Winds Page
data defaults to the values provided by these
components.
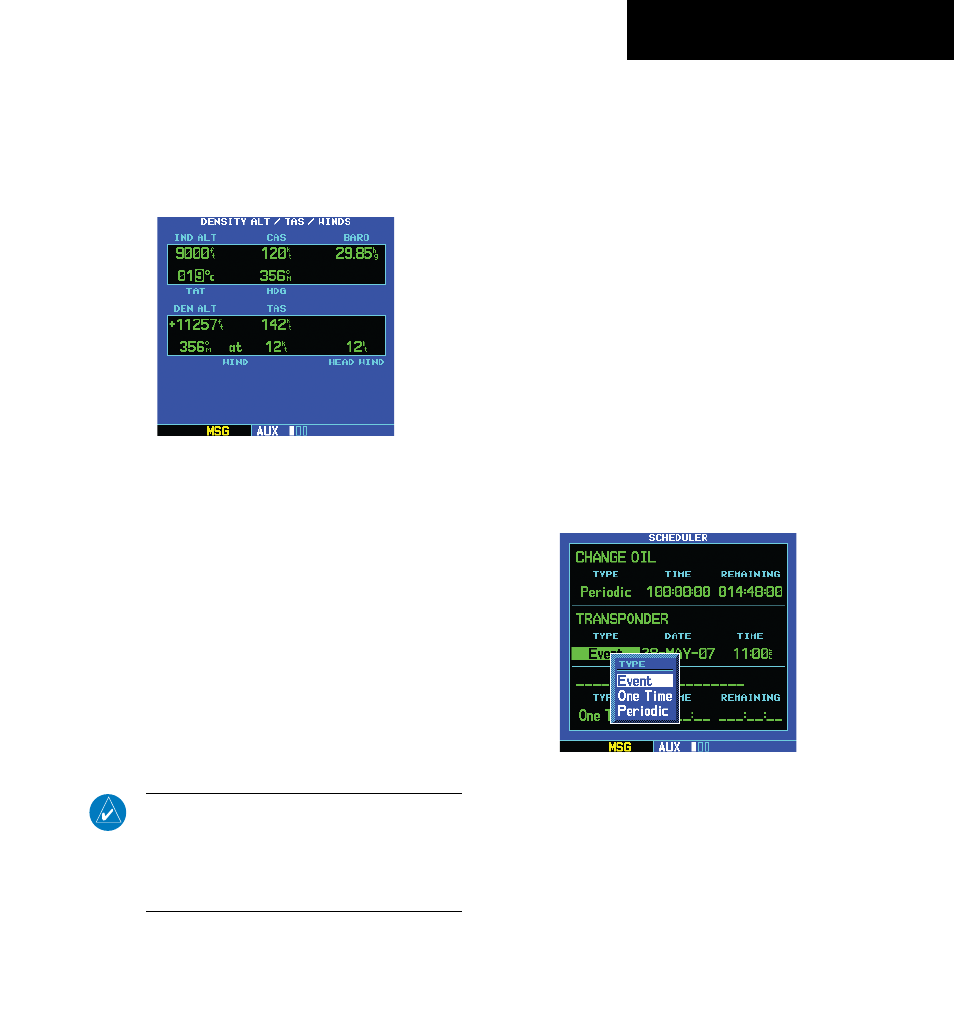
Flight Planning Page: Scheduler
Entering a scheduled message:
1) Select ‘Scheduler’ from the Flight Planning Page,
using the steps described in this section.
2) The flashing cursor highlights the first message
field. If necessary, turn the large right knob
to highlight the first blank message field.
3) Use the small and large right knobs to enter
the message text. Press the ENT Key when
finished. (The GPS 500 stores up to nine
scheduled messages holding 20 characters
each.)
4) The flashing cursor moves to the type field
under the new message. Turn the small right
knob to display a window of available options
(Figure 8-11): Event, One Time, Periodic. Press
the ENT Key to select.
Figure 8-11 Type Field Highlighted
190-00181-60 Rev. G