Polycom microphone lights, Connecting audio output, Connecting speakers to polycom qdx 6000 systems – Polycom 6000 User Manual
Page 44: Polycom microphone lights -2, Connecting audio output -2, Connecting speakers to polycom qdx 6000 systems -2
Administrator Guide for Polycom QDX 6000 System
4 - 2
For best audio:
• Place the microphone on a hard, flat surface (table, wall, or ceiling) away
from obstructions, so the sound will be directed into the microphone
elements properly.
• Place the microphone near the people closest to the monitor.
• In large conference rooms, you may need more than one microphone.
Each Polycom microphone covers a 3-6 foot radius, depending on the
noise level and acoustics in the room.
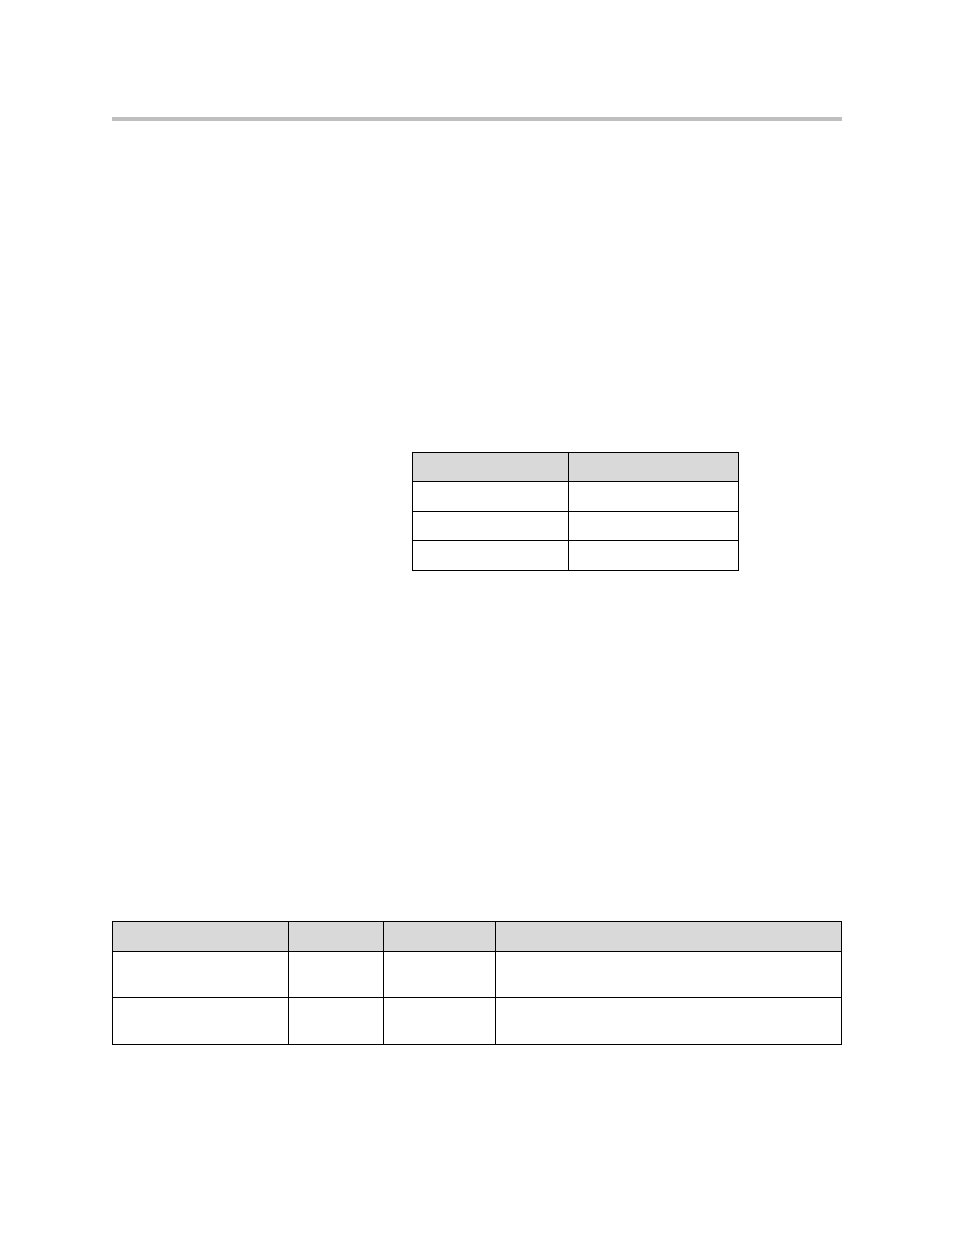
Polycom Microphone Lights
The following table describes the behavior of the microphone lights.
Connecting Audio Output
You must connect at least one speaker to Polycom QDX 6000 systems in order
to hear audio. You can use the speakers built into the main monitor, or you can
connect an external speaker system such as the Polycom StereoSurround kit to
provide more volume and richer sound in large rooms.
Refer to your system’s setup sheet for connection details. Make sure that the
system is powered off before you connect devices to it.
Connecting Speakers to Polycom QDX 6000 Systems
The following table describes the audio outputs of the Polycom QDX 6000
system.
Microphone Light
Status
Off
Not in a call
Green
In a call, mute off
Red
Mute on
Audio Output Number
Connector
Output Type
Audio Mix Routed to the Output
Line Out (Main Audio)
RCA
Mono/Stereo
System tones and sound effects +
Audio from the far site
VCR OUT (VCR/DVD
Player)
RCA
Mono/Stereo
Near-site talkers +
Audio from the far site