Wj-dr200 av disc recorder control, Connections, Setup – Panasonic WJ-NT204 User Manual
Page 113: Control operation
114
■
WJ-DR200 AV Disc Recorder Control
●
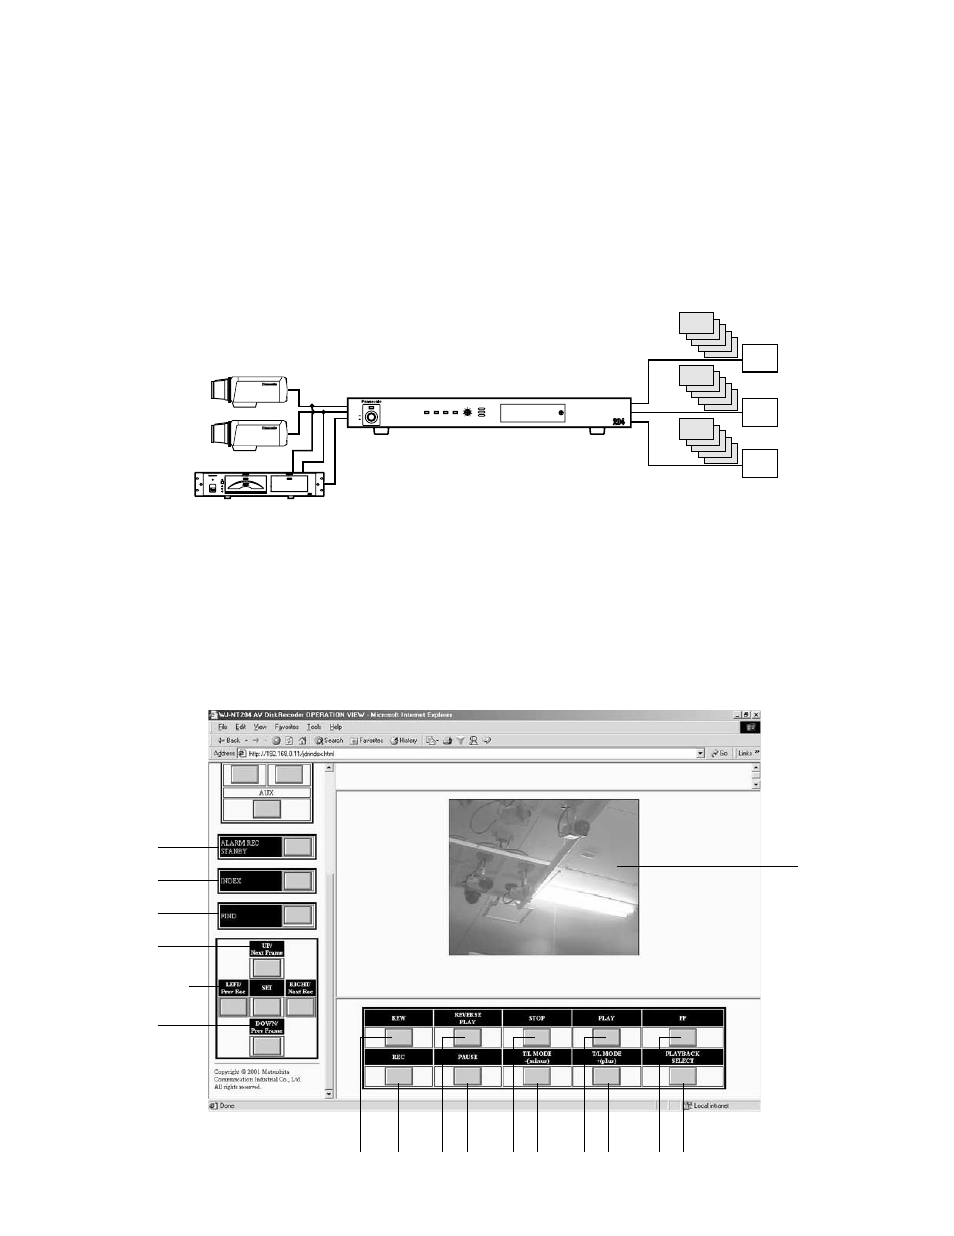
Connections
• Random Input Selection Mode
(1) Connect CAMERA 1 and 2 to the VIDEO IN 1 and 2 connectors on the rear of the WJ-NT204.
(2) Connect the VIDEO OUT 1 and 2 connectors on the rear of the WJ-NT204 to the VIDEO IN A and B connectors of the
WJ-DR200.
(3) Connect the VIDEO OUT connector of the WJ-DR200 to the VIDEO IN 3 connector of the WJ-NT204.
(4) Connect the RS-232C ports (of WJ-DR200 and WJ-NT204) with a RS-232C cable.
• For VIDEO INPUT SELECTION MODE under OPERATION MODE SELECT, mark RANDOM INPUT SELECTION MODE.
• Enables control of cameras connected to the VIDEO IN connector of the WJ-NT204 (requires customizing the WJ-
DR200 OPERATION VIEW window).
• Unless a user changes channels, the last selected channel is used to continue transmission.
●
Setup
Files to be used are as follows. Consult your dealer for these files, because the files are not included
For H.323/H261: [drindex.html]
For JPEG: [jdrindex.html]
In the SERIAL PORT SETUP window, set TYPE under RS-232C to WJ-DR200. Set the same communication parameters as for
the WJ-DR200 AV Disc Recorder. (For further details refer to the operation manual of the WJ-DR200 AV Disc Recorder.)
●
Control Operation
On the Location bar, type the URL http://192.168.0.10/drindex.html to access the WJ-DR200 OPERATION VIEW window for the
AV Disc Recorder.
q
w
e
r
tyu
i
!9
R A M
PUSH OPEN
PUSH OPEN
AV Disc Recorder WJ-DR
REMOTE
OPERATE
ALARM
RESET
REC
DISC
ALARM
REC
DISC
CONTROL
PC
PC
PC
WJ-DR200
WJ-NT204
CAMERA 1
CAMERA 2
CAM1
CAM1
CAM1
(VIDEO OUT)
LINK/
10BASE-T
100
BASE-TX CONNECT
ACT
LOW
HIGH
RING.VOL
Network Interface Unit WJ-NT
POWER
ON
OFF
!4
o
!5
!0
!6
!1
!7
!2
!8
!3