Smart Technologies 3000i User Manual
Page 50
3000i Installation Guide
42
8 Slide the projector out through the back of the cabinet.
9 Refer to page E-53 and E-54 of the NEC 1065/1060 User's Manual for instructions on
replacing the projector lamp and filter.
10 Reverse the steps above to replace the projector.
NOTES
• You may need to slide the projector forward or backward to adjust the image size
before you secure the three adjustment screws.
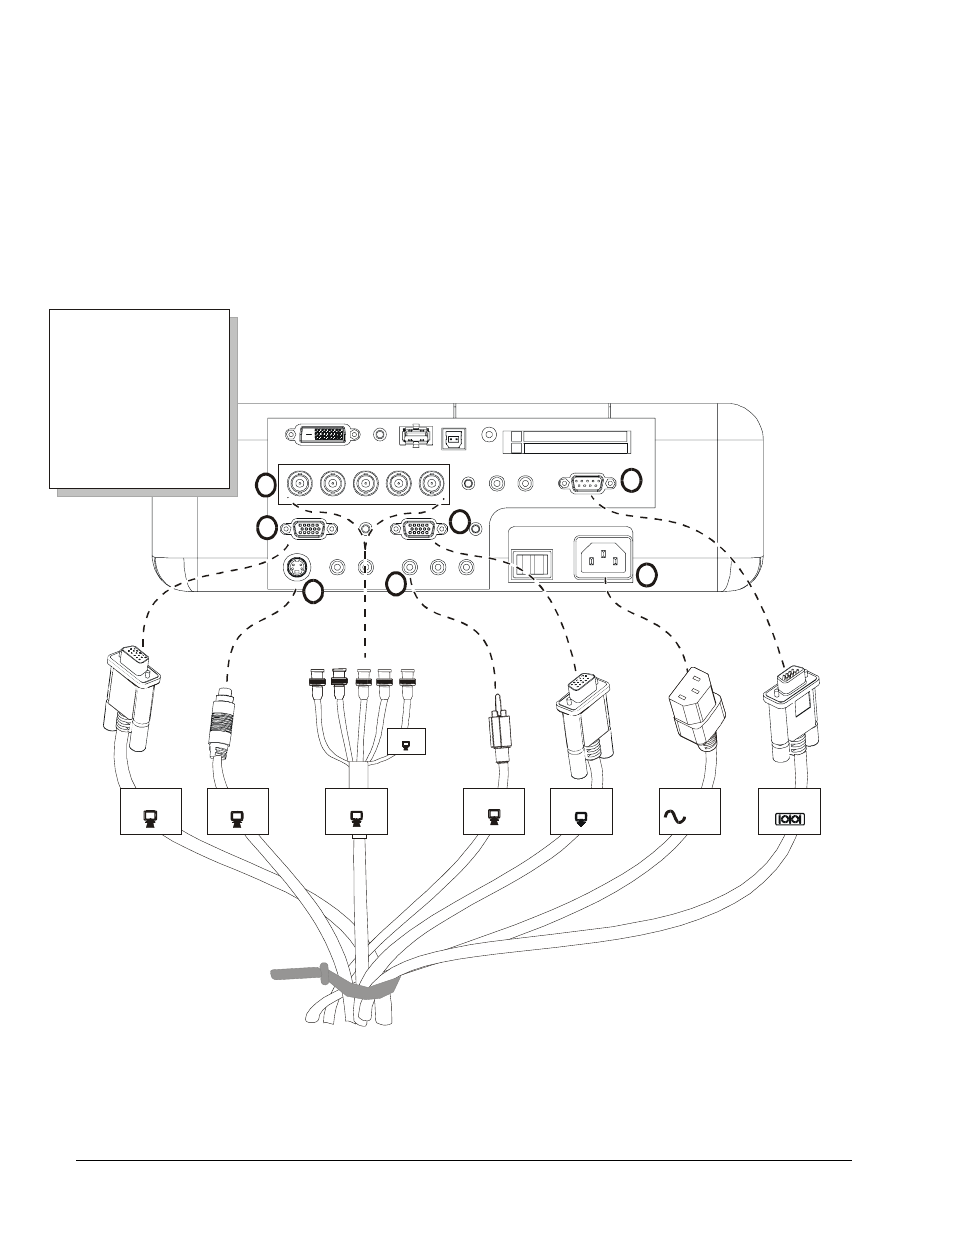
• Reconnect and tighten the projector cables as shown below.
Reconnecting the Projector Cables
Red Green Blue H
V
RGB 2 IN - V
1
2
3
4
5
6
7
Projector
AC
RGB 1 IN
S-Video IN
RGB 2 IN
Video IN
RGB OUT
PC Control
1
2
3
4
5
6
7
RGB 1 IN
S-Video IN
RGB 2 IN
Video IN
RGB OUT
AC POWER
PC CONTROL