Installing and connecting the internal computer – Smart Technologies 3000i User Manual
Page 20
3000i Installation Guide
12
Installing and Connecting the Internal Computer
To position and secure the computer
1 Slide the computer into place above the computer straps, and then use them to secure
it.
NOTE: The straps allow you to roll the cabinet from room to room without removing the
computer. However, these straps will not secure the computer in place during cabinet
transportation. If you move the cabinet, remove the computer first.
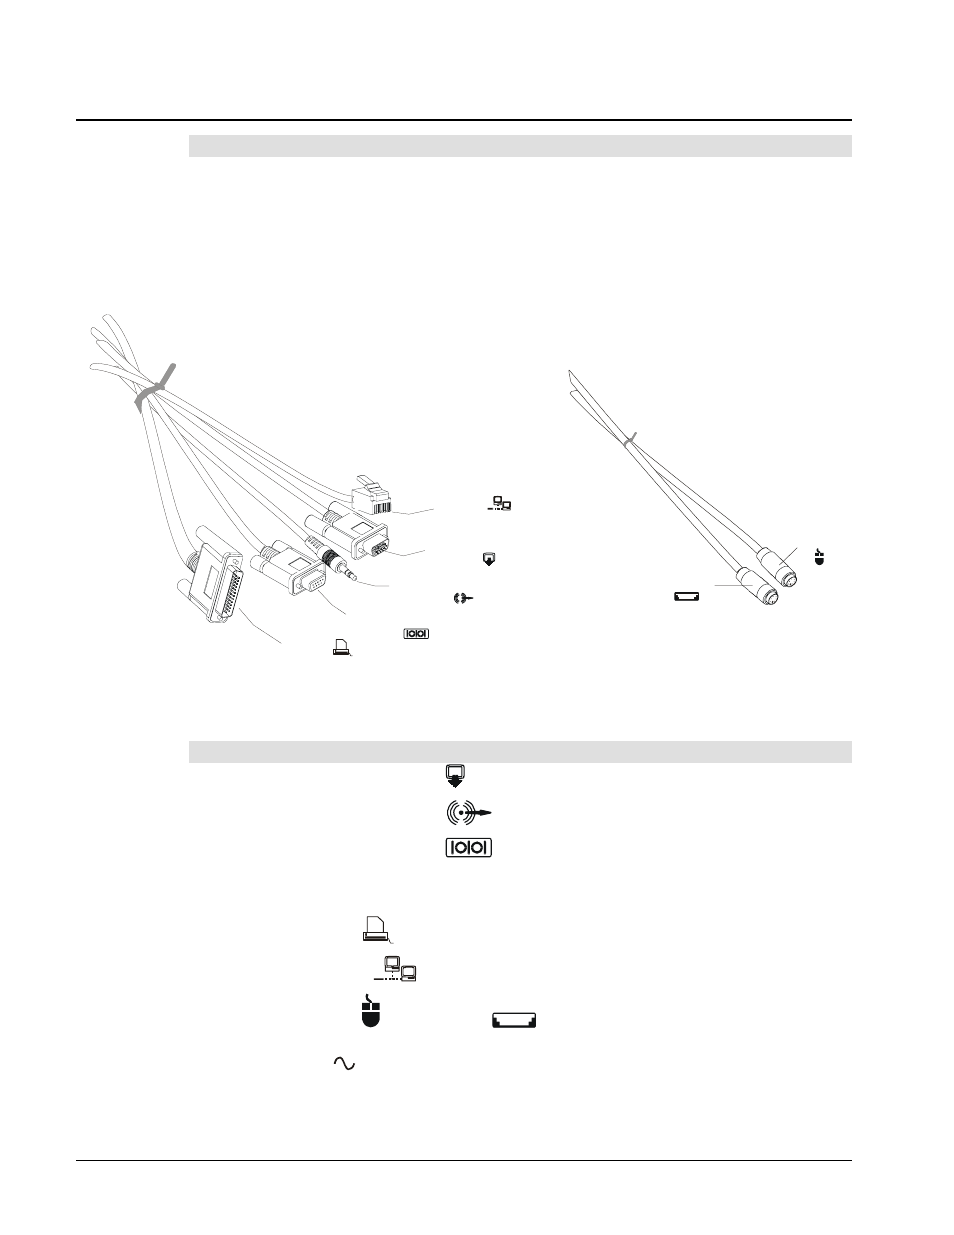
2 Locate the tie-wrapped bundle of labeled cables dangling inside the cabinet. In addition
to this cable bundle, AC power, keyboard and mouse cables are located nearby.
3000i Computer Cables
To make all cable connections to the computer
1 Connect the Computer 1 Video
cable to the Monitor Video connector.
2 Connect the Computer 1 Audio
cable to the Audio Line OUT.
3 Connect the Computer 1 Serial
cable to an available COM port.
NOTE: If you're connecting a computer without a serial port, use the SMART USB
adapter (order number USB-ADP) to connect to the Computer 1 Serial cable.
4 Connect the Printer
A
cable to the 25-pin parallel port (printer) connector.
5 Connect the Network
cable to the network card (if applicable).
6 Connect the Mouse
and Keyboard
cables to the PS/2 mouse port (identified
by a mouse symbol) and the PS/2 keyboard port (identified by a keyboard symbol).
7 Connect the AC
power cord to the Computer Power IN port.
Keyboard
Mouse
Computer 1
Audio
Computer 1
Video
Printer
A
Computer 1
Serial
Network