Selecting a custom size – Savin 2045 User Manual
Page 21
Initial Scanner Setup
15
2
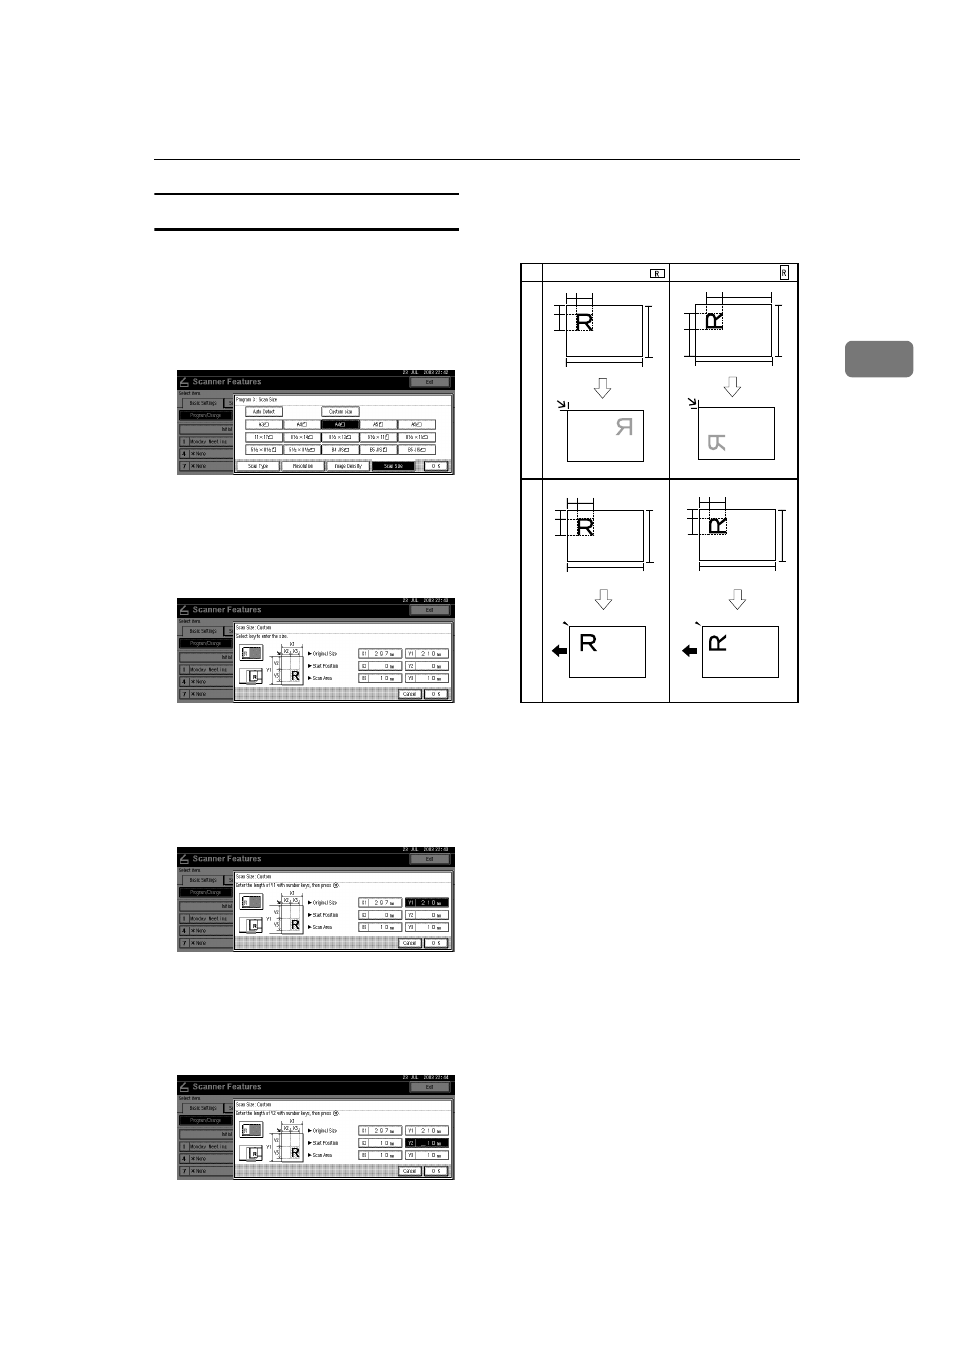
Selecting a custom size
When selecting [Custom size] as the
scan size, follow the procedure be-
low.
AAAA
Press [Custom size] on the Scan
Size Setting screen.
BBBB
Enter the original size with the
number keys.
Select and enter values for [X1] and
[Y1]
.
CCCC
Enter the scan starting point in re-
lation to the standard scan start-
ing point.
Select and enter values for [X2] and
[Y2]
.
DDDD
Enter the scan size (area) with the
number keys.
Select and enter values for [X3] and
[Y3]
.
Depending on how the original is
positioned, the scan area will be as
shown.
The range of possible original sizes
and scan sizes is as follows:
• Original Size
X1: 10 mm - 432 mm (0.4” - 17.0”)
Y1: 10 mm - 297 mm (0.4” - 11.7”)
• Scan Size
X3: 10 mm - 432 mm (0.4” - 17.0”)
Y3: 10 mm - 297 mm (0.4” - 11.7”)
Keep the scan area settings within
these range.
X3
X2
X1
Y2
Y1
Y3
X3
X2
X1
Y2
Y1
Y3
X3
X2
X1
Y2
Y1
Y3
X3
X2
X1
Y2
Y1
Y3
When placed on the e
xposure glass
When placed on the ADF
ZHSY055E
Original orientation
Original orientation