Td831137-02_2g, Installation instructions – Sanyo CHX03652 User Manual
Page 31
2-23
1
2
3
4
5
6
7
8
Design of Mini ECO-i SYSTEM
3-1. Indoor Unit
AVOID:
●
areas where leakage of flammable gas may be
expected.
●
places where large amounts of oil mist exist.
●
direct sunlight.
●
locations near heat sources which may affect the
performance of the unit.
●
locations where external air may enter the room
directly. This may cause “sweating” on the air
discharge ports, causing them to spray or drip.
●
locations where the remote controller will be splashed
with water or affected by dampness or humidity.
●
installing the remote controller behind curtains or
furniture.
●
locations where high-frequency emissions are
generated.
DO:
●
select an appropriate position from which every corner
of the room can be uniformly cooled.
●
select a location where the ceiling is strong enough to
support the weight of the unit.
●
select a location where tubing and drain pipe have the
shortest run to the outdoor unit.
●
allow room for operation and maintenance as well as
unrestricted air flow around the unit.
●
install the unit within the maximum elevation difference
above or below the outdoor unit and within a total
tubing length (L) from the outdoor unit as detailed in
Table 2-10.
●
allow room for mounting the remote controller about
3 ft. off the floor, in an area that is not in direct sunlight
nor in the flow of cool air from the indoor unit.
NOTE
Air delivery will be degraded if the distance from the floor
to the ceiling is greater than 10 ft.
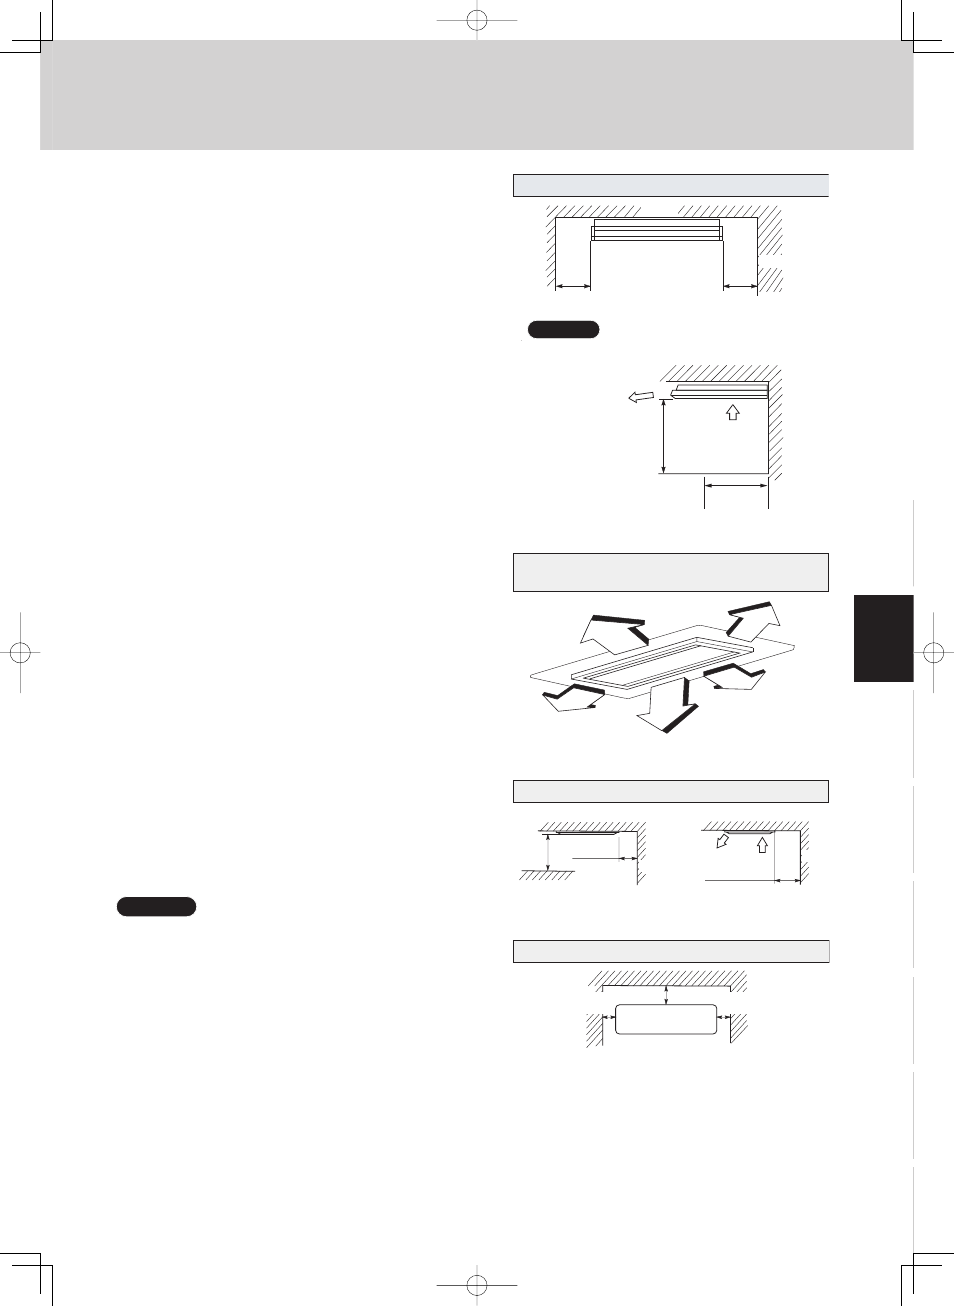
Concealed Duct (High-Static Pressure) Type
3 ft.
3 ft.
3 ft.
3 ft.
3 ft.
4-Way Air Discharge Semi-Concealed Type
Wall-Mounted Type
min. 6 in.
Front View
min.
6 in.
min.
6 in.
Ceiling-Mounted Type
Side view
min. 10 in.
The rear of the indoor unit can be installed flush
against the wall.
min. 2 ft.
Air intake
Air
discharge
min. 10 in.
Ceiling
Wall
Front view
Max. 10 in.
Obstacle
NOTE
Fig. 2-1
Fig. 2-2
min. 2 in.
min. 2 in.
min.
3 ft.
Air
intake
Air
discharge
Obstacle
Ceiling
Wall
Wall
Side view
1-Way Air Discharge Semi-Concealed Type
Fig. 2-3
Fig. 2-4
3. Installation Instructions