Installing and removing pci expansion cards, Removing and installing a pci card – Gateway Server E-9520T User Manual
Page 47
Installing and removing PCI expansion cards
www.gateway.com
41
5
Follow the instructions in
“Closing the server case” on page 30
.
6
Turn on the server and open the BIOS setup utility. Verify the
System
Memory
listed in the Main menu. When you exit the BIOS setup utility
make sure that the operating system completely loads. If you receive an
error, see
“Installing memory” on page 38
.
Installing and removing PCI expansion cards
The system board provides one PCI-E x16 with x8 speed, two PCI-E x8 with x4
speed, two PCI-X 64-bit/66 MHz, and one PCI 32-bit/33 MHz expansion slots.
Removing and installing a PCI card
Caution
PCI expansion cards are not
hot-swappable. Before installing or
removing a PCI card, make sure that
power is turned off and the power cords
are unplugged.
To remove and reinstall a PCI expansion card:
1
Follow the instructions in
“Preventing static electricity discharge” on
. Make sure that you turn off the server, then unplug the power
cord(s) and all other cables connected to the server.
2
Follow the instructions in
“Opening the server case” on page 29
.
3
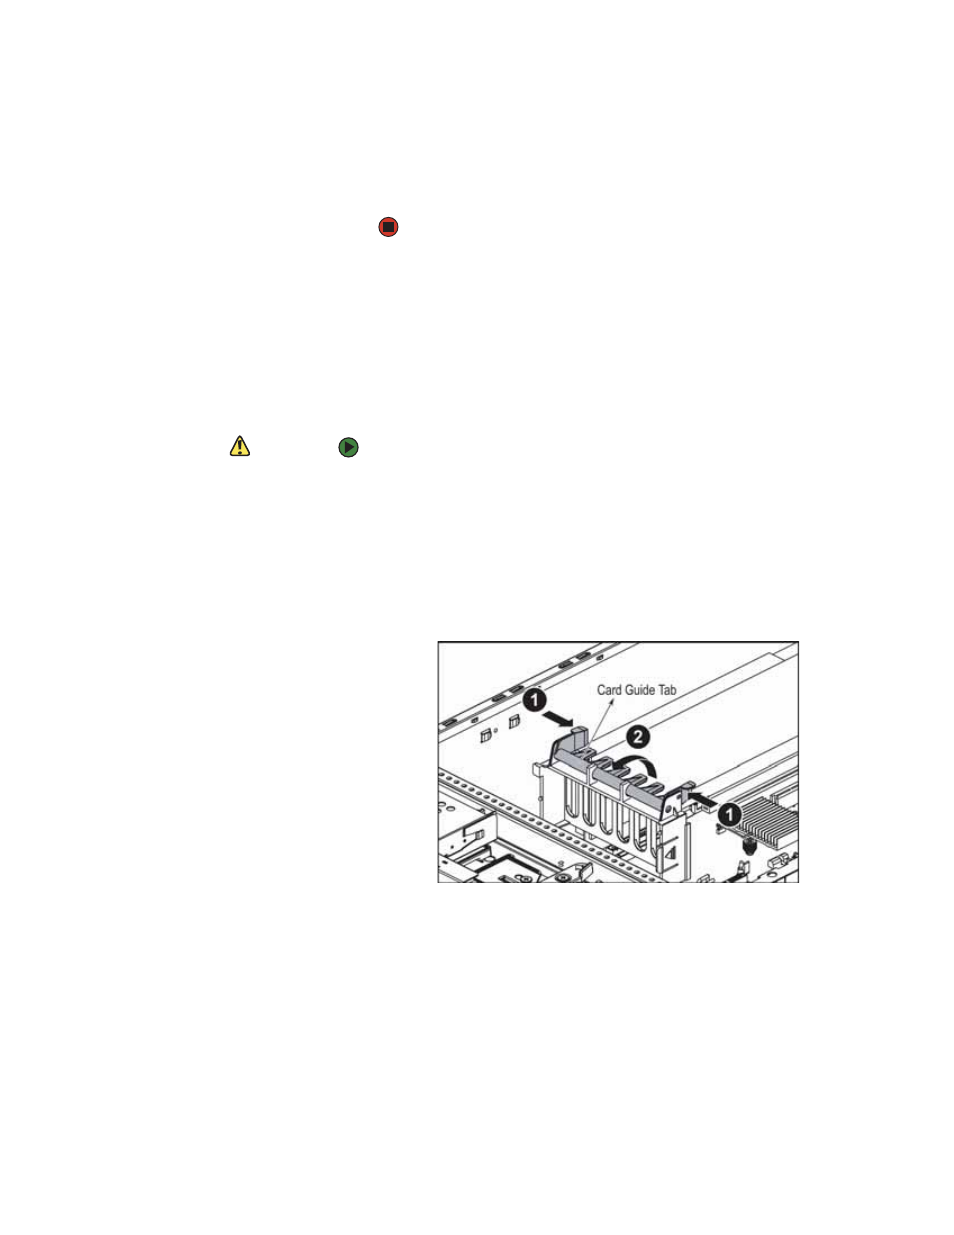
If you are removing and installing a full-length card, press the clips (1) on
the card guide tab, then rotate the card guide tab (2) up to release the PCI
expansion cards. Otherwise, go the next step.