Table tilt handwheel backlash, Digital readout calibration – Grizzly G0696X User Manual
Page 77
-74-
g0605X1-6X1, g0696X-97X (mfg. 8/11+)
Table Tilt handwheel
Backlash
the table tilt handwheel should move with very
little backlash or slop when the saw is new. over
time the tilt gears may wear, increasing backlash.
you can eliminate backlash by adjusting the tilt
handwheel gears.
Tools Needed
Qty
hex Wrench 6mm .............................................. 1
Wrench 12mm ................................................... 1
Wrench 13mm ................................................... 1
To adjust the table tilt gear backlash:
1. disConnECt sAW From poWEr!
2. turn the table tilt handwheel one way a
couple turns, then turn it the other way to feel
the backlash.
3. Unscrew the tap screws securing the angle
sensor cover, then remove it, and loosen the
two cap screws and the jam nut shown in
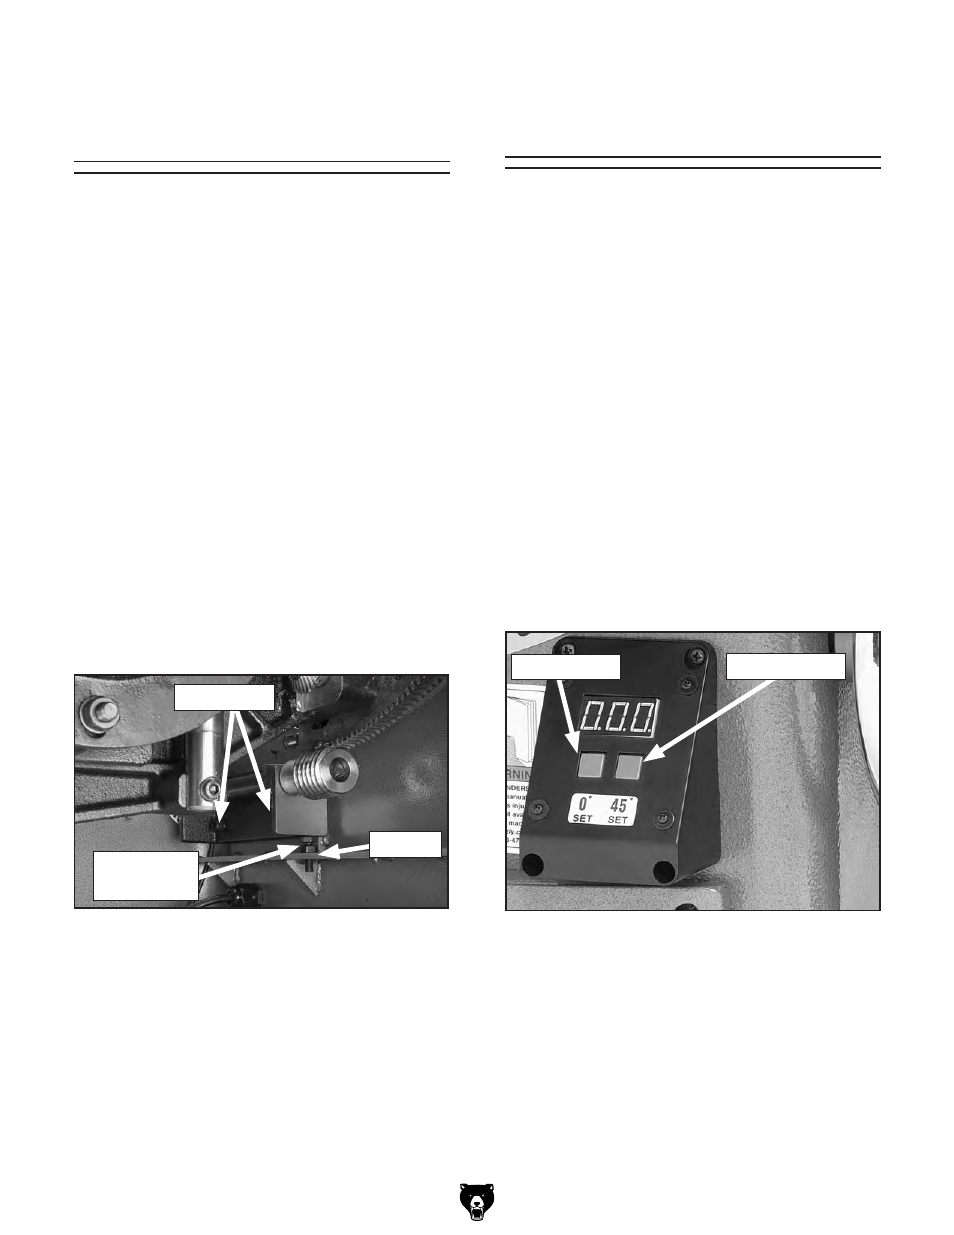
Figure 145.
the digital readout displays the current blade
angle. only set the readout after verifying that
the 90° and 45° blade tilt stops are correctly posi-
tioned.
To calibrate the digital readout:
1. Ensure the power is connected and the 45°
and 90° stop bolts are set (see
Blade Tilt
Stops starting on page 64).
2. move the blade angle to 90° and press the 0°
sEt button (
Figure 146) for several seconds
until the readout displays 0.00, or move the
blade angle to 45° and press the 45° sEt
button until the readout displays 45.0.
Note: If the power is disconnected, the
digital display will automatically reset to 0.00.
Therefore, when you reconnect power, follow
Steps 1–2 above.
Digital Readout
calibration
4. While a helper tightens the adjustment hex
bolt, turn the tilt handwheel back and forth.
tighten the hex bolt until you no longer feel
any wobble or looseness when the handwheel
is initially turned. do not overtighten the gears
or they will bind.
5. tighten the jam nut and cap screws, re-install
the angle sensor cover, then close the motor
access cover.
Figure 145. table tilt handwheel adjustment.
Adjustment
hex Bolt
Jam nut
Cap screws
Figure 146. digital readout.
45° set Button
0° set Button