Spreader or riving knife alignment – Grizzly G0696X User Manual
Page 71
-68-
g0605X1-6X1, g0696X-97X (mfg. 8/11+)
Spreader or Riving
Knife Alignment
checking Alignment
the blade guard spreader and riving knife must
be aligned with the blade when installed. if the
spreader/riving knife is not aligned with the blade,
then the workpiece will before forced sideways
during the cut, which will increase the risk of kick-
back.
Tools Needed
Qty
straightedge ...................................................... 1
To check the spreader/riving knife alignment:
1. disConnECt sAW From poWEr!
2. raise the saw blade to the maximum height
so you have easy working access.
3. Check to make sure the blade is 90° to the
table. Follow "setting 90° stop Bolt" instruc-
tions on
page 64.
4. place the straightedge against the top and
bottom of blade and spreader/riving knife,
as shown in
Figure 131. the spreader/riving
knife should be parallel with the blade along
its length at both positions and should be in
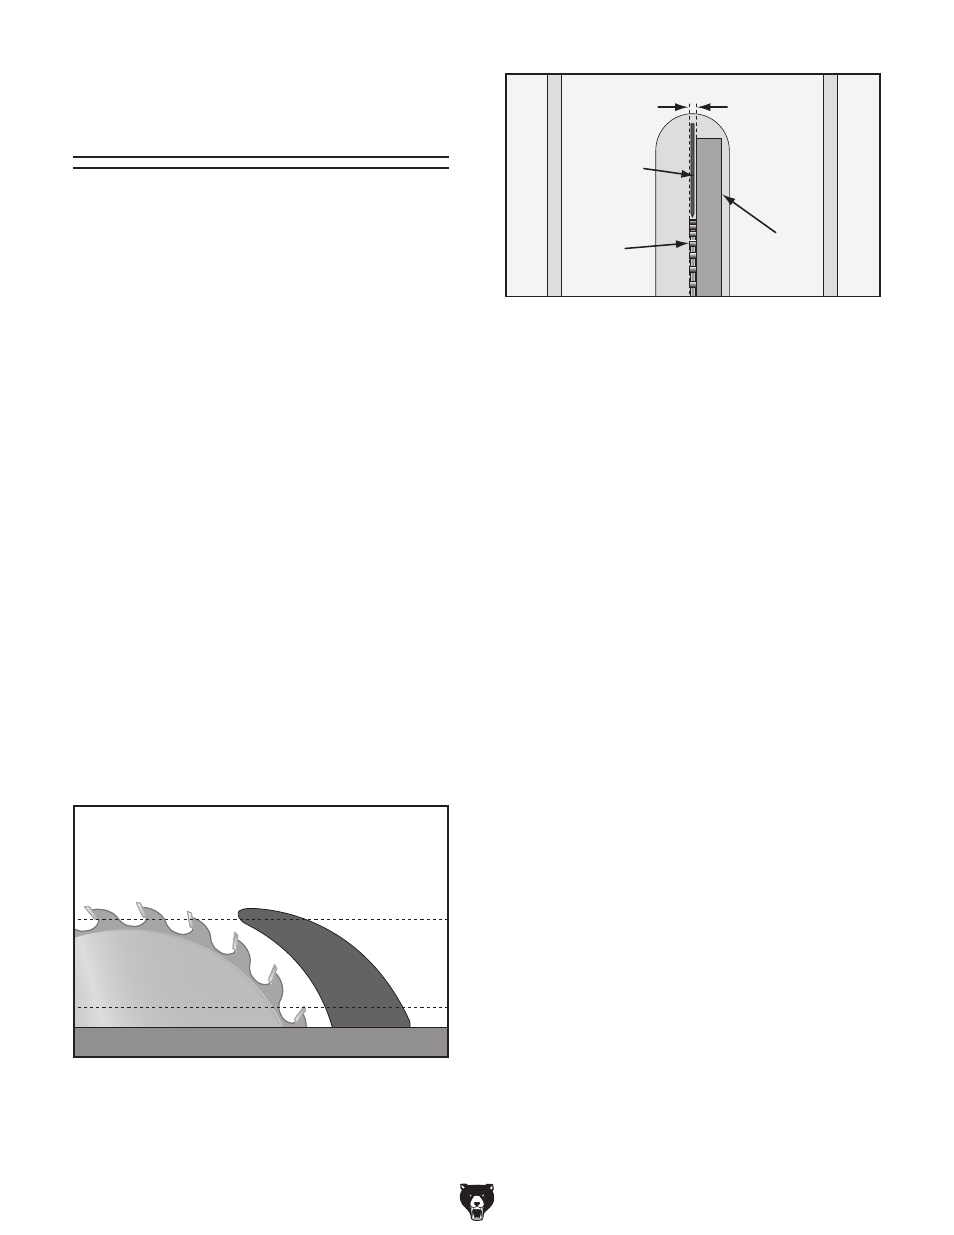
the "Alignment zone," as shown in
Figure
132.
Figure 132. spreader/riving knife alignment
zone.
Alignment
Zone
Spreader or
Riving Knife
Blade
Straightedge
— if the spreader/riving knife is not parallel
with the blade and inside the alignment
zone, then it needs to be adjusted. proceed
to
Adjusting Alignment instructions.
— if the spreader/riving knife is not parallel
with the blade at either the top or bottom,
it may be bent. remove the spreader/riv-
ing knife and place it on a flat surface and
check to see if the spreader/riving knife
lays evenly along its length. if the spreader/
riving knife does not lay evenly, proceed to
Adjusting Bent Spreader/Riving Knife
on
page 69.
Figure 131. Checking top and bottom riving knife
parallelism with blade.
Top Alignment
Bottom Alignment