On/off switch and blade – Grizzly G0696X User Manual
Page 28
g0605X1-6X1, g0696X-97X (mfg. 8/11+)
-25-
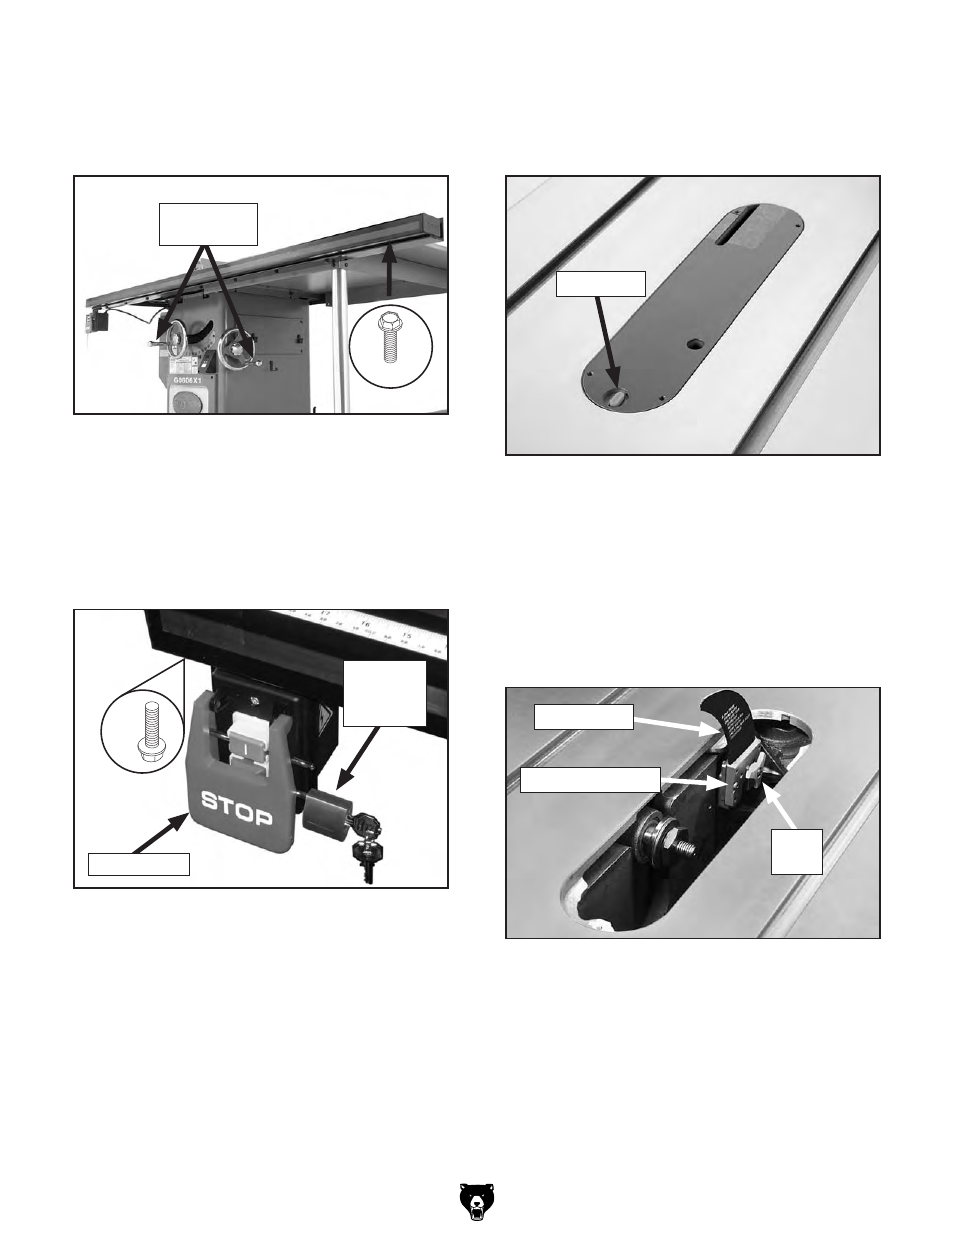
2. turn the lock knob that secures the table
insert so it is parallel to the inner slot, as
shown in
Figure 39, then remove the insert
and set it aside.
6. place the 91
3
/
8
" fence tube over the 91
1
/
4
"
front rail, secure with (9) m8-1.25 x 12 flange
bolts, as shown in
Figure 37, then install the
handwheel handles.
Figure 39. insert lock knob unlocked.
lock Knob
3. raise the arbor all the way up and set the
arbor angle to 0°.
Figure 37. Fence tube mounted to front fence
rail.
x9
handwheel
handles
Note: The riving knife is installed for shipping
purposes. Two pins in the mounting block
insert into matching slots on the riving knife,
keeping it secured.
4. Unthread the lock knob on the riving knife/
blade guard mounting block (
Figure 40) sev-
eral turns. push the riving knife away from the
knob, then lift the riving knife up to remove
it.
Figure 40. riving knife installed.
lock
Knob
riving Knife
mounting Block
On/Off Switch and Blade
1. Fasten the switch to the left end of the front
rail with (2) m8-1.25 x 12 flange bolts, then
insert the switch disabling lock, as shown in
Figure 38.
Figure 38. switch installed.
x 2
stop paddle
switch
disabling
lock
5. install the saw blade as outlined in Blade
Installation on page 34.