Miter gauge adjustments – Grizzly G0696X User Manual
Page 76
g0605X1-6X1, g0696X-97X (mfg. 8/11+)
-73-
Miter Gauge
Adjustments
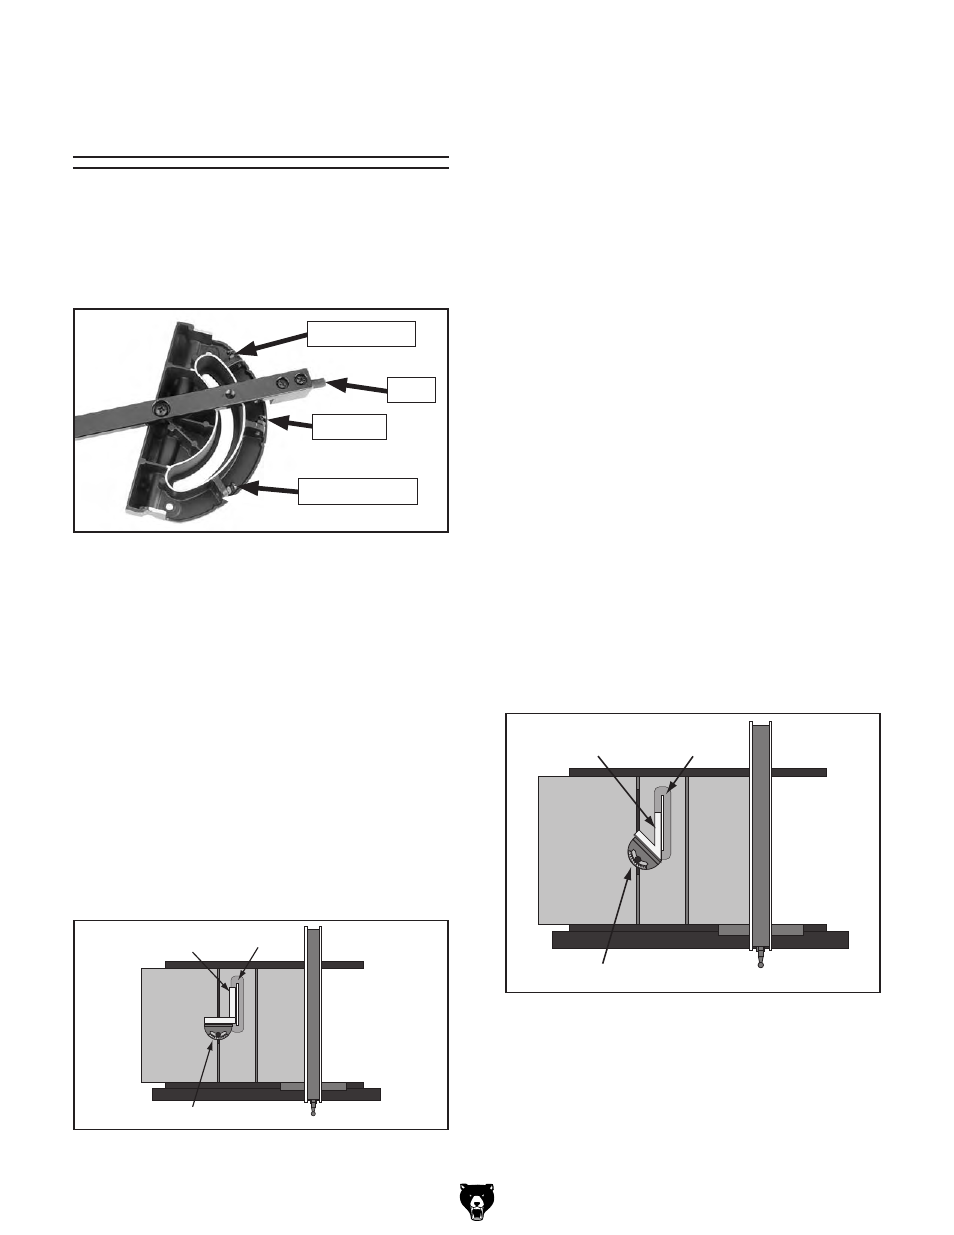
the miter gauge is equipped with stop screws that
allow you to easily adjust the miter gauge from 45°
to the left, 90°, and 45° to the right (see
Figure
142). the stop screws contact the shaft, which
moves in or out of the way for adjustments.
Figure 143. Checking 90° stop on miter gauge.
Square
Miter Gauge
Blade
— if the square touches the miter body and
the body of the blade (not the teeth) evenly
at the same time, then it is square to the
blade and the 90° stop is set correctly. no
further adjustments are necessary.
— if the square does not touch the miter body
and blade body evenly at the same time,
then proceed to
Step 5.
5. loosen the hex nut (jam nut) that secures
the 90° stop screw and adjust the stop screw
until it is seated against the shaft while the
square is evenly touching the miter body and
the blade body, then tighten the hex nut.
6. loosen the screw on the front of the miter
bar, adjust the pointer to 0°, then tighten the
screw.
checking/Setting 45° Stops
Follow the same process with the 45° stops that
you followed with the 90°, except using a 45°
square or adjustable square to verify that the
miter body is 45° to the blade, as shown in
Figure
144.
Figure 144. Checking 45° stop on miter gauge.
45° Square
Miter Gauge
Blade
Tools Needed
Qty
hex Wrench 2.5mm ........................................... 1
phillips screwdriver ........................................... 1
square 90° and 45° ..................................1 Each
Wrench 8mm ..................................................... 1
checking/Setting 90° Stops
1. disConnECt sAW From poWEr!
2. slide the miter gauge into the t-slot on the
table, then push the sliding shaft all the way
into the miter gauge.
3. Adjust the miter gauge so the 90° stop screw
rests against the sliding shaft.
Figure 142. miter gauge stops.
45° left stop
4. place the 90° square evenly against the face
of the miter gauge and the blade, as shown
in
Figure 143.
90° stop
45° right stop
shaft