Adjusting bent spreader/riving knife, Adjusting alignment – Grizzly G0696X User Manual
Page 72
g0605X1-6X1, g0696X-97X (mfg. 8/11+)
-69-
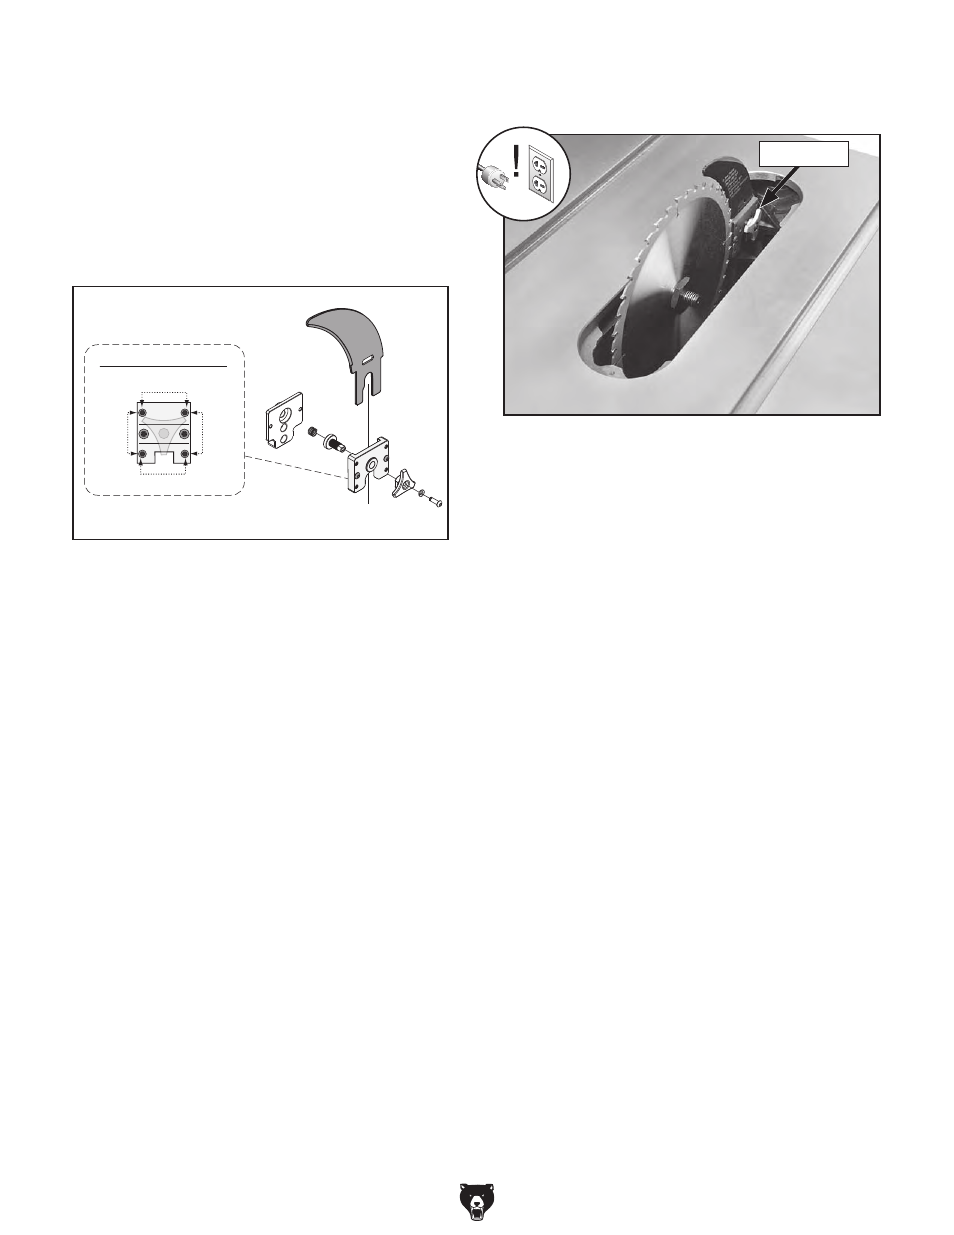
Figure 133. set screws for adjusting spreader/
riving knife position.
Mounting Block
Top Control
Side
Control
Side
Control
Bottom Control
Adjusting Bent Spreader/Riving
Knife
1. disConnECt sAW From poWEr!
2. Bend the spreader or riving knife by hand
while installed, then follow
Steps 1–4 in
checking Alignment on page 68 to deter-
mine if it is parallel with the blade and inside
the "Alignment zone."
— if this does not work, remove it to straight-
en.
— if you cannot straighten it properly, replace
it.
Figure 134. lock knob location.
lock Knob
4. tighten the lock knob (see Figure 134), then
re-install the table insert.
5. Follow checking Alignment, Steps 1–4, on
page 68.
— if the spreader/riving knife is in the align-
ment zone, no additional steps are neces-
sary.
—if the spreader/riving knife is still not in the
alignment zone, continue adjusting the set
screws on the mounting block as neces-
sary to correctly position the spreader/
riving knife.
6. tighten the two cap button head cap screws
on the mounting block to secure the spread-
er/riving knife adjustment.
possible Tools Needed
Qty
hex Wrench 2.5mm ........................................... 1
hex Wrench 3mm .............................................. 1
To adjust the spreader/riving knife position:
1. disConnECt sAW From poWEr!
2. remove the table insert.
3. loosen the two button head cap screws
on the mounting block, then adjust the set
screws on the block to move it in the neces-
sary direction (see "mounting Block" inset in
Figure 133).
Adjusting Alignment
the spreader/riving knife mounts to a block that
can be repositioned to correctly align the spread-
er/riving knife to the blade. the mounting block
adjusts by turning the set screws in each corner
of the block.
Figure 133 shows the set screws associated with
controlling the mounting block position.