3 good laboratory practices (glp) data, 4 good laboratory practices (glp) set, Procedure – Ohaus NBF1A2 Navigator Balances User Manual
Page 30
30
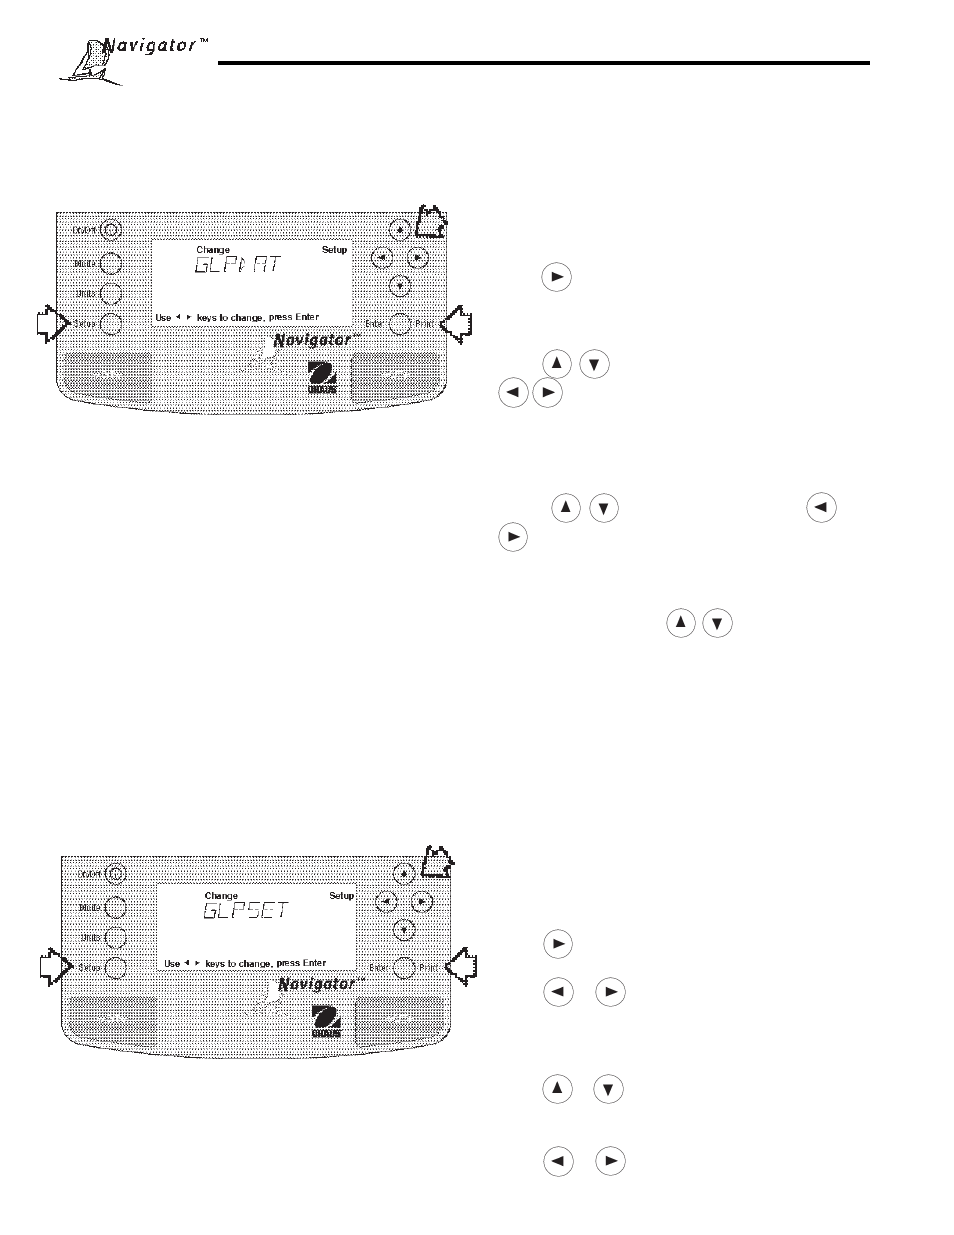
4.3 Good Laboratory Practices (GLP) Data
The GLP Data menu enables the storage of a user identification number (6 digits) and/or a project number (6 digits).
When entered into the balance, the identification number and project number are available when printing, provided they
are turned on in the GLP Set menu. A lock setting is also available which locks in the user identification and project
number.
Procedure
To enter data in the GLP Data menu, proceed as follows:
• Press the Setup button, CAL is displayed.
• Press
button until GLPDAT is displayed.
• Press Enter button to continue, USERNO is displayed.
• Press Enter button to continue.
• Press
buttons to change digit values and
buttons to advance to next digit and enter a
6 digit number for the user number.
• Press Enter button to save setting, PROJNO is displayed.
• Press Enter button to continue.
• Press
to change digit values and
to advance to next digit as directed by thedisplay
and enter a 6 digit number for the project number.
• Press Enter button to save setting, LOCK is displayed.
• Press Enter button, press
to select ON or OFF.
• Press Enter button to save setting, SAVED is dis-
played then EXIT.
• Press Enter button, balance returns to weigh mode.
• Press the Setup button, CAL is displayed.
• Press
button until GLPSET is displayed.
• Press Enter button to continue.
• Press
or
button until either TIME, BAL ID
(see note), USER NO, PROJ NO, DIFF, NAME,
LOCK or EXIT is displayed.
• Press Enter button to continue.
• Press
or
button and select either ON or
OFF for each entry.
• Press Enter button to save setting.
• Press
or
button to continue or EXIT.
• Press Enter button, balance returns to weigh mode.
Procedure
To select any of the items in the GLP Set menu, proceed
as follows:
4.4 Good Laboratory Practices (GLP) Set
Good Laboratory Practices (GLP) Set menu allows the selection of and will permit printing of Time, Balance Identifica-
tion, User Number, Project Number, Difference and Name data. The default setting is OFF. When an external printer is
used with the balance calibrated, and all items are set ON, the printer will print out calibration data for audit trail
purposes and will indicate date, and time. (It should be noted that the User number and Project number must be
entered in the GLP Data menu before printed data is available).
NOTE: Balance ID (BAL ID) represents the actual serial
number of the balance and cannot be entered or changed.
Setting BAL ID ON allows printouts to display the serial
number of the balance during GLP data.