Connecting the 5250 ally to power, 5250 ally front panel – I-Data 5250 ALLY User Manual
Page 32
AGILE 5250 ALLY Users Guide and Reference
Page 1-10
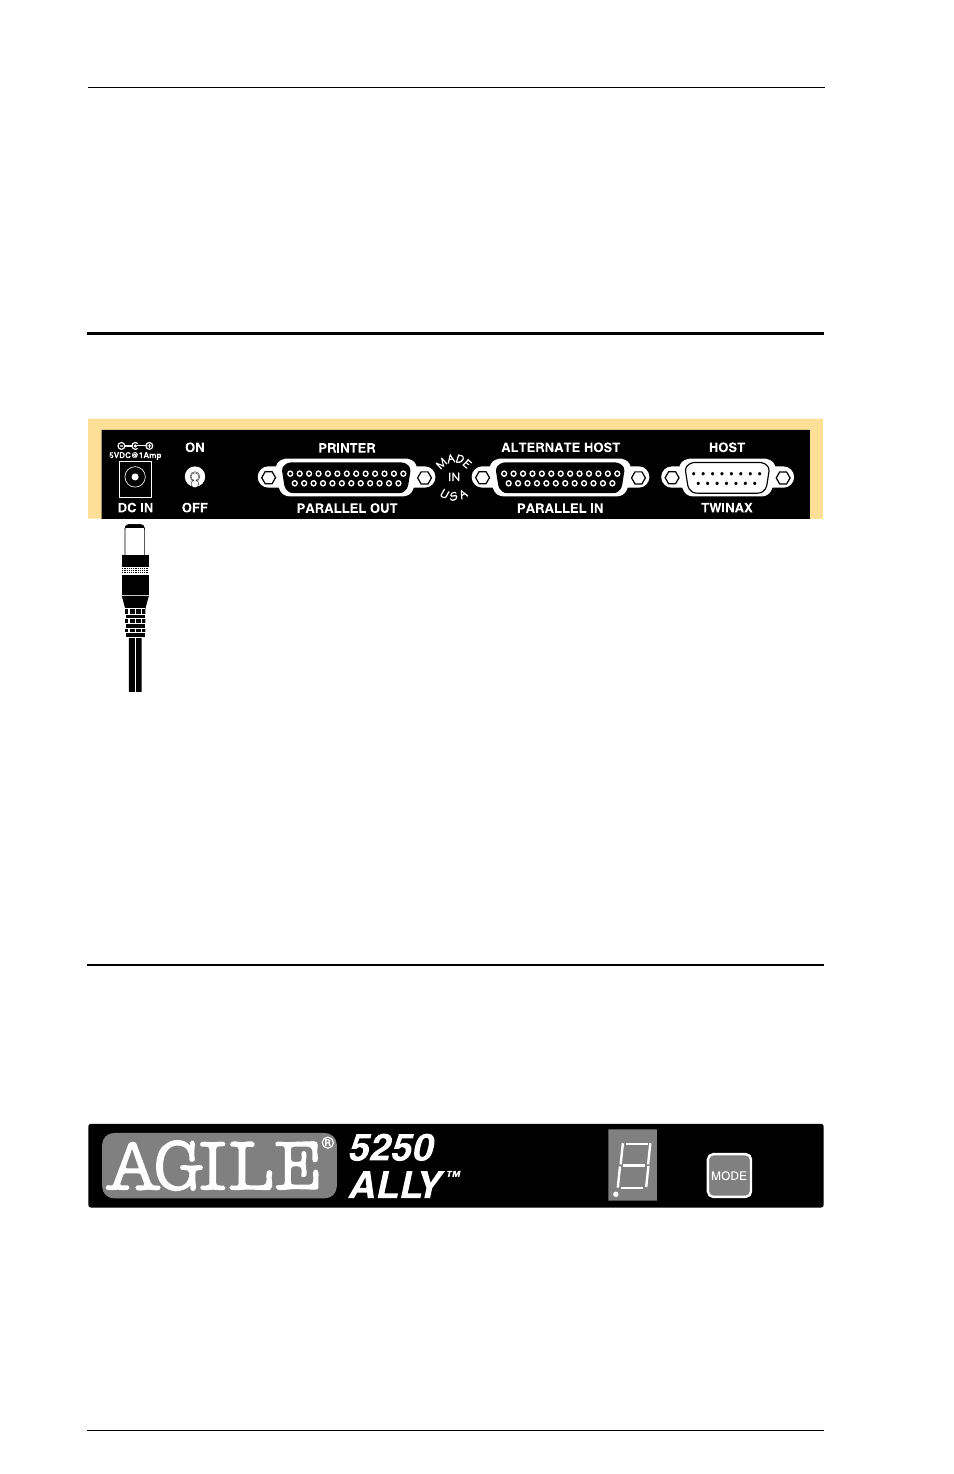
3. Insert the other end of the AGILE alternate host cable into the
PARALLEL IN ALTERNATE HOST port of the 5250 ALLY.
4. Tighten the thumbscrews until the connection is firm, but do not
overtighten.
Connecting the 5250 ALLY to Power
Now that the 5250 ALLY has been connected to the printer and alternate
host device, it may be connected to the power outlet.
1. Connect the female end of the power cord to the DC IN power
receptacle of the 5250 ALLY.
2. Plug the male end of the power cord into an AC power outlet.
Remember: Never unplug either end of the power cord by pulling on
the cord. Always pull by the plug.
5250 ALLY Front Panel
The front panel of the 5250 ALLY provides a MODE button and a seven-
segment LED used as a mode indicator. To select a mode, press the MODE
button until the LED indicates the appropriate number. The mode
operation will begin two seconds later.
Note: This section describes only how each mode is selected. It does not
fully explain the purpose of each mode, nor does it fully describe each
mode selection. For a complete description of each mode, please refer to
Basic Port Configuration later in this chapter and to Chapter 2
Advanced Configuration.