Home canning_ifsr_cg, Oven use_ranges/ovens_cg, Positioning racks and bakeware_w11637359a – KITCHENAID 30 Inch Slide-In Induction Range Owners Guide User Manual
Page 23: Home canning, Oven use, Positioning racks and bakeware
�
For foods containing sugar in any form, clean up all spills and
soils as soon as possible. Allow the cooktop to cool down
slightly. Then, while wearing oven mitts, remove the spills
while the surface is still warm. If sugary spills are allowed to
cool down, they can adhere to the cooktop and can cause
pitting and permanent marks.
�
To avoid scratches, do not slide cookware or bakeware across
the cooktop.
�
To avoid damage to the cooktop, do not allow objects that
could melt, such as plastic or aluminum foil, to touch any part
of the entire cooktop.
�
To avoid damage to the cooktop, do not use the cooktop as a
cutting board.
�
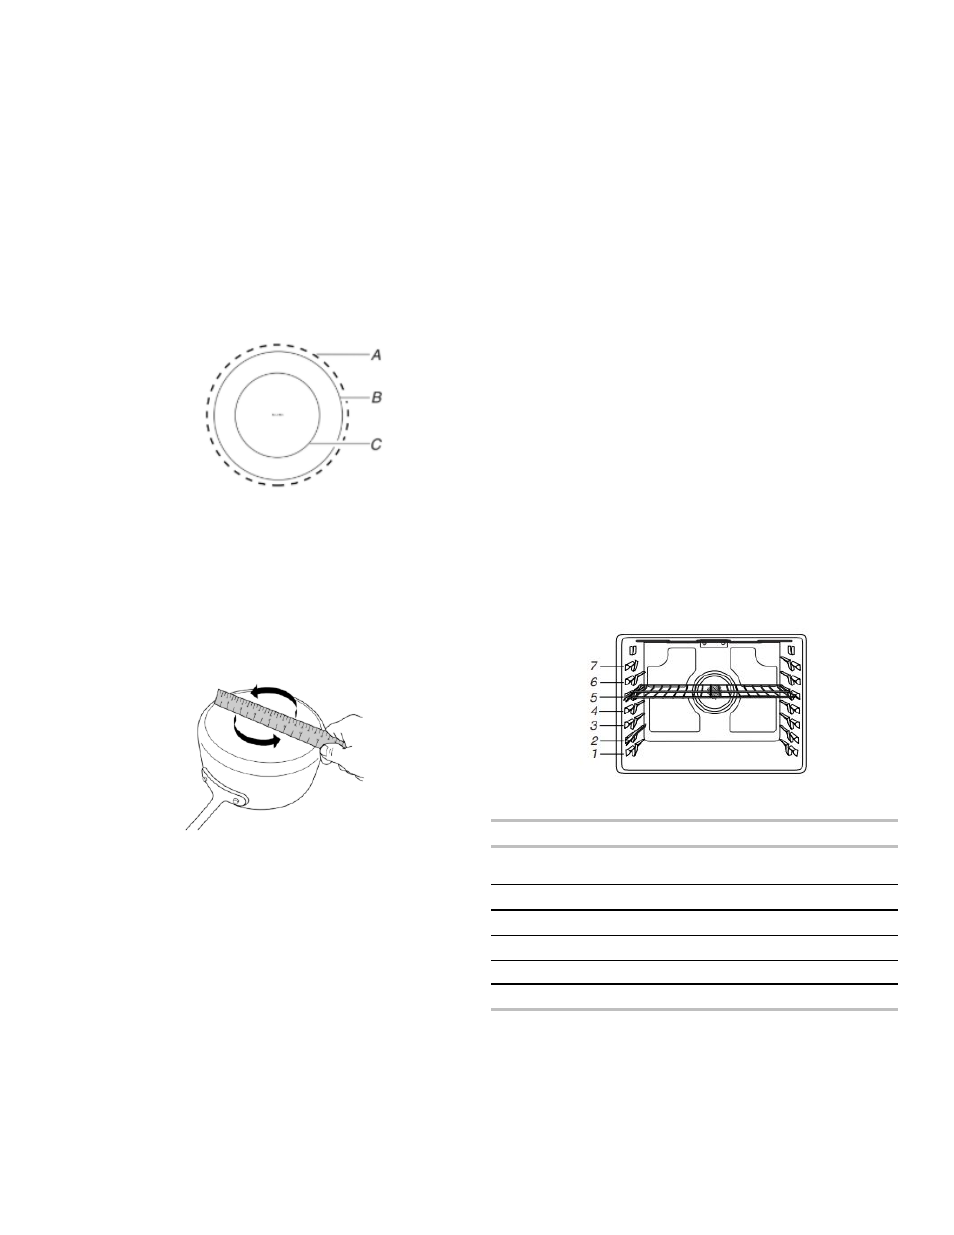
Use cookware about the same size as the surface cooking
area. Cookware should not extend more than 1/2" (1.3 cm)
outside the area. Minimum pan size is also noted on the
cooktop with the inner ring, if applicable.
A.
1/2" (1.3 cm) maximum overhang
B.
Outer edge of cooktop
C.
Minimum pan size, if applicable
�
Use flat-bottomed cookware for best heat conduction and
energy efficiency. Cookware with rounded, warped, ribbed, or
dented bottoms could cause uneven heating and poor cooking
results.
�
Determine flatness by placing the straight edge of a ruler
across the bottom of the cookware. While you rotate the ruler,
no space or light should be visible between it and the
cookware.
�
To determine which pan to use on which induction element,
measure the bottom of the flat area of your pan. Do not include
the sides if they curve up. Use this measurement to help
determine which induction element would best fit your pan.
Manufacturer measurements listed on pans are usually for the
top opening dimension. The flat bottom may be smaller.
�
Make sure the bottoms of pots and pans are clean and dry
before using them. Residue and water can leave deposits
when heated.
Home Canning
Canning can be performed on the induction cooktop. See the
“Cookware” section to check if the canner will work on the
induction cooktop. When canning for long periods, alternate the
use of surface cooking areas or elements between batches. This
allows time for the most recently used areas to cool.
�
Center the canner on the largest surface cooking area or
element. On electric cooktops, canners should not extend
more than 1/2" (1.3 cm) beyond the surface cooking area or
element.
�
Do not place canner on 2 surface cooking areas or elements at
the same time.
�
On ceramic glass models, use only flat-bottomed canners to
avoid damage to the cooktop and elements.
�
For more information, contact your local agricultural extension
office or refer to published home canning guides. Companies
that manufacture home canning products can also offer
assistance.
OVEN USE
Odors and smoke are normal when the oven is used the first few
times or when it is heavily soiled.
IMPORTANT:
The health of some birds is extremely sensitive to
the fumes given off. Exposure to the fumes may result in death to
certain birds. Always move birds to another closed and well
ventilated room.
POSITIONING RACKS AND
BAKEWARE
To position a rack, pull it out to the stop position, raise the front
edge, and then lift out. Use the following illustration and charts as
a guide.
The oven has 7 positions for a flat rack, as shown in the previous
illustration and the following table.
Flat Rack Position
Type of Food
7
Broiling/searing meats, hamburgers,
steaks
6
Broiled meats, poultry, fish
4
Air Fry Basket
3
Most baked goods, casseroles
2
Roasted meats
1
Large roasts or poultry
IMPORTANT:
If your model has a Max Capacity Rack, the
recessed ends must be placed in the rack position above the
desired position of the food. See the following illustration.
23